Gear Education Set
thingiverse
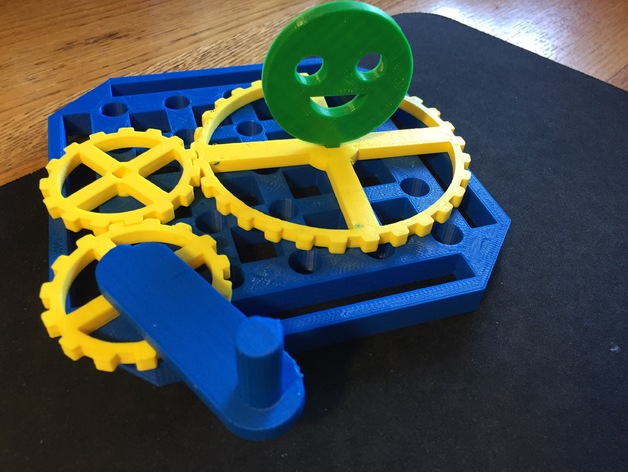
This is a set to help students understand how gears and gear ratios work. It is meant to foster an interest in engineering and to give some understanding to how many things work today. The large boards can be connected together to form one large board however big you may want it and there are many combinations of gears. Print Settings Printer: Wanhao Duplicator i3 v2 Rafts: Doesn't Matter Supports: Yes Resolution: 0.3mm Infill: 10% for the boards, 20% for everything else Notes: Make sure to tilt everything so that it is lying flat on the bed before printing. I would not recommend printing them upright. The gear spinner should be printed laying on its side with the handle and the connector sticking out to the sides and with supports. How I Designed This Introduction I began by wanting to build something engineering related but had absolutely no clue as to what I could make. In the end I decided upon gears because of my own experiences in engineering. How it was made To begin with I started deciding some sizes that I wanted the gears to be. I decided upon a 50 mm diameter gear and a 100mm diameter gear to showcase the basic principles of gears. From there I measured out circles that would be the guide lines for where the gear's teeth would be and fit together with their neighbor. Then it was left to do a circular pattern to repeat the pattern all along the ring so that I would end up with 15 separate teeth for each small gear. Diagram of the Small Gear The next part to come was the larger gear which design wise matched the first one. I created a circle of 100mm diameter and then made a smaller circle to show where the teeth were, after designing the teeth using the same size dimensions of the smaller one, I repeated the teeth around the circle until there were 30 teeth. Diagram of the Large Gear From there I had to create a board that would hold the gears for people to use them and I decided to make two different sizes, an individual size, and a large board for larger displays. I also wanted the larger boards to be able to fit together so I designed a connector that would go on the bottom of the board. Each peg had to be 24mm apart so that the teeth would overlap enough to turn each other as well. From there I added pegs to the gears so they would fit in the gear board and then I added square cutouts in the bottom so that the gear spinner could then fit in it. I used a square cutout because the gear spinner could then be placed in any of the gears and would not need glue to stay in the cutout. I designed the spinner by making a slot shape and then extruding that. Then on the top I created a small circle that I extruded to become the handle and the square connector was created on the bottom. Finally I designed something that would allow people to see the effects the gears had, I designed a little spinner designed to fit in the exact same square cutout and it would allow people to see the direction and speed that the gears caused it to move in. Project: Gear Education Set Objectives: • To learn about how gears work and about gear ratios • To foster an interest in engineering and the mechanics behind many contraptions Audiences: • Anybody can use these to learn about how gear ratios and gears work • Students of all ages can use this project to gain an understanding of gears and to foster an interest in engineering Preparation: • Individual gear boards can be printed for each student along with a small gear and a large gear • Or gear boards can be printed and multiple small gears and large gears can be printed and students can work in groups to experiment and see the end result Steps: • Students should grab their gears and experiment with going from a small gear to a large gear and a large gear to a small gear • They should then note down what they notice the difference seems to be with the spinner with each configuration • Students should then experiment with different numbers of gears and they should observe the clockwise and counterclockwise direction that the gears turn in • After they have a clear understanding of how the gears work they should then try to list all of the ways that gears are used in today’s world. They should describe what they are found in and what they may do inside of there Results: • Each student should now have an understanding of how gears work and what gear ratios are and just how they are helpful in the world • They should understand an example of a machine that uses gears and how the gears are used in that machine and why • If following the individual track, each student should have their own individual gear board and small and large gear that they can experiment with and take home themselves.
With this file you will be able to print Gear Education Set with your 3D printer. Click on the button and save the file on your computer to work, edit or customize your design. You can also find more 3D designs for printers on Gear Education Set.