GEAR SCREW SHIRT BUTTON
prusaprinters
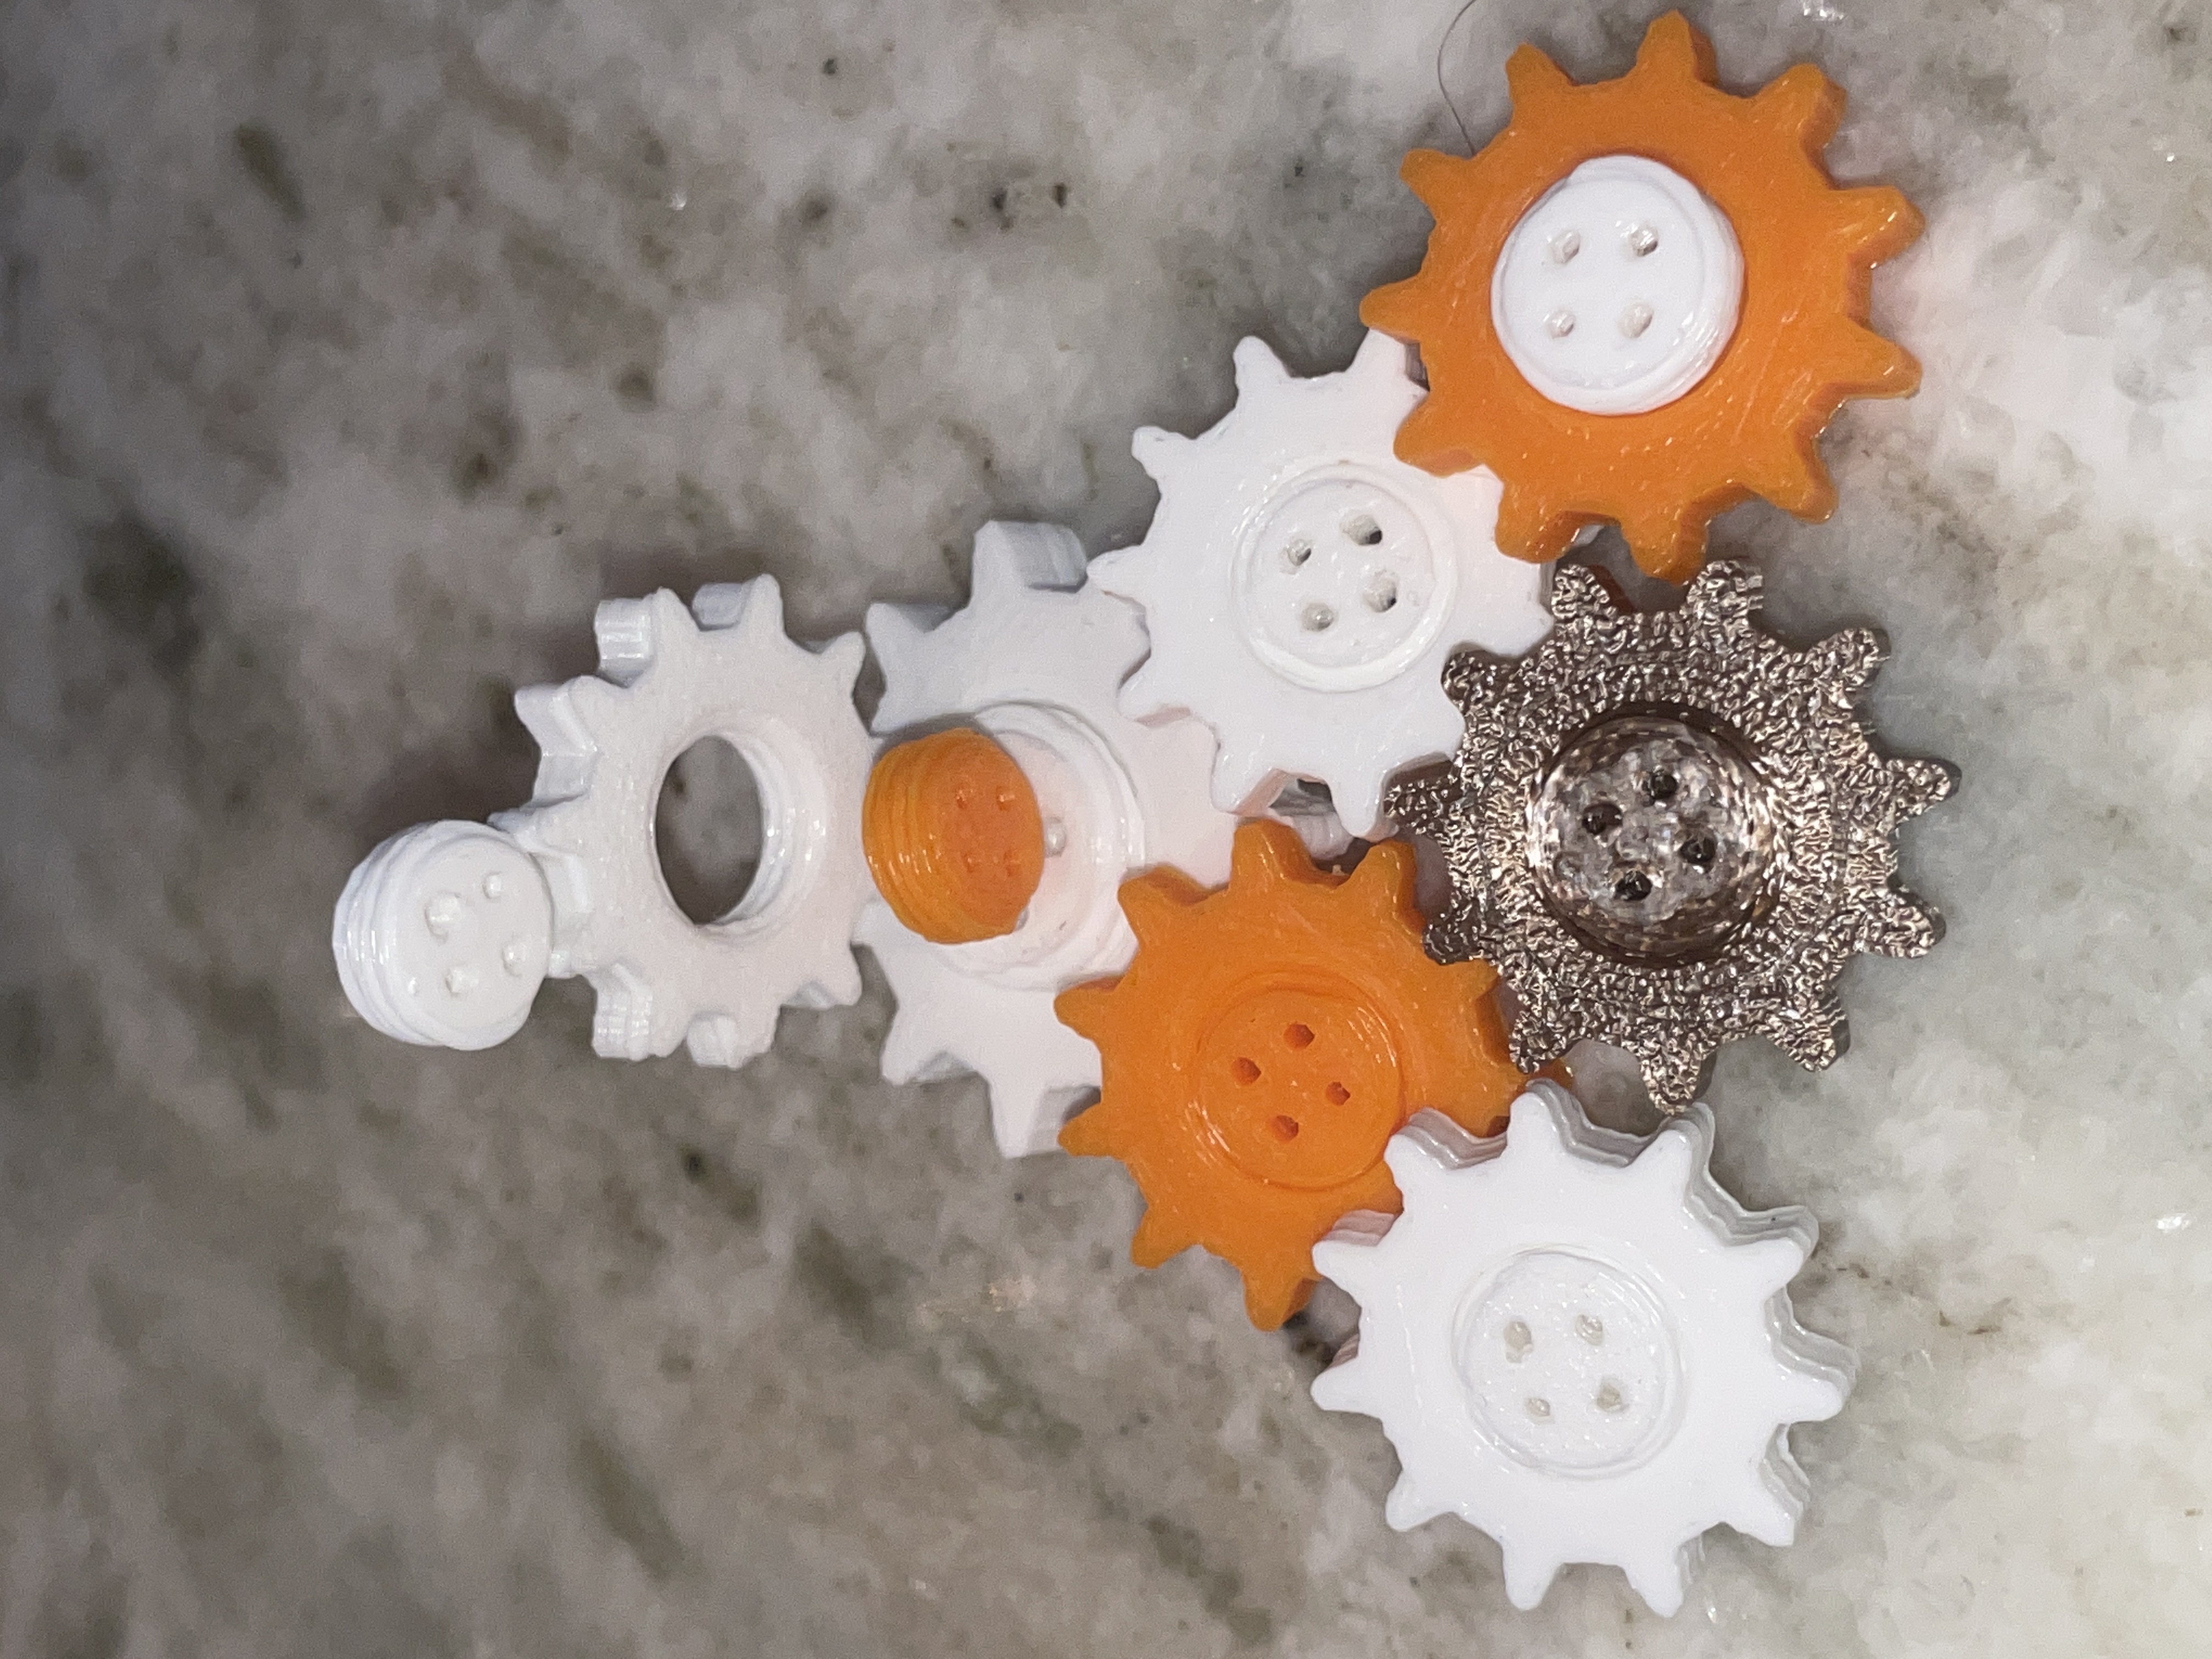
<h3>Hello! This shirt button, the “GEAR SCREW BUTTON” was created with Prusa's weekly contest in mind. </h3><p> </p><figure class="image image-style-align-center image_resized" style="width:35.05%;"><img src="https://media.prusaprinters.org/media/prints/121771/rich_content/efe89848-1d8e-44d8-ad32-80200cc04fa1/image-1-19-22-at-840-pm.jpg#%7B%22uuid%22%3A%2255c491b5-f93e-428b-8d0e-58717542f2f2%22%2C%22w%22%3A1025%2C%22h%22%3A697%7D"></figure><p>I used Tinkercad to create and had fun working with several iterations to get the fit good and tight. I have included both;</p><p> inner part (screw with button holes) </p><figure class="image image-style-align-left"><img src="https://media.prusaprinters.org/media/prints/121771/rich_content/1967692d-ed2f-4f01-80b3-c2a29610ae95/inner.png#%7B%22uuid%22%3A%22cb5a480e-d13b-4b9c-9795-2bf76c6068df%22%2C%22w%22%3A138%2C%22h%22%3A174%7D"></figure><p><img class="image-style-align-right image_resized" style="width:18.99%;" src="https://media.prusaprinters.org/media/prints/121771/rich_content/a3583464-cf33-41a1-b2a3-0d38ea5e4d9b/outer.png#%7B%22uuid%22%3A%2260168b26-ae59-4566-abe0-d4ea2b3f3f01%22%2C%22w%22%3A408%2C%22h%22%3A447%7D"> <br> </p><p>and outer part (gear) </p><p> </p><p>as separate .stl files so you can print and match colors etc. The files printed as downloaded will produce a total size of around 27mm. This is a big button:) If you'd like a smaller button that is closer to a regular button size, I recommend printing at 75%. This will give you around a 21mm diameter button. I made it a tight fit so it stays on well. The smaller inner piece could be sewed on to your garment of choice then pushed through the shirt slot. Finally, screw on the outer piece and show off your engineering prowess with pride. I included a video showing examples. I'm excited to see what others do with the design. I would like to see someone do a full button up shirt and maybe even have the gears mesh from one shirt hole to the next!</p><p>A good remix would be a stem off of the outer gear for a lavalier (lapel) microphone. This would be cool for a science or engineering presenter.</p><p>I printed with various filaments, PLA, PLA+, ASA CarbonX, ProtoPasta Iron composite (so magnets will stick and you could place logos or caps.</p><p>I used 0.2 at 50mm/s and the set prints in only 9 minutes!</p><p>Discussion and Assembly Video:</p><figure class="media"><oembed url="https://youtu.be/3oe7I-uKtFA"></oembed></figure><p>HELP SECTION:</p><p>If you find the fit too tight for your liking, reduce inner part size by 5% at a time on X and Y only. Let me know if you need any help and I'll do what I can. If the small parts cause issues with bed adhesion, use a raft. I personally use a PEI flexible removable magnetic build surface and it has been amazing. With this I print a skirt to get the filament flowing and rarely have issues. I think it‘a the best under $30 mod you can do for any printer. Sorry to drag on, but if you do get a PEI bed surface, I recommend looking into PID tuning your build plate IF you see what looks like Z wobble in your prints. Because PEI is usually thinner, it can cause temp fluctuations that you wouldn't get with thicker glass for example. </p><p>God Bless,</p><p>Casey</p><p>BOWIEINC</p>
With this file you will be able to print GEAR SCREW SHIRT BUTTON with your 3D printer. Click on the button and save the file on your computer to work, edit or customize your design. You can also find more 3D designs for printers on GEAR SCREW SHIRT BUTTON.