Gearbox for FRC Denso Throttle Motor
thingiverse
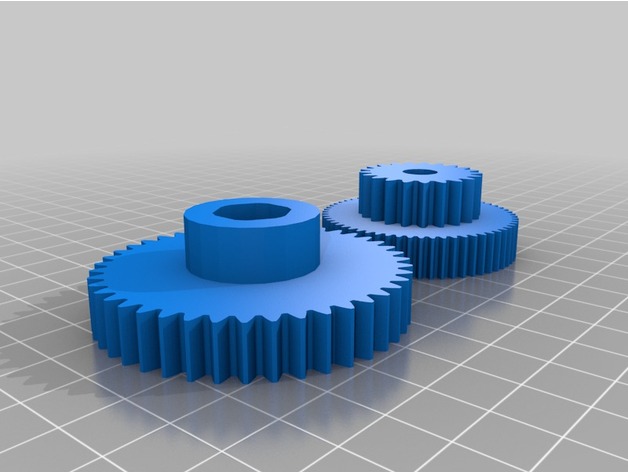
This gearbox was designed to work with the Denso Throttle Motor that is given out with the Frist Robotics KOP for several years. The gearbox housing and gears are entirely 3D printed using PLA plastic. PLA seems plenty strong for the limited power this motor has. After running and loading the output shaft of the gear box for several minutes I saw no degradation in the printed gears. There are two sets of gears providing a gear reduction of about 10:1 and 18:1. The total weight of the motor and gearbox is less than 1lb. The gearbox and gear files are available to all FRC teams complements of "Andromeda One - TEAM #4905". Our only request is that if you print or use the gearbox that you post a picture on our facebook page: https://www.facebook.com/frc4905 Also, if you have any suggestions for improving the design please post them here on Thingiverse. I still have some more torture testing to do, but honestly I think it is way over designed. As time allows I will look into improving and minimizing the design. Any positive feedback you can provide is appreciated. Good Luck! UPDATE: This gear box was used successfully on our Steamworks robot to open and close doors that delivered gears to the steam ship. After having issues with limit switches not working, we just hard opened and closed the doors at about 50-70% power to hard stops. I thought for sure this would be hard on the gear, but after an entire season which included going to worlds both gear boxes operated flawlessly. After much more use post season the gear boxes were removed and the gears were inspected. The gears looked like new, and no wear could be detected. FYI - we used "Super Lube" to grease the gears at the beginning of the season. UPDATE 2: The shaft shown in the picture was 3D printed for display use only. You will probably want to swap that out for 1/2" hex stock (Al or Plastic). The gears were designed for VEX ROBOTICS 1/2" thunder hex. Regular 1/2" Hex will work, but you may have to file the hex shape in the gears to make it fit. You also need to swap out the round flange bearings with 1/2 Hex bearings such as Item# 217-3875 from VEX. To keep the shaft captive to the gearbox you can use either 1/4-20 bolts and fender washers tapped into the ends of the shaft or use 1/2" hex shaft collars (such as VEX item #217-2737). The shaft used for the gear mated to the motor pinion was simply cut from the smooth shaft of a 1/4" bolt. A thin 1/4 ID brass sleeve was press fit into the gear as a bearing surface for the 1/4" bolt. Wish I had pictures, but the gearbox was disassembled and the parts were lost long ago. Print Settings Printer Brand: FlashForge Printer: FlashForge Creator Pro Rafts: Doesn't Matter Supports: Doesn't Matter Infill: 30/50 Notes: Gearbox Housing: The gearbox housing was printed with 3 solid top and bottom layers with 2 solid inside and outside layers and 30% infill. PLA filament was used. Gears: The gears were printed with 4 solid top and bottom layers with 4 solid inside and outside layers and 50% infill. PLA filament was used. Post-Printing Additional Hardware Hardware Required: 1/4" ID, 5/16" OD, 3/4" long brass bushing 1/4" OD, 1 1/4" long steel axel (cut mine from non threaded shaft of 1/4" bolt) Three - #8-32 x 2" Flat Phillips Countersunk Machine bolt and nut. Three - #8-32 x 2" (or longer) Round Head Machine bolt and nut. One - #8-32 x 3/4" Round Head Machine bolt and nut. Seven - #8 lock washers Four - #8 washers Two - #14S Brass Flat Washers Two - 0.187" Female Terminal (note these are smaller than common female terminals) (http://www.acehardware.com/product/index.jsp?productId=1286919) 16 - 18 AWG wire Two - Hex Flanged Bearings - 13.75mm x 1.125" x 0.313" 1/2" ThunderHex shaft from VEX Robotics (optional) Plastic Safe Lubricant for gears (silicon, PTFE, white lithium grease, etc) Assembly Starting with the gearbox back, look inside and you will see a hex opening that will fit a #8 nut. Place a #8 nut in the hole. Using the motor terminals as a guide, insert the Denso motor on the outside of the gearbox back. Place a lock washer over the #8-32 x 3/4" bolt and lightly screw it into the hole containing the nut. Don't tighten the screw until all screws are in place. Now place the 1/4" shaft into the 1/4" hole inside the gearbox back and place one of the brass washers over the shaft. Now press fit the brass bushing into the gear with the 5/16" hole. It should fit snugly. If not add some tape to the bushing and insert it. Now place the gear over the 1/4" shaft so the plastic gear mates with the motor gear. Place the second brass washer over the 1/4" shaft onto the gear. Press one of the HEX flange bearings into inside opening of the gearbox back. Place the ThunderHex shaft into the bearing. Place the second gear over the ThunderHex shaft starting with the non-gear side. The first and second gears should mesh well. Place the second HEX flange bearings onto the ThunderHex shaft starting from the flanged side. Crimp the 0.187" Female Terminals to the ends of 16 - 18 AWG stranded wire. These will be your connection to the motor. The motor draws 7A at stall so 18 AWG wire or larger is all that is needed. Once the wires are attached, press the terminals onto the motor terminals. Now take the gearbox front and mate it with the gearbox back. Place two of the #8-32 x 2" Flat Phillips Countersunk Machine bolt into the holes attaching the motor. Place a lock washer and nut over the end of both screws and tighten down the motor evenly. Place the last Flat Phillips Countersunk Machine bolt in the hole with the counter sink and attach using a #8 washer, lock washer and bolt - in that order. tighten to about the same tension at the motor bolts. The last three #8-32 Round Head Machine bolt act as both the gearbox mounting bolts as well as bolts that hold the gear box together. The length of the bolts will depend on how you are going to mount the gearbox. NOTE: you will also need to determine how you will keep the ThunderHex captive to the gearbox. This could be done with a bolt and washer on the motor side, and a hex collar or gear on the other. Since the method used to keep the shaft captive will depend on how you intend to use the gearbox, I leave this as an exercise to the user. Also note, that I have not use any lubricant on the gears yet and it seemed to work just fine. I do intend to find and use a plastic safe lubricant if we end up using the gearbox on our robot.
With this file you will be able to print Gearbox for FRC Denso Throttle Motor with your 3D printer. Click on the button and save the file on your computer to work, edit or customize your design. You can also find more 3D designs for printers on Gearbox for FRC Denso Throttle Motor.