Geared Game Box (Small)
thingiverse
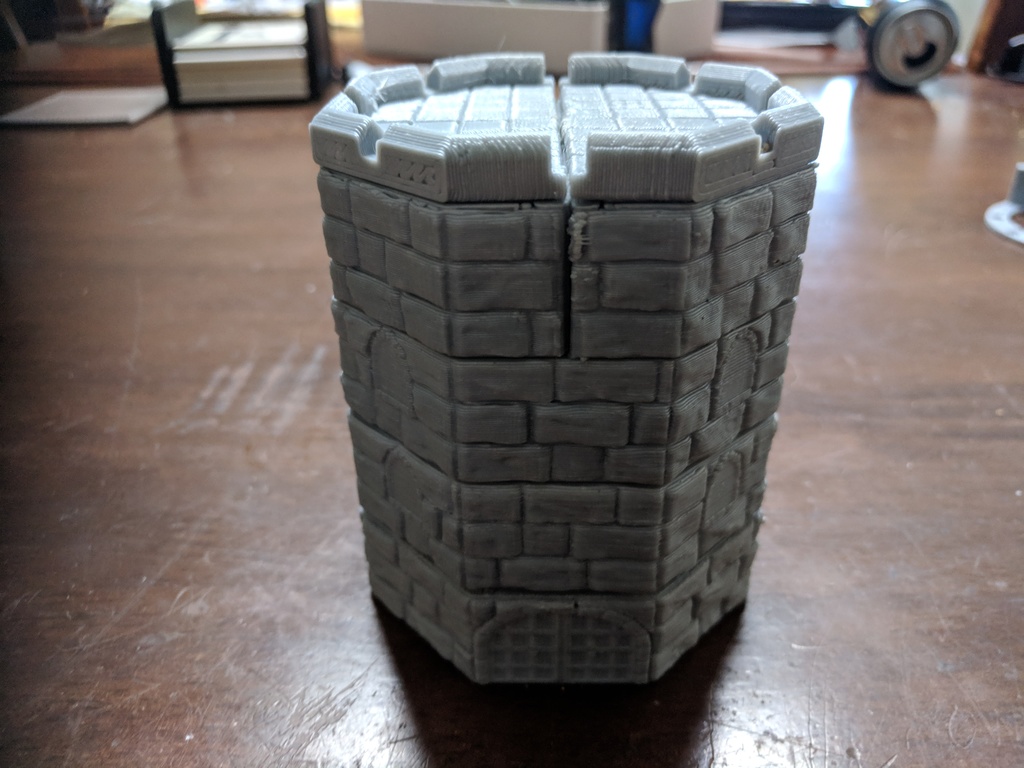
https://youtu.be/nCU-Of2aNIo This mechanical storage box was designed for a friend's card game, but it can also work well as a dice-box or small token container for many other games. The game it was designed for (Disastles) uses half-sized cards so this box will not fit standard playing cards. I might see if I can make a full-sized version eventually. **Construction** Note: This project required gluing to complete. I used hot-glue as it fills some of the tolerance gaps and ensures a smoother motion. Image 2 shows the necessary parts to fully construct this box (minus the 4 magnets). The construction process is as follows: 1. Glue 'Center Ring' A and B together (Image 3). 2. Insert the 'Connect Gears' into the 'Top Ring', ensuring that the arrows point towards the middle (Images 4 & 5). 3. Insert 'Drive Gear B' into the slot adjacent to the connect gears. Ensure that the arrow on the 'Connect Gear' remains pointing inwards and that the angle of the 'Drive Gear B' is approximately the same as the outer windowed wall of the 'Top Ring' (Images 6 & 7). The gears should fit snugly in the hole and remain there. 4. Insert 'Drive Gear A' into the remaining holes in the 'Top Lid' (Image 9). Ensure the arrows are pointing inward. 5. Insert the current assembly into the combined 'Center Ring', ensuring that the feet of the gears are fitted within the appropriate holes on the 'Center Ring' (Image 11). 6. Partially insert the current assembly into the 'Base', ensuring that one of the pillars of the 'Center Ring' is aligned with the Door on the 'Base' (Image 12). 7. Peer down the center of the assembly and ensure that the gears are properly aligned (Image 13). All of the gear arrows should be pointing inwards and the gears should smoothly fit together. 8. Insert the 'Center Insert' into the current assembly (Images 14 & 15). 9. Attach the 'Base Screw' to the 'Center Insert Bolt' (Images 16 & 17). 10. Glue the combined bolt to the bottom of the 'Center Insert' via the hole at the bottom of the 'Base' (Image 18). 11. Align the 'Lids' to the appropriate gear heads (Image 19) and then glue them in place (Image 20). 12. Glue the 'Battlements' into the appropriate slots on the lids, ensuring that the curved edges of the battlements align with the curved edges of the lids (Images 21 & 22). *Optional* 13. Insert 4mm(diameter) x 3mm(thick) neodynium magnets into each 'Magnet Holder', four in total. Ensure that there are two pairs of magnets (Image 25). 14. Insert magnets into the appropriate slots in the 'Lids', ensuring that the paired magnets meet when box is closed (Images 26 & 27). Enjoy your new box!
With this file you will be able to print Geared Game Box (Small) with your 3D printer. Click on the button and save the file on your computer to work, edit or customize your design. You can also find more 3D designs for printers on Geared Game Box (Small).