Geared Servo Direct Extruder
thingiverse
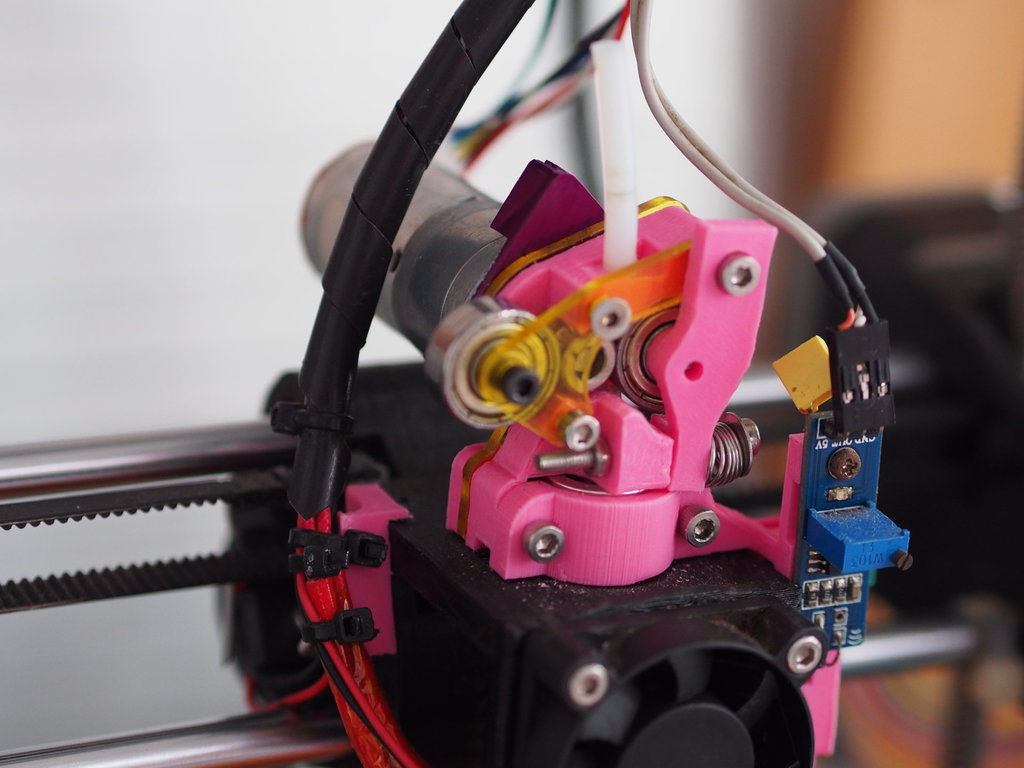
__________________________________________________ Introduction Direct drive and bowden extruder both have it's own advantage. Bowden extruder can be designed to be very light weight resulting in great print quality at higher print speed than direct drive extruder. Direct drive extruder, on the other hand, can handle flexible filament like TPU or TPE better than bowden extruder. The major disadvantage of direct drive extruder is weight of the stepper motor. This weight will cause ringing in the print when printing at high speed. To minimize the weight of the direct drive extruder, I've used a light weight geared servo motor instead. _______________________________________________________________________ Servo Motor Choice I had to overcome a few challenges before I managed to get to an acceptable print quality. There were mechanical, heat and software issues. The first mechanical issue I had to deal with is the motor drive shaft diameter. Most of the extruder drive gear are meant for stepper motor with 5mm drive shaft. I could only find servo motor with either 4mm or 6mm drive shaft. Finally, I decided on a 370 size geared DC motor with encoder. This motor have a 4mm shaft. I found a 0.5mm thick piece of metal to act as a shim to mount to an MK8 drive gear. _______________________________________________________________________ Servo Motor Shaft Flex The servo motor, unlike stepper motor which have a very rigid shaft, have a shaft with a lot of play. When the bearing on the right of the extruder press against the filament onto the extruder drive gear, the motor shaft would move slightly to the left. This result in a weak grip on the filament causing poor print quality. This was resolved by adding a bearing on the left to keep the extruder gear in place when the bearing on the right is pushing against it. With this modification, this extruder grip onto the filament much harder. I could not pull out the filament by hand. _______________________________________________________________________ Servo Motor Heat With the 2 bearing design, the extruder was able to print small object that lasted less than 10 minutes quite well. When the print was large, the upper layer had under extrusion. I found out this was caused by the heat generated by the servo motor. The servo motor was at about 60°C, the glass transition temperature of PLA. The extruder's PLA softened and cannot grip the filament well. The solution to this was to add a heat sink to the motor and CNC cut two acrylic piece. The acrylic piece between the motor and PLA extruder is meant to act as the heat insulator. The acrylic piece at the front and back would sandwich the PLA in the middle to add mechanical strength. With the modification, I can print larger object lasting more than 1 hour without under extrusion. https://youtu.be/btQTC4jKYq4 https://youtu.be/Oj1c9ShmNzM _______________________________________________________________________ Servo PID Sampling Rate I used the standard arduino PID library for the arduino nano servo motor controller. https://playground.arduino.cc/Code/PIDLibrary/ After noticing some artifact on my prints, I realized that this standard library have a minimum sampling time of 1 millisecond. What this means is the servo motor controller does not react when there are stepper pulse input from the RAMPS 1.4 board in between this 1 millisecond, the servo motor controller react to this stepper pulse input only when the 1 millisecond timer is up. I print my outer layer at 50mm/s and my printer has 100 steps per mm. This means the X and Y axis would have moved 5 steps before the extruder start moving. I had to modify the PID code to reduce the sampling time to 200 microsecond. This is the time for 1 step at 50mm/s. This change reduced the artifact greatly. _______________________________________________________________________ Future Improvement After reading the extruder drive gear comparison below, I found that the MK8 drive gear i'm using have the weakest grip. I'll be experimenting with drive gear with better grip. https://www.instructables.com/id/Extruder-Drive-Gear-Shootout/
With this file you will be able to print Geared Servo Direct Extruder with your 3D printer. Click on the button and save the file on your computer to work, edit or customize your design. You can also find more 3D designs for printers on Geared Servo Direct Extruder.