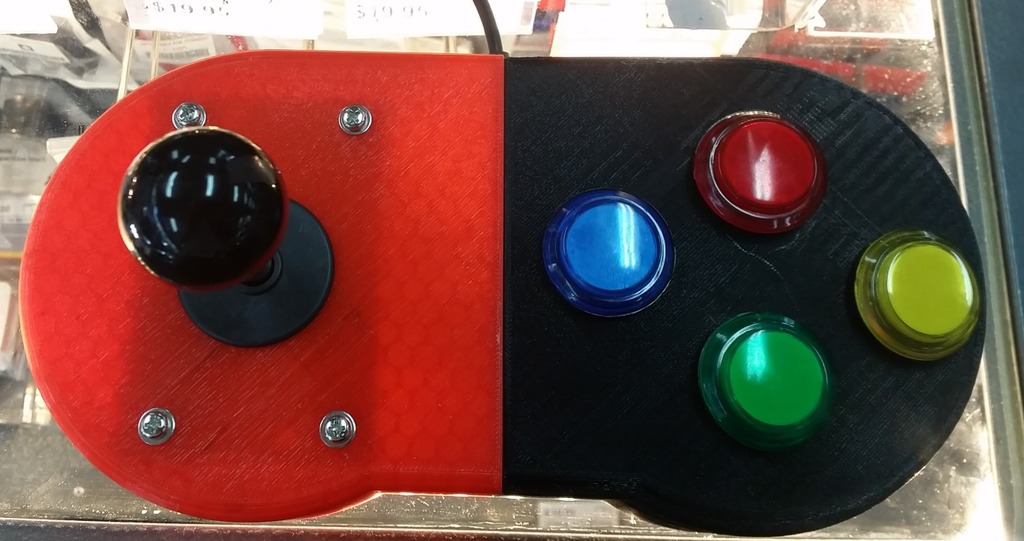
Gender Neutral USB Arcade Controller
thingiverse
Need to re-live your childhood? All your friends left you and/or dead? Then play some retro arcade games with this arcade controller enclosure (computer/RaspberryPi/skills/friends not included). Your life will thank you. **STEP 1 - CONSUMER ACTIVATE** Whip out your meaty credit card from your trousers/skirt and purchase the following - 1. Arcade Joystick https://www.jaycar.com.au/arcade-joystick-with-microswitches/p/SM1052 2. 4 x Arcade Buttons (of various ethnicity) https://www.jaycar.com.au/blue-arcade-button-switch-with-led-illumination/p/SP0666 3. USB interface for joystick/buttons https://www.jaycar.com.au/usb-interface-for-joystick-and-buttons/p/XC9046 4. Some M2/M3 fasteners and cables ties **STEP 2 - COME ON DOOO EET** Print both files (A and B). I designed these files to print upside down (with the cavity facing upwards) using minimal supports (just one for the USB cable hole on my slicer settings). **STEP 3 - Amanaemonesia** Clickety clack everything together using the practical skills you've accumulated over your life. If you're extremely young this may be hard. If you're extremely old, well done on using a computer and getting past step 2. ***1a. Put down your joystick and stop playing with it. Before we mount any switches, we need to start with bringing both halves together to encapsulate the rubber strain relief of the USB cable. You should notice a squarish hole specifically for the rubber on the USB cable (see picture).*** ***1b. Once the USB cable is in place (should protrude neatly from the back of the assembly) cable tie both halves together using four cable ties in the 8 holes (see picture). *** ***2. Mount the USB interface board using 4 screws/nuts , ensuring that the board is on the joystick side (more room). If you have mounted it on the button side, you have failed at life and should stop here.*** ***3. Now you can start mounting the buttons and joystick in their respective holes.*** ***4. Wire up all buttons to the USB interface, using the larger rectangular hole to feed through the button wires.*** ***5. Plug the USB into a computer/raspberryPi and program the buttons *** ** STEP 3 - How did I get here? ** You are now ready to use your arcade controller and play some pirated Super Mario. If you have reached this point, find a mirror and congratulate yourself. Because no one else's opinion matters as much as your own.
With this file you will be able to print Gender Neutral USB Arcade Controller with your 3D printer. Click on the button and save the file on your computer to work, edit or customize your design. You can also find more 3D designs for printers on Gender Neutral USB Arcade Controller.
