Geodesic dome hubs
thingiverse
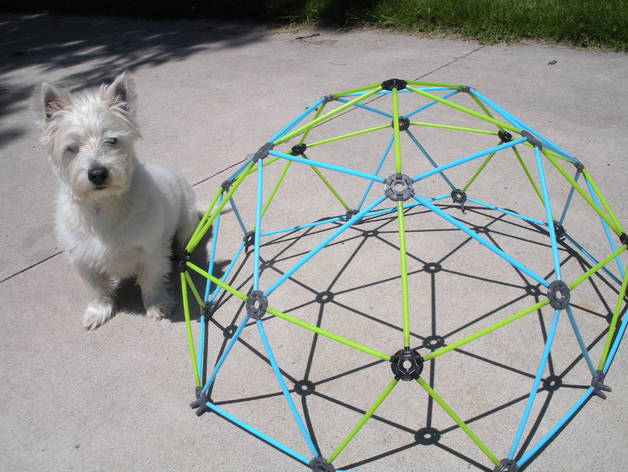
Geodesic domes - even people who don't want to live in one think them beautiful. Who doesn't admire Epcot's architecture? This is another hub to join the struts that form a geodesic dome. This one uses common drinking straws as the struts, and builds a dome about 3/4 meter in diameter. This design's distinctive feature is the hubs' swivel arms. Fixed-angle hubs can only be used in the architecture for which they were designed, but a varying-angle hub like this can be used in different geodesic dome designs. Instructions Many geodesic domes are possible, but here's a simple plan: Print - 20: geodesic joint - 6 sides.stl 6: geodesic joint - 5 sides.stl Purchase drinking straws and cut to length - 35 straws at 208 mm ("long straws") 30 straws at 180 mm ("short straws") If your straws are not the same diameter as mine (23mm circumference; see photo), you'll need to customize the "straw_inside_dia" parameter in "geodesic joint.scad". Assembly, starting at the top - See http://www.desertdomes.com/pictures/dome/2vdiagram.gif, which illustrates these steps. Rule of thumb: 5-sided hubs always connect to short straws, never long ones. Connect 5 short straws to 1 5-sided hub. To each of these 5 straws, connect a 6-sided hub. To each of these 6-sided hubs, add a short straw, opposite the existing short straw. To each of these straws, add a 5-sided hub. To each 5-sided hub, add a short straw on each joint. At this point, your assembly should look like Assembly Picture 1. You have used all the 5-sided hubs and all the short straws, and should have only 6-side hubs and long straws left. Connect adjacent 6-sided hubs with long straws, elevating the center hub enough so things fit. At this point, your assembly should look like Assembly Picture 2. Add a long straw to each open joint on the 6-sided hubs. Where 4 straws point together, join them with a 6-sided hub, again elevating the more central hubs as needed so things fit. At this point, your assembly should look like Assembly Picture 3. On each open joint of the 6-sided hubs, add a long straw. Where 2 straws point together, join them with a 6-sided hub, again raising the more internal hubs so things fit. Finally, join adjacent 6-sided hubs with long straws. Your assembly is now complete, and should look like Assembly Picture 4. The axles on each hub have very small footprints, so sometimes one will come loose early in the print and ruin the print. To prevent that, you can use the "w(ith) brim.stl" versions, which have a larger footprint and so are more stable, but are easier to work with than Cura's auto-generated brim. Example geodesic dome calculator: http://www.desertdomes.com/dome2calc.html When using a calculator, keep in mind that the joints printed here add 30 mm to each straw's length.
With this file you will be able to print Geodesic dome hubs with your 3D printer. Click on the button and save the file on your computer to work, edit or customize your design. You can also find more 3D designs for printers on Geodesic dome hubs.