Geordi La Forge Visor--Star Trek: The Next Generation
pinshape
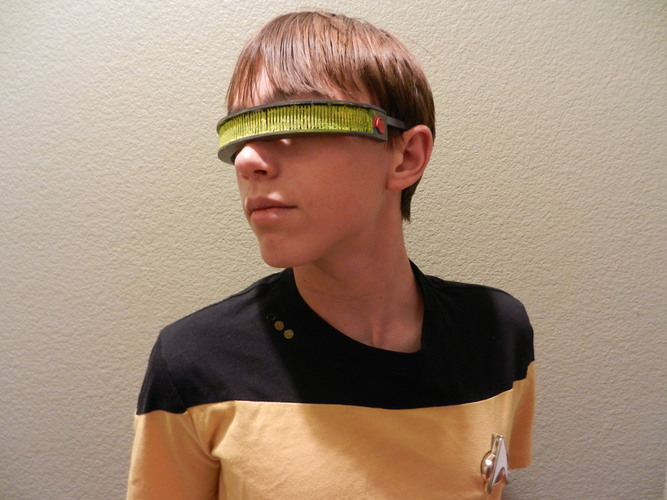
This is a replica of the visor used by Geordi La Forge in Star Trek: The Next Generation. This visor is designed to accommodate many head sizes via scaling. It may seem impossible to see out of this visor, but, it only adds a tint of color to your overall vision. If you print this object in blue, like I did, you will have a slight blue tint added to your vision when you wear this visor. The visor acts like a rudimentary pair of sunglasses. You have about 75%-85% of your original visibility while wearing these. The visor has two print modes. Auto-lock files can (theoretically) be asembled with no glue. Non-auto-lock files require glue for assembly. This post comes with four models. 1: main visor only.stl-- The main part of the visor. It contains the vertical slits and is the biggest piece of the visor. 2: Top visor without auto-lock tabs.stl-- The top part of the visor that has auto-locking tabs. This is an experimental locking system that allows the user to assemble a 4 piece print with no glue or adhesive materials. (See assembly instructions) 3: Visor FULL with auto-lock tabs.stl-- This is the entire visor with default scaling. All pieces included at default scale in this model. 4: sunglasses extenders.stl-- This model contains longer earpieces if the default ones are too short. PRINTER SETTINGS: Nozzle Temp: 190*C Filament: PLA Bed Temperature: N/A Speed: 45mm/second Infill: 20% Layer-Height: 0.2mm or lower Support: Touching Build Plate ONLY Recommended Material color: Yellow (less difficult to paint) *Printed on a CoLiDo DIY by Print-Rite POST-PROCESSING: Step 1: Remove all objects from printer, and carefully remove support material. Step 2: Slot the earpiece mounts into their appropriate slots on either side of the model. The earpieces should slot into the rectangular slots on the biggest piece of the visor. Step 3a (No auto-latch system): Guide the pins of the top part of the visor into their appropriate housings. These housings are very close to the slots for the earpieces. Secure the pins in their housings by adding a bit of hot glue to the pins. Step 3b (For auto-latch system) : After placing the earpieces, lock the top visor piece into place by fitting the large pins into their cylindrical housings. These housings are very close to the earpiece slots. Once you have inserted the pins into their proper housing, press the pins into the housing until you hear a faint "click". You do not need glue for this step. But, feel free to add some if you want. That completes the assembly of this visor. I hope you enjoyed my 3D model. It is a realistic, easy to print/assemble object for the cosplay contest. Thanks for reading my submission, live long and prosper. -Frank R
With this file you will be able to print Geordi La Forge Visor--Star Trek: The Next Generation with your 3D printer. Click on the button and save the file on your computer to work, edit or customize your design. You can also find more 3D designs for printers on Geordi La Forge Visor--Star Trek: The Next Generation.