Ghost Clips
prusaprinters
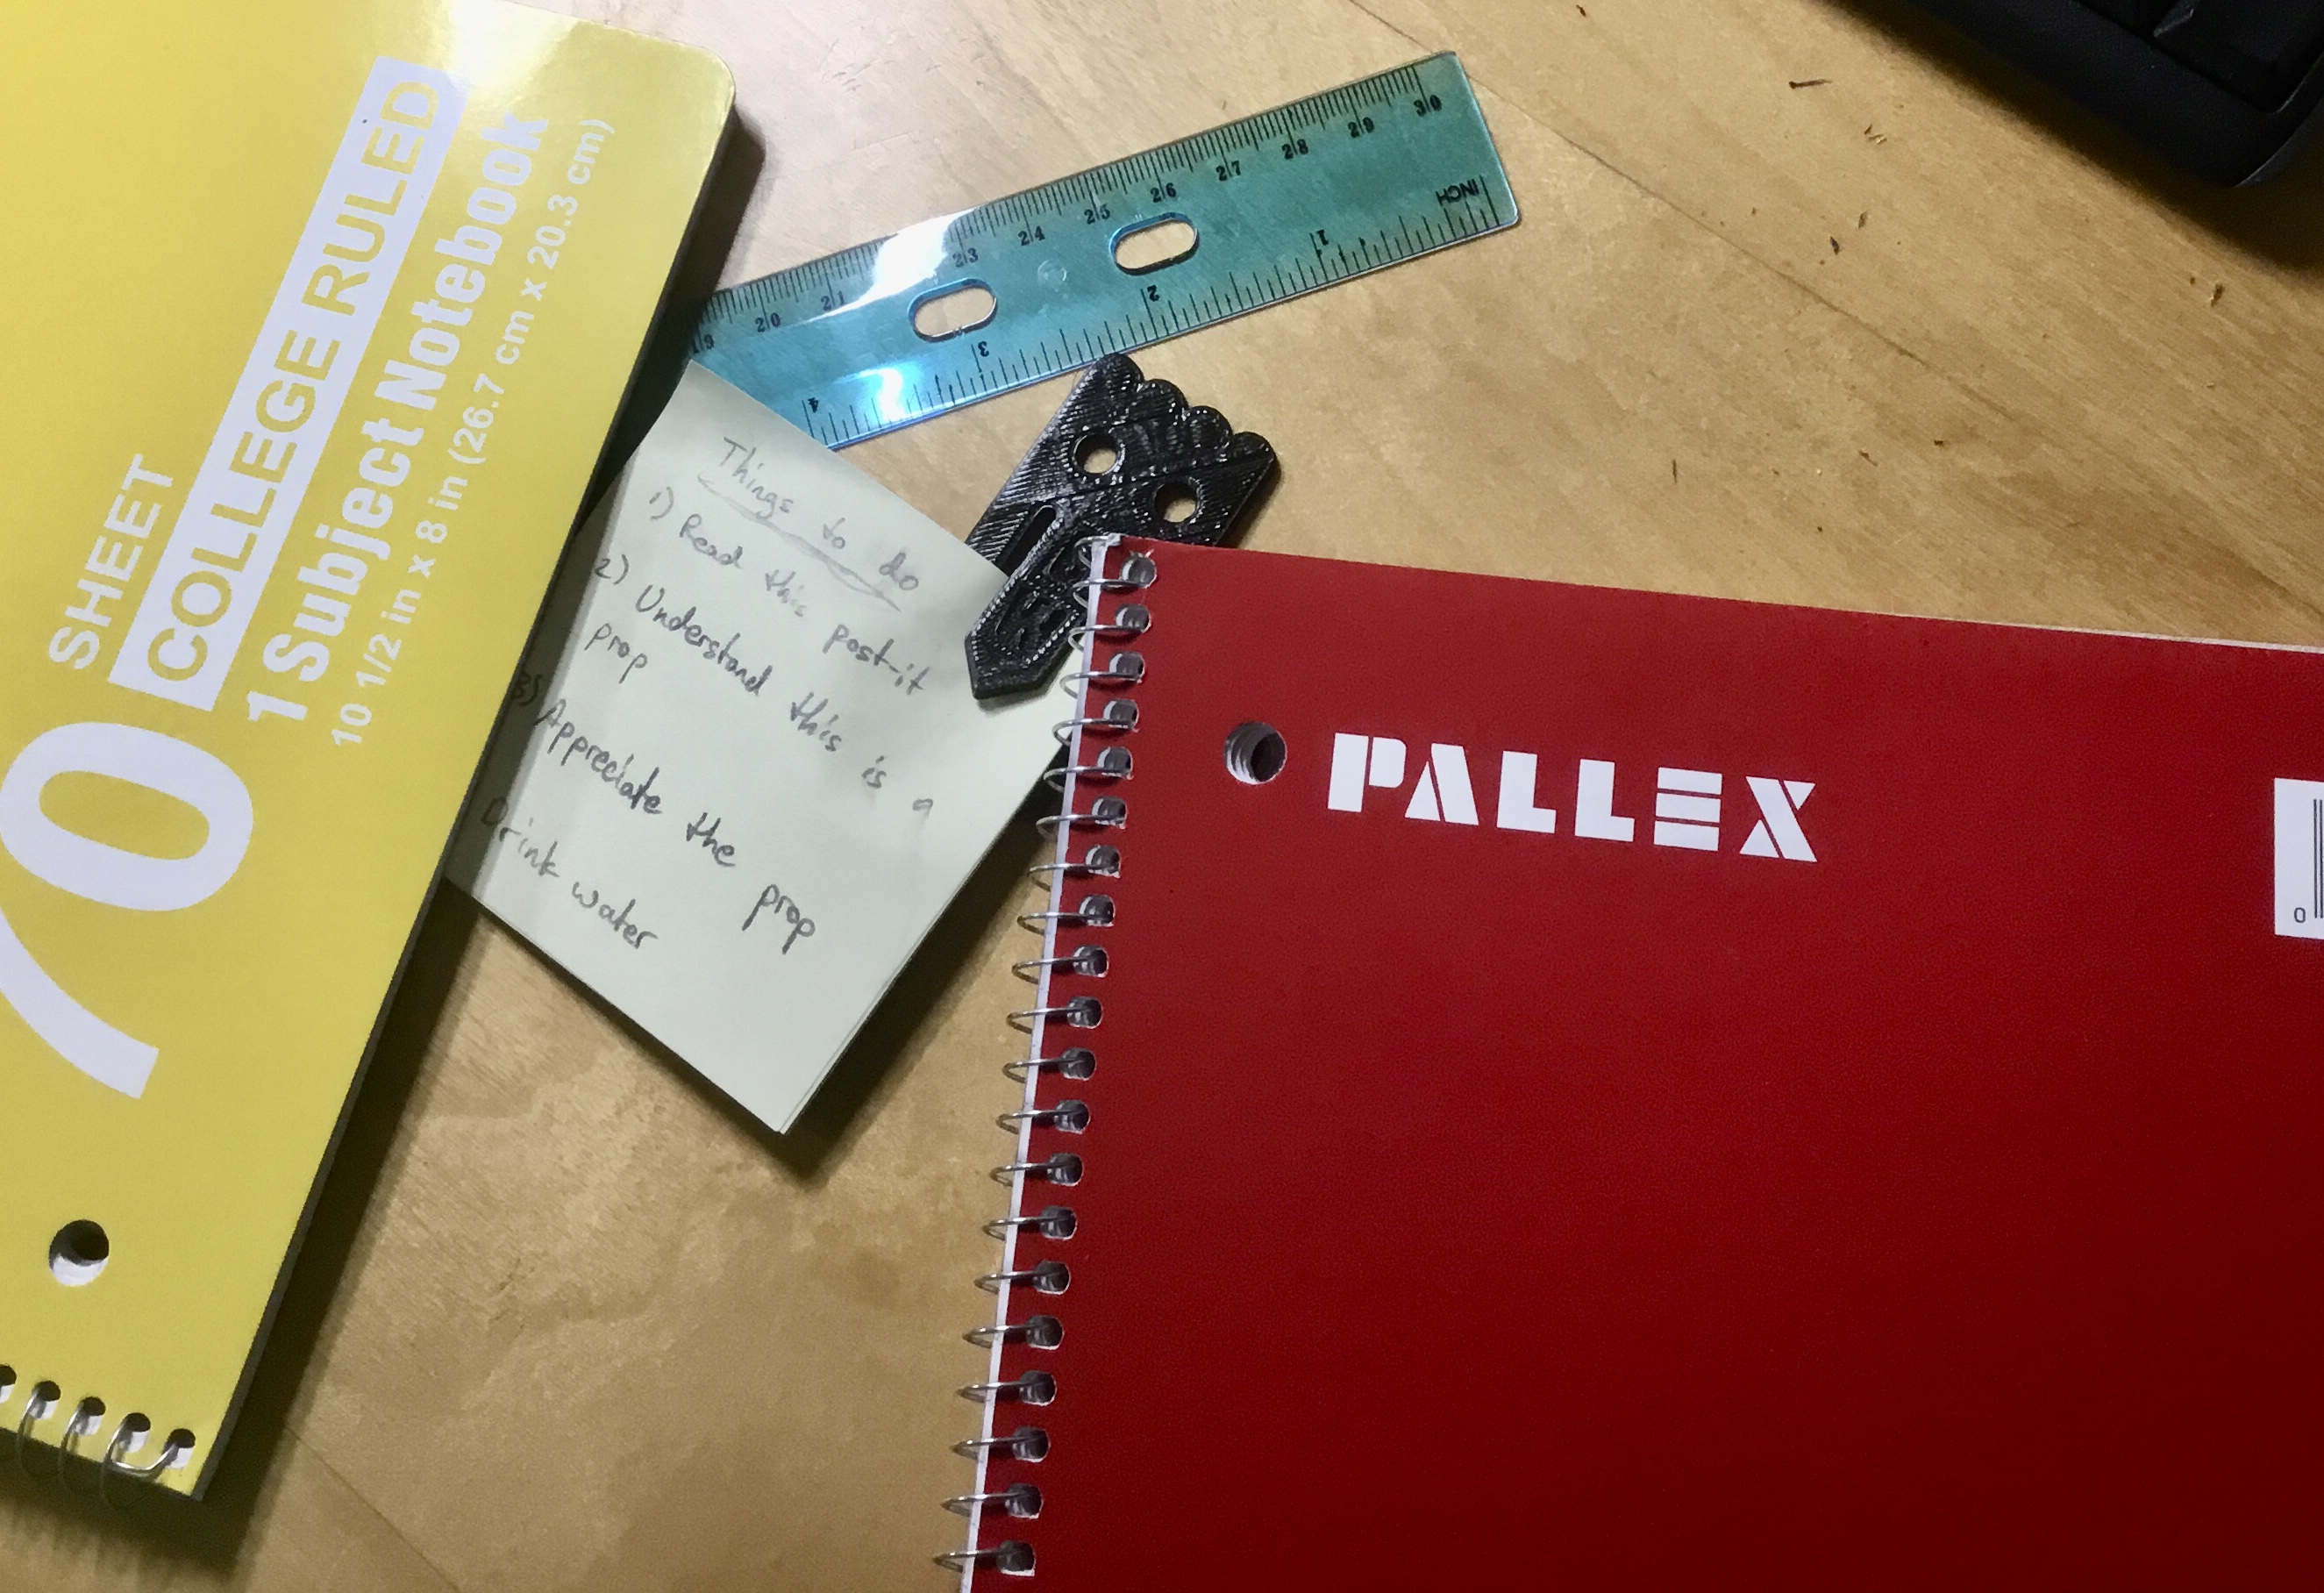
<p><strong>Summary (cont.)</strong><br><br>A collaborative creation by Devin Barker and Brendon Wen, the ghost clip is both a fashionable addition to the Halloween spirit that corporate tries to encourage and an implement to help keep your working environment organized - whether that means maintaining a neat stack of papers, acting as a bookmark for your monthly read, or reminding you of priority tasks is up to you! With the ghost’s compact dimensions of 6.55 cm x 3.00 cm x 0.200 cm, your office cubicle knows no bounds for how many you can fit inside. No assembly required.</p><p>Find my partner Devin's report of clip recreation <a href="https://www.printables.com/model/301556-spooky-office-ghost-clip">here.</a></p><p> </p><p><strong>Client's Ask</strong></p><p>With a partner, recreate the presented ghost clip using Solidworks. You and your partner MUST have identical files that you create by collaborating on each step, one at a time. This ensures that your projects are accurate and efficient.</p><p>Presented ghost clip model in question:</p><figure class="image image_resized image-style-align-center" style="width:56.31%;"><img src="https://media.printables.com/media/prints/294287/rich_content/b7f67dca-fa6d-41a5-95bf-82113328cc03/img_3980.jpg#%7B%22uuid%22%3A%22b23e94d4-8bdf-4a88-a006-0895fb3f78ac%22%2C%22w%22%3A988%2C%22h%22%3A1340%7D"></figure><p><br><br><strong>Construction Instructions</strong></p><ol><li>Create a center construction rectangle on the origin with dimensions similar to the ones shown on the paper. </li><li>Make sure the construction lines appear from midpoints instead of from corners. </li><li>Make two horizontal construction lines similar to the ones shown on the paper distanced from the top and bottom of the construction box <ol><li>Split the upper construction line into 4 equal sections. </li><li>Split the bottom construction line into 3 equal sections. </li></ol></li><li>Use the three-point arc tool to form four congruent semicircles with points positioned on the upper construction line and box as shown in the diagram. </li><li>Create three congruent isosceles triangles with points positioned on the lower construction line and box as shown in the diagram. The bottom tips should be along the midpoints of each of the 3 sections. </li><li>To create the ghost’s eyes, <ol><li>Form a horizontal construction line on which the eyes’ center points rest on. It should be distanced from the top of the constraint box as shown in the diagram.</li><li>Create a circle on the portion of the construction line that is to the left of the box’s vertical axis of symmetry. Then, position it a certain length away from the vertical axis of symmetry as shown in the diagram.</li><li>Use the mirror entities function: select the circle as the entity to mirror and the vertical axis of symmetry as the line to reflect across. </li></ol></li><li>To create the smile of the ghost,<ol><li>Construct a vertical line within the constraint box’s left half. Position its upper endpoint from the top of the constraint box and axis of symmetry and set its length as shown in the diagram.</li><li>Connect the bottom endpoint of the vertical line to a diagonal line that ends on the vertical axis of symmetry. Adjust the vertical and horizontal components of the diagonal line to match those of the diagram.</li><li>Select these two lines and use offset entities with a width as shown in the diagram. Make sure that the function has cap ends checked off and will offset the lines leftward only.</li><li>Delete the bottom cap end, and extend the offset diagonal line until it snaps onto the vertical axis of symmetry.</li><li>Use mirror entities to mirror this hockey stick-looking figure across the vertical axis of symmetry </li></ol></li></ol><p>Reference diagram:</p><p><img src="https://lh5.googleusercontent.com/510VdKPO5gwTnGZYQE2TG0Y5_W9yUJbfOWWq6EvW2xMLqaFs43omAXsBVEfjqPZNwHzW6LNhFsQq4QFJfGT9GgxYsINBpfVCmtCZhsJBbMx3atvbcOaR1_j4Jc39qKTnnj0sg7TZRBJ9lb5liIq2dVgha2QCd60tVHtRCUj8nfuAa-o31zZJJoSg"></p><p> </p><p><strong>Our Designing Process</strong></p><p>Devin and I created blown-up sketches of our ghost clip model at a scale factor of two. This helped us with grasping a better understanding of the model’s overall shape and size without needing to constantly squint. Tools used include rulers, compasses, and graph paper. Due to minor difficulty in properly transferring measurements from object to paper, we made discrepancies that distorted our sketch. We only noticed these errors when mirroring the numbers onto the engineering application Solidworks with the sketch feature: the model clip and virtual creation did not overlap at a 1:1 scale factor, which should be the case with identical designs. Given this information, we repeatedly adjusted our inaccurate measurements through further inspection until the two clips overlapped perfectly. Our edits are shown below:</p><p> </p><p><img class="image_resized" style="width:47.26%;" src="https://lh5.googleusercontent.com/bqgWXxGSF8YaxgmZIUM7mbVeyBwhb4Yylv793SuoxSquYYZjLZQfj8_k04N_HN7ZcGLGpal-NuBd2EBwyuWwHDyjbSdggIVZ7M9-CiAf5jnufxErfMw_pGtj-YKxAM87zdRvrWrZeuhdhmhPnMv0UxjUN9dMyBYgpO9cqE7UVLGSqJ6TdnTORBJh"> <img class="image_resized" style="width:47.89%;" src="https://lh6.googleusercontent.com/Btlv2k1JO51bsEE9tdYquuKJzswJRDnCvzJtl69KDSqFqJ54RGlurmAOo97ZAlYpYbjRsz-kta8MrjcLsi_3COMY42qgQNBMsL_fY8Q_MuARAGb5fYlaZFOJafOqnZ9lpL5OusS6MSxzFujFj4vXkvye2QIcHYl4gco0qj-sEod-fx0QYJcRzSEo"></p><p>The vertical length of the entire clip was adjusted from 7 cm to 6.55 cm to decrease surface area. Improves function by taking up less space while maintaining the same objective. Also more aesthetically pleasing by seeming less lanky.</p><p> </p><p><img src="https://lh3.googleusercontent.com/1-DfAoaD3x1T1YqdpUeu06qKMpqxr2scG7PqBc8ryLG2kx1Dc2RFa2bSgxSmPs3TjsDY7gtA-EHhQu6DfEvAYQSfpnMX3VOOvu2apaaN3Jo91WsBSyKhueCdLMXypiW8SCvmeKXYhE3JTfPmBLeRLgtjd2LFyipIIKXQvya9CJuxYjD3iBpAHaTz"><img src="https://lh3.googleusercontent.com/O8MVs1xqznLJDlVU61pCiTfqSkCOsIpoJAQX7xWLEFGGVq4cyPkVtuDNqob3PGuhOswTgRw4Me4sIRFfyRaz3P6tossuQrvEnLMFUmsUrSpVjp_2UyJdfLH9BRpQQ6n6wxM4HFa8gPiG-KjgPR4M9bgafFXIQEH2Yd6kpPFd2aThWOCrnB0tvhBX"></p><p>The clip's eye placement was adjusted from 0.80 cm to 0.83 cm away from the vertical edges. </p><ul><li>Aesthetic purpose: eyes looked odd when they were too far apart.</li></ul><p> </p><p><img src="https://lh5.googleusercontent.com/aO1DQDUO9YRdPEUSk0GrWyzDSkksD_PazuZHfvepXH2slq0vuzhXvp-tByDXNHVs53fKWqh_t-8CNeDlMeo_rJFqI8iNxCjbTp2SvoxCjVjBTM_Our__VKWI5bo4IlznxUiz5tqJEcviaY46NP7j54YpPQgXP9_1GiDwTaSlZno482Im2VQCndsZ"> <img src="https://lh6.googleusercontent.com/t1-rYXoKi4aicPEyzX1zaNq3fKmjumxGbwnE8P5maFntqR8PoRt76xC8DuxCw0IQhciYFdOJI38Z1e9sJFd1YDBbdPAuvXHkUSN_6akP9x2vWvvolymk7ZAF_vJCgwwSXeQg0Z8pcmjVPEtZEmZ1FdLwxaaxKxT-k6RAuvxHGXkJyRMPeO8mTxrr"></p><p>The width of the ghost's smile was increased from 0.20 cm to 0.265 cm. </p><ul><li>Functional reason: increasing the gap would make clipping easier.</li><li>Aesthetic reason: 0.20 cm made the smile appear too thin</li></ul><p> </p><p><img src="https://lh3.googleusercontent.com/gdVf76jKNwTQI6Ax9wYWuN8dtvI5ZwNsuYgUsu0PLk98A5fn6davU3s7Qn6UBRQc-oXly7QGKj56M4zIXO05nu574Vw99R1A9SZwTCQCgGiDYzjvcdNrXF2GqV7nAhm0lH-gH4GRZ3OJPIx50QrCtnF4XoEOVpKhqwxkyKxDOHhNPXYR5T9YqPu-"> <img src="https://lh5.googleusercontent.com/TXm2rnwaQkhpcG5oXM7woNrMBxGs93ERmleHV7bqSV3lII78fI0T_48C4J3r3piW9o-tyr2wQnThbGKfAtQI2KUt5EIe6l6MgMNljfBu77fzlI8sU2H6l__iopwMJ7AcuFkLi2f1Y4yz5bCqHMaIrYzj8M9BzylOuKq_DER0-aQPYCZkykZKTNBP"></p><p>The distance between the upper curve of the ghost's smile and the bottom edge of the clip was shortened from 2.425 cm to 1.90 cm.</p><ul><li>Aesthetic reasoning: the smile looked more natural at a wider angler</li><li>Functional reason: improve the sturdiness of the smile's tip, and lowers its likely to break off.</li></ul>
With this file you will be able to print Ghost Clips with your 3D printer. Click on the button and save the file on your computer to work, edit or customize your design. You can also find more 3D designs for printers on Ghost Clips.