Ghostbusters Ghost Trap Pedal (1984)
thingiverse
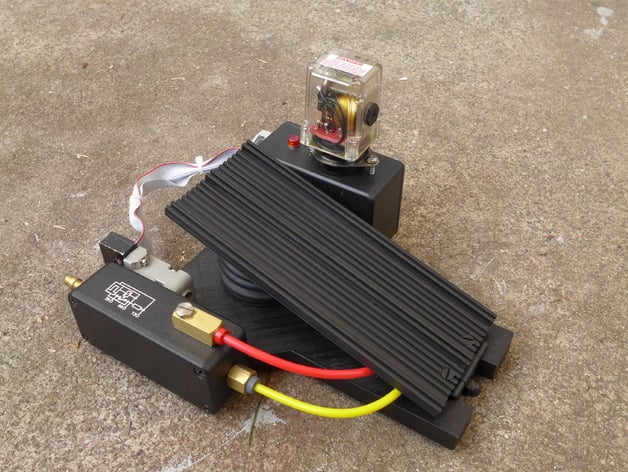
UPDATES 2/18/18 Electro-Mechanics Guide is now available in my shop! 95 page, fully-illustrated guide geared toward the layman to build and install electronics and mechanics.https://charlesworthdynamics.etsy.com Check out the Sneak Peek PDF for a taste of what the guide is like plus a full list of parts needed: http://bit.ly/Electro_Sneak-Peek Arduino code & SFX files available for free on my site: http://bit.ly/3D_Kit_Instructions Print Guide updated to v10 - indicates which parts need printed for electronics installation UPDATES 1/23/17 Added 1591 Box for Amphenol and Omron style relay sockets Added drill templates for 1591 Amphenol and Omron style sockets Renamed some files for organizational purposes - model remains the same Print Guide updated to v9, reflects new parts, corrections and more details. ASSEMBLY GUIDEShttp://www.charlesworth-dynamics.com/2013/08/instructions.html ASSEMBLY HARDWARE A complete list of hardware needed for a Standard trap (fully 3D printed) is included in the downloads. You can also get all hardware and Deluxe upgrade parts directly from me: https://charlesworthdynamics.etsy.com Ghost Trap is also available to print:http://www.thingiverse.com/thing:1394492 Updates via Twitter and Etsy:https://twitter.com/CworthDynamicshttps://charlesworthdynamics.etsy.com This Ghost Trap Pedal is over 26 parts designed to be 3D printed except for the screws and other key elements that just aren't printable. The pedal can also accommodate hardware upgrades and a switch or other electronics for triggering the Ghost Trap. A complete list of hardware needed is included in the downloads. The first gallery picture is a Deluxe trap with as much real hardware as possible, the rest are 3D printed as much as possible. Unlike my Ghost Trap which is fully 3D printable, the pedal is more challenging and needs additional 'real' parts such as the hinge, tubing, ribbon cable, and the hard-to-find relay. I modeled the pedal starting with excellent plans from Stefan Otto from www.gbfans.com and from there made further modifications based on my own research, manufacturer blueprints, real parts and an abundance of photo reference. While the pedal is almost fully printable, it was designed based on real parts whenever possible so they can be swapped out as an upgrade. For example, the 3D printed base can be used as a template to upgrade to 1/2" MDF. To learn more about how the Trap & Pedal were designed and built, see me on Tested: Print Settings Notes: You will need a print bed that can accommodate up to 7" W x 4" D (177mm x 98mm). All files have been run through mesh repair and are ready to print. They are oriented for optimal print quality. An excellent pedal can be made without painting by printing each piece in appropriate colors. To help confirm scale, I have uploaded cube_1_inch.stl and cube_20mm.stl. Depending on what system you are using, load one of these cubes with the parts and confirm if it is 1" or 20mm. If so, all the parts should be at proper scale. I'm not providing print settings since it can vary wildly from printer to printer. Certain parts, such as the handle and handle frame should use a higher infill for strength. Other parts, such as the foster connectors benefit from slower speeds. A parts list and print guidelines for supports, etc, is included in the download.
With this file you will be able to print Ghostbusters Ghost Trap Pedal (1984) with your 3D printer. Click on the button and save the file on your computer to work, edit or customize your design. You can also find more 3D designs for printers on Ghostbusters Ghost Trap Pedal (1984).