Ghostbusters Giga Meter Dome Mechanism
thingiverse
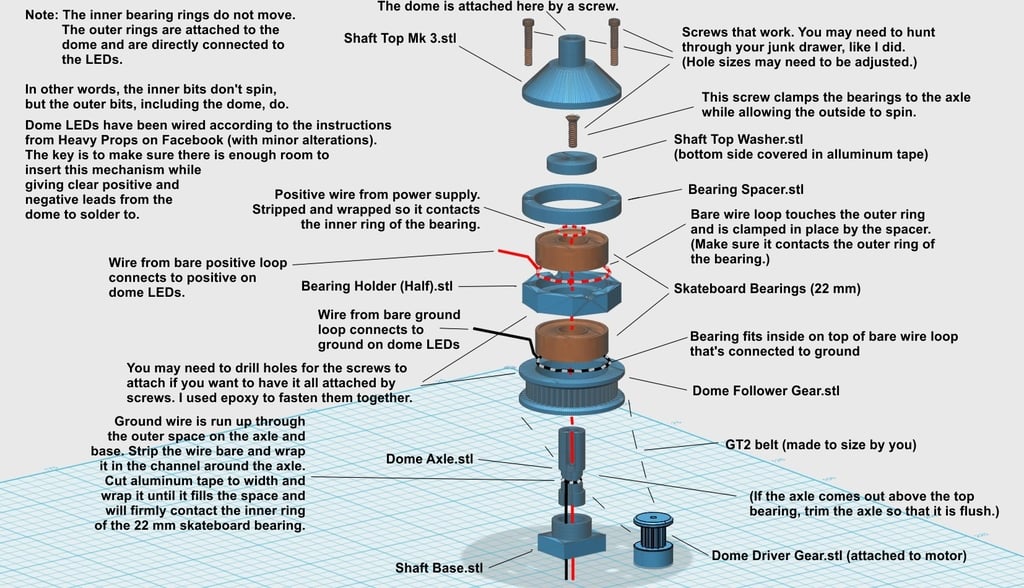
These are the mechanical bits I designed to make the Ghostbusters Giga Meter lighted dome able to remain lit up and spin. The key element here is the continuity between the outer and inner rings of a standard 22 mm skateboard bearing. The dome and most of the Giga Meter parts I printed are the wonderful design from ERankLuck. I also used the updated face plate from TheLegendOfMart. The ear movement was provided by the custom parts designed by WindDrake. The wiring of the lights is based on the Heavy Props tutorial on Facebook, with the exception that I did not bring the resistors together in the centre of the dome, but wired them together so they could be pressed against the inside of the dome, giving space for the drive mechanism I designed. The dome is ERankLuck’s design modified with a countersunk hole in the top for a screw to mount it to the inner mechanism. My use of this mechanism involved making a custom 2 mm GT2 belt. (There are some good videos on YouTube about how to do that.) As I’ve said, the parts I’ve designed rely on 22 mm skateboard bearings. The key is the continuity between the outer and inner rings. In this design, the inner rings and axle do not move. The outer rings have the dome and LEDs attached to them and spin. The electrical continuity of the bearings lets this happen.
With this file you will be able to print Ghostbusters Giga Meter Dome Mechanism with your 3D printer. Click on the button and save the file on your computer to work, edit or customize your design. You can also find more 3D designs for printers on Ghostbusters Giga Meter Dome Mechanism.