Ghostbusters Proton Pack Parts
prusaprinters
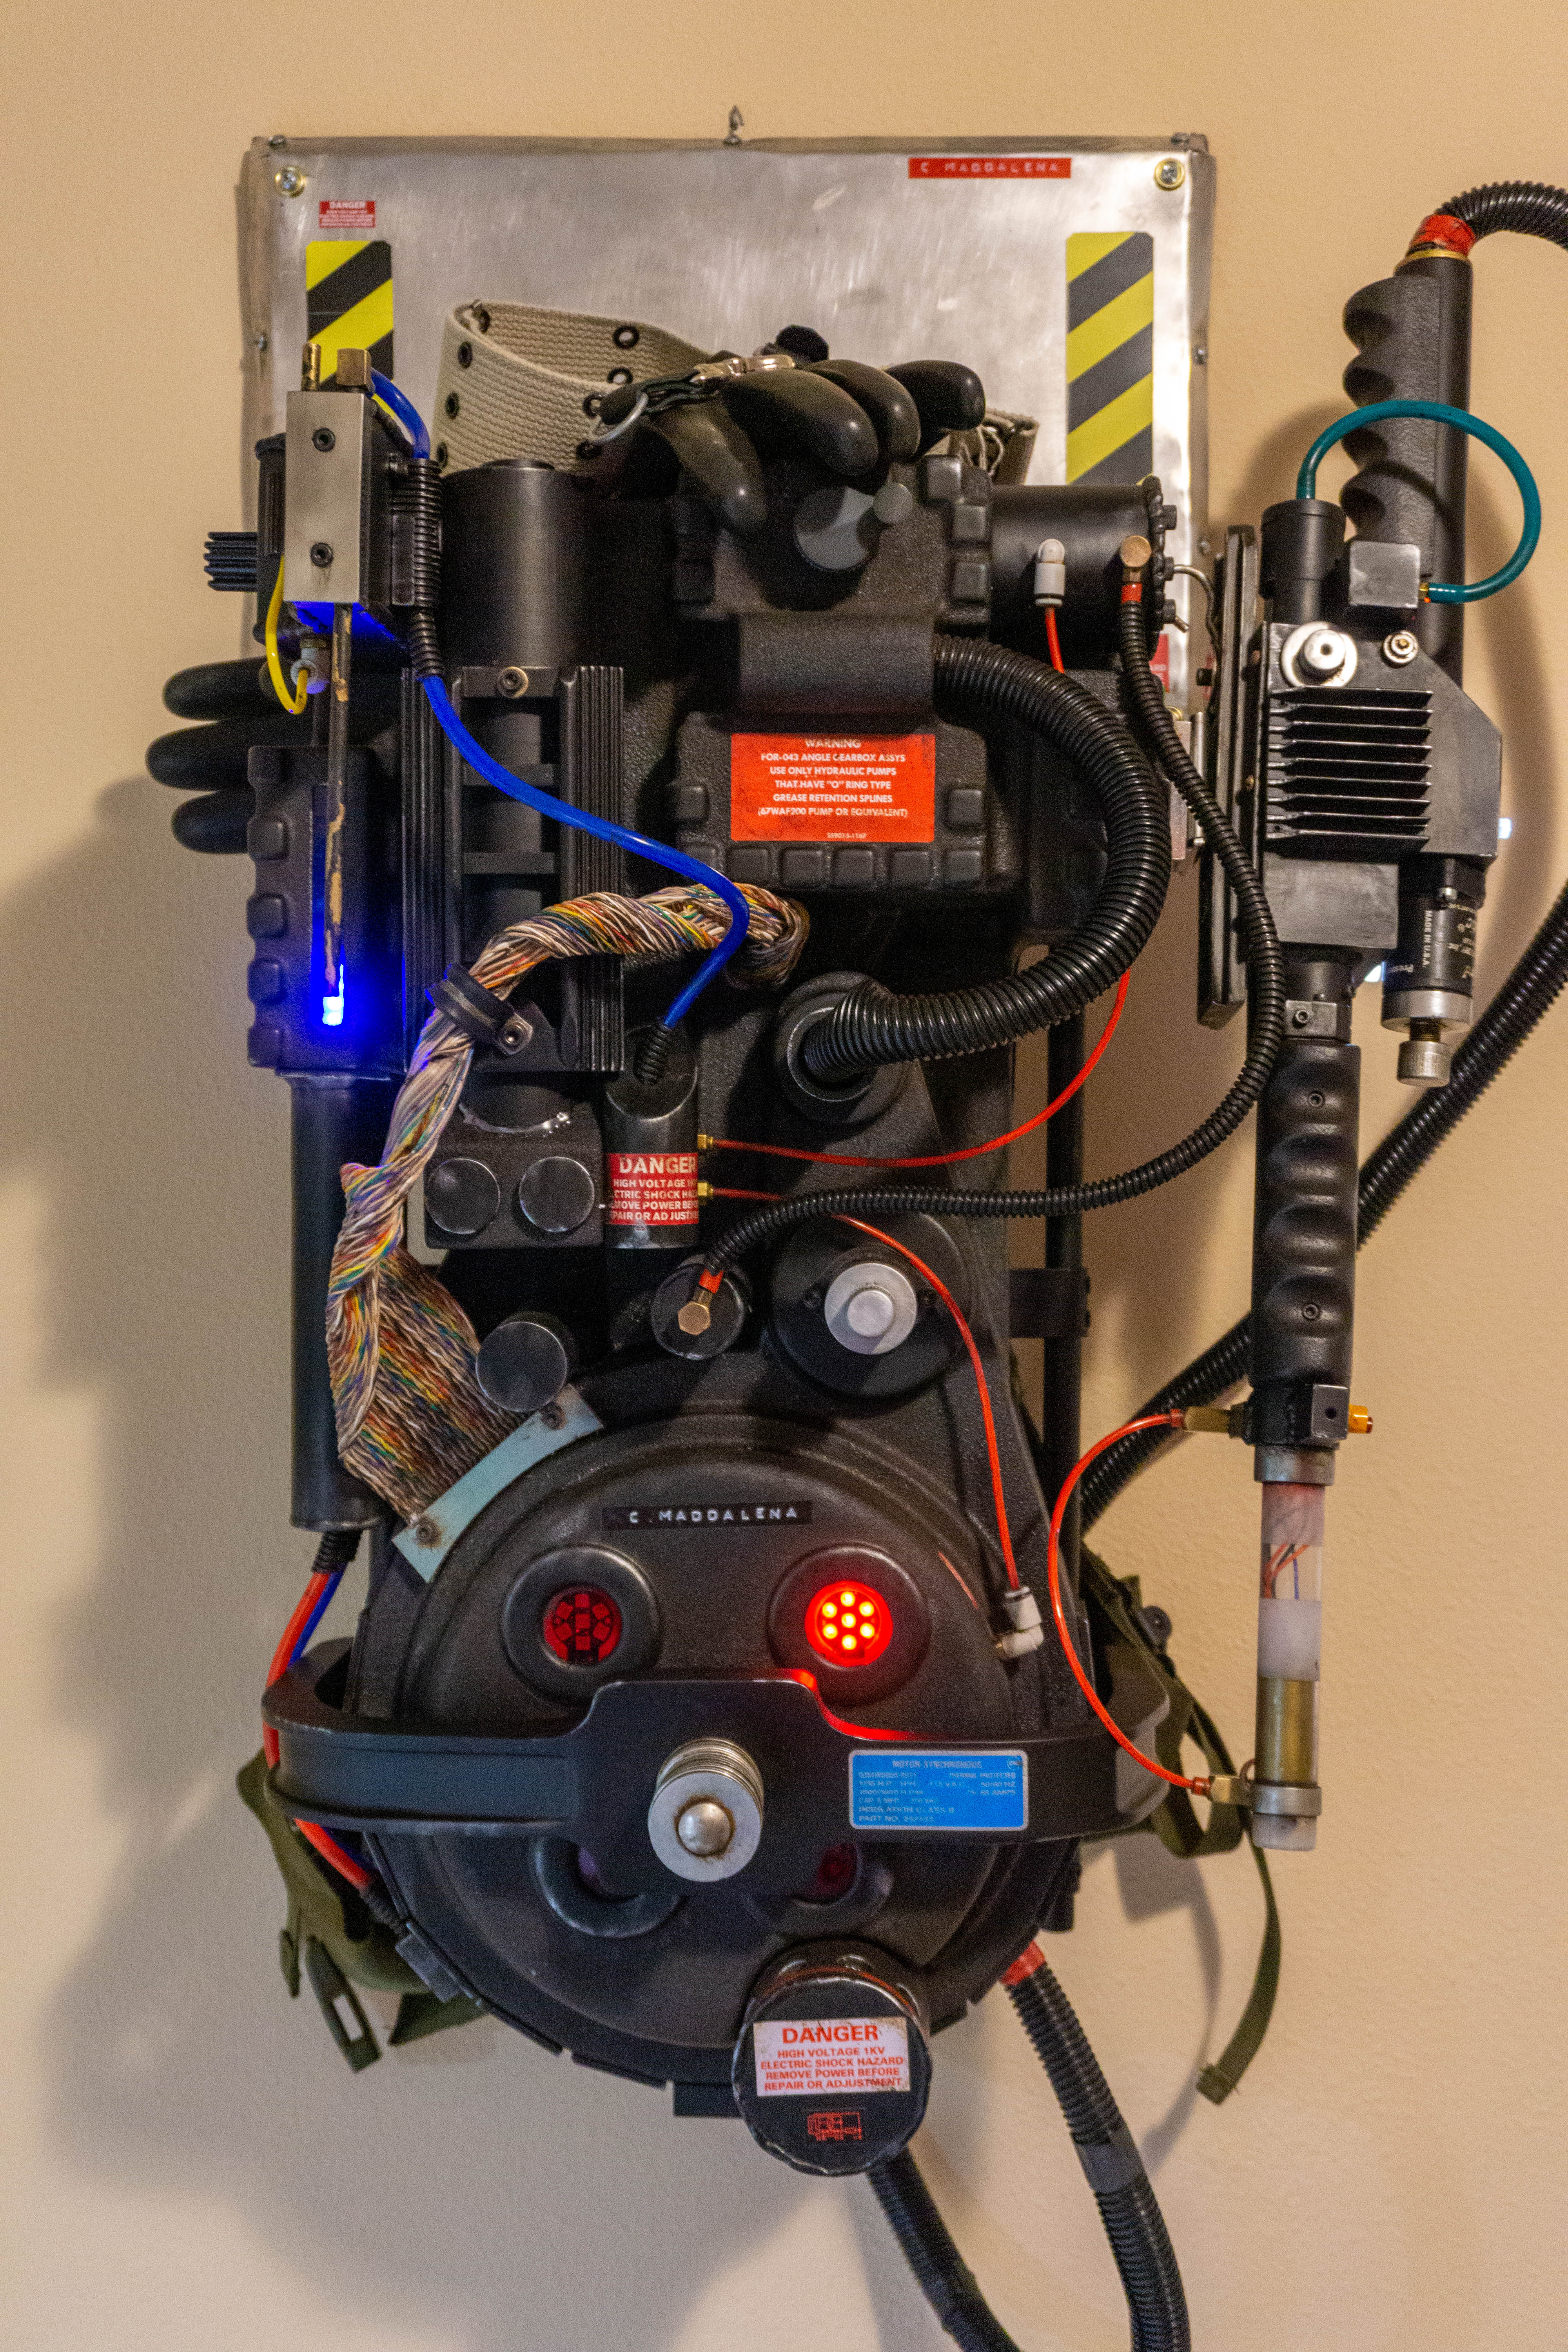
<p>This is a collection of parts I designed to create my proton pack replica. There are several pieces and I will continue adding more as I complete the designs. In the meantime, I suggest using the models created by Thingiverse users agmeadows, tgoacher, and slicerd to complete your pack.</p> <p>PVC Pipe Caps<br/> These caps are intended for use with 1" ID PVC pipe, which can be used for the vacuum tube and the two other tubes in the "cosmetic plating" section of the pack (the middle area between the generator and cyclotron and the top). Each cap is 0.125" thick, so you will subtract 0.25" from your measurements when cutting your pipe. There is a whole cap for capping one tube, bottom caps that hold 3/8" or M6 hex bolts for attaching the tubes to your pack, and a cap with a .375" hole intended for accepting a Clippard hex fitting for one of the tubes (there is also an insert for the head of a .375" hex bolt in case you would rather use those instead of M6 bolts). Glue these caps into place.</p> <p>Vacuum Tube Cap<br/> Like above, this cap fits into a 1" ID PVC pipe. This part is optional (I didn't end up using it), but might help you if you have 3/4" wire loom or some other corrugated/ribbed tubing that you want inserted into your vacuum tube a bit more securely. The cap has a .80" hole to close the gap between the 3/4" tubing and the edges of the 1" PVC pipe. This can help hold the vacuum tube more securely without glue. Do not glue this cap into place to allow for removing the tubing.</p> <p>Plating<br/> The plating is quick to print and you need 14 plates in total. You will need one of the plates with the hole for your 3/4" tubing used with the wand, one of the "fat plates" for the bottom of the pack, two of the short plates for the top of each side, and ten of the regular plates.</p> <p>You will also need one "TubeBlock" as I called it. This will be glued to one of your standard plates and has 1/4" holes for the 1/4" OD tubing that goes from this block/plate into the "Injector Tubes" connected to the "Power Cell."</p> <p>N-Filter<br/> My filter is designed to fit into the hole on the Studio Creations proton pack shell. However, that space should be the same on other shells and packs. There are two models. You can choose whichever you prefer. I suggest the one labeled "N-FilterAlt" to avoid having to glue anything. For those who might care, know that this model has nine holes evenly spaced at 40 degrees. The screen-used filters have uneven holes, but I made the choice to correct this mistake, as I think Egon Spengler would have ;)</p> <p>If you go with N-FilterAlt, print an N-FilterAltInsert to go into the bottom. Likewise, if you go with the other version, print a cap to be glued into place.</p> <p>ALICE Frame Bracket<br/> I just threw this design together for wall mounting. They are sized for the ALICE frames to which the proton pack attaches. There are two holes for screws to help keep them from spinning.</p> <p>I recommend printing these upside down, which is counterintuitive. If you print them so the back/flat edge is on your print bed, you will have vertical layers when the brackets are on your wall. That means the weight of the pack is pulling with the "grain" and you are much more likely to get layer separation and have a bracket fail. Print them so the top of the bracket is against the bed. You will get a slightly uglier curve and need some support material, but it's minimal. You'll never see the brackets, let alone the rougher curve under the ALICE frame.</p> <p>Be careful with these. My pack only weighs a max of 25 pounds and is quite secure on my wall. If you use a lot of wood or metal you're definitely going to want get some good anchors.</p> <p>Wand Bargraph Insert<br/> This insert is specifically designed to be as accurate to the real deal as possible. There are less bars, but the real deal - an aircraft bargraph (<a href="https://www.gbfans.com/forum/viewtopic.php?t=33580">https://www.gbfans.com/forum/viewtopic.php?t=33580</a>) - has too many tiny bars for an FDM printer to print without the lines either not printing or being a single line. Of course, no one will notice and it still looks great.</p> <p>It slides into a properly sized bargraph slot (e.g. 35.5mm x 6.5mm, like in ThrowingChicken's wand body). It fits snugly so no glue is required. If you place one of Adafruit's bargraphs behind it the slot spacing and bargraph LED spacing line up well so that each slot in the print will have light and animate. I recommend lining up a powered bargraph to make sure you have everything lined up and then hot gluing it in place.</p> <p>Neopixel Stick Powercell<br/> This is intended for the pack's powercell. I used two Neopixel Sticks. The stems line up with the holes on the sticks. The second and third stems are slightly further apart with a depression in the center. This is to allow for the variance in distance once you have soldered the two sticks together, and give the solder room below the sticks. Then there is room for an acrylic plate to sit above the stick.</p> <p>I recommend using this as a handy holder for the Neopixel Sticks when soldering them together. They'll fit perfectly afterwards and be held in place during soldering.</p> <p>Cyclotron Lens Holders<br/> I designed these to hold one 7-LED Neopixel Jewel and one red acrylic lens. They will hold the Jewel in place against the lens and should fit perfectly inside of a pack behind the cyclotron rings. These hold everything in place, in the same orientation, and still allow for wire management.</p> <p>Barrel Insert<br/> This insert fits inside the wand's acrylic tube. If you're after some extra authenticity, this insert holds an LED and an AG-1B flash bulb. There is also a channel down one side for running wiring from the tip down the tube (not the LED's wiring). The screen-used hero props had wiring up the tube and into these brass-colored inserts for blowing the flash bulbs (that big flash at the start of the firing sequence). There are also black and red wires running down the tube, out a hole by the wands tip, and into the bras banjo.</p>
With this file you will be able to print Ghostbusters Proton Pack Parts with your 3D printer. Click on the button and save the file on your computer to work, edit or customize your design. You can also find more 3D designs for printers on Ghostbusters Proton Pack Parts.