Ghostbusters Trap (1984) - Handle Modification
thingiverse
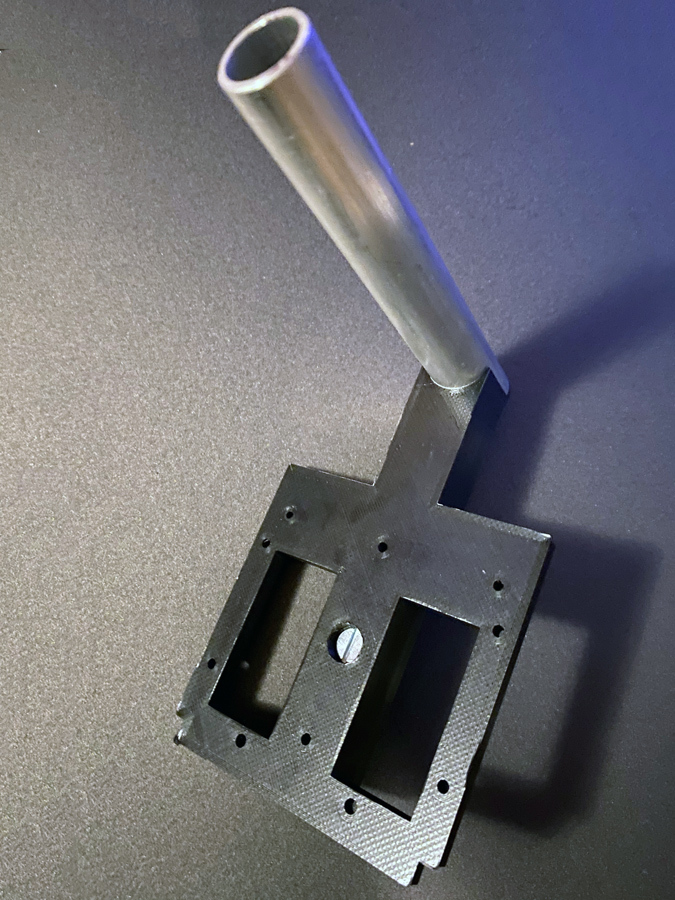
I remember back to when I was a kid and feeling the heartbreak as my LEGO Ghostbusters trap came apart at the handle and smashed into a hundred foot murdering pieces. As I was building my trap from CountSpatula I was concerned that the single small screw would not hold the weight of the trap or take a beating while being worn or tossed. After then stripping the plastic while trying to thread the screw, I decided to design what I felt would be a more stable solution. I am using the aluminum handle from the CountSpatula deluxe kit. Check him out on Etsy for the kit. ... Materials: 1/4-20 x4" Stove Bolt - Round Socket Head 1/4-20 x 1/2 Barrel/Dowel Nut ... 1. Print the modified handle frame model and the handle inserts. The inserts and hole for the bolt are designed to be fairly tight fitting as I wanted to eliminate as much movement as possible. You may need to do a bit of sanding/drilling if things are too tight. 2. In order to get the bolt and the insert to fit into the aluminum tube, you will need to first expand the smaller hole to 1/4”. Then, cut out a channel of equal width. I used a rotary tool for this, but it could also be done with a mini saw... or I suppose a hobby knife, but you better have a few movies and about 100 spare blades. 3. Slide the bolt into the insert and push it all the way in. Now, align the bolt shaft and the notch and push it all the way in until it lines up with the hole. 4. Take the barrel/dowel nut and insert it into the largest hole on the 3D printed handle frame. Make sure the grove is facing you. Take a screwdriver and turn the nut until it lines up with the handle. This will line up the hole for the bolt. 5. Insert the bolt into the hole in the 3D printed handle frame and push it all the way down until you feel it touch the nut. Then, from the top, insert a screwdriver into the hole and start turning the bolt until it grabs the nut. You may need to use a screwdriver to keep the nut aligned. Continue tightening the bolt until the handle is held snuggly in the handle frame. Do not over tighten. 6. Line up the cap so the hole is on the top and insert it into the handle. It is keyed, so it can only go in one way. Slide it in and the hole for the socket screw should line up. (Keep in mind that the holes on your aluminum handle might be in a slightly different place.) 7. The socket screw that ships with the hardware kit will no longer fit as it is too long. You have the option of finding a shorter version, or cutting the existing screw shorter. ... I hope this works for you and gives you confidence your trap handle can withstand busting ghosts! Thanks to CountSpatula for the trap design. This is a remix, so head over to his Thingiverse page and Etsy shop for more info. This is a remix from https://www.thingiverse.com/thing:398515
With this file you will be able to print Ghostbusters Trap (1984) - Handle Modification with your 3D printer. Click on the button and save the file on your computer to work, edit or customize your design. You can also find more 3D designs for printers on Ghostbusters Trap (1984) - Handle Modification.