Gigaminx by nvmsocool
thingiverse
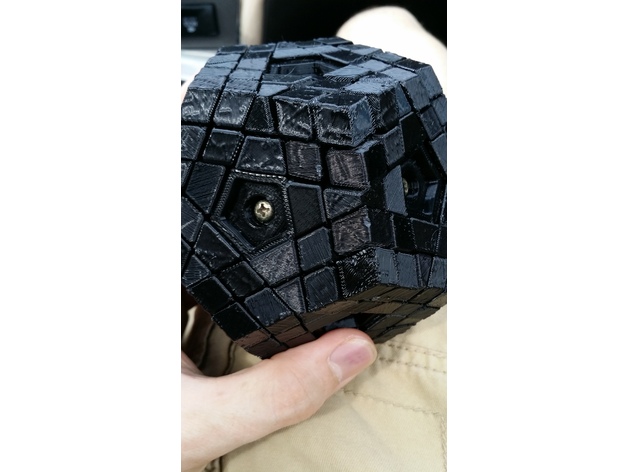
It's a Gigaminx design I created! PLEASE READ: Coincidentally there are 8 pieces in this design multiplied by two!! I highly recommend printing off small subsections of the Gigaminx to ensure your print settings are dialed in correctly and the pieces slide together well! Post-Printing Parts: Print off the following parts - it's a lot!! 12 x cap 12 x center 2 x core 20 x corner 30 x hand 60 x hand edge 60 x arm 60 x arm edge The models include supports, and the orientation of the models is fixed for structural integrity! Additionally, you will need: Strong glue 12 small screws that fit into the core (if you want to modify the core, but if you use screws that are too big it will crack the core) 12 small springs that fit under the screws Assembly: Glue the half cores together with something very strong! Make sure the cores are well printed and smooth. Make sure all supports are removed from the pieces, and that they are smooth/without imperfection. Use the screws and springs to pin the center pieces to the 12 holes on the core by placing the center on the core, dropping a spring into the chamber, and then threading the screw through the spring and center piece and into the core. You will know you have done this correctly when the centers can spin freely and you can pull them out a bit and get resistance from the spring. Start assembling all pieces around the screwed-on centers. When you get to the last pieces, you might have to remove one center piece, assemble around it, and then screw it back onto the core. After all pieces are assembled onto the core, place the caps over the holes in the center pieces.
With this file you will be able to print Gigaminx by nvmsocool with your 3D printer. Click on the button and save the file on your computer to work, edit or customize your design. You can also find more 3D designs for printers on Gigaminx by nvmsocool.