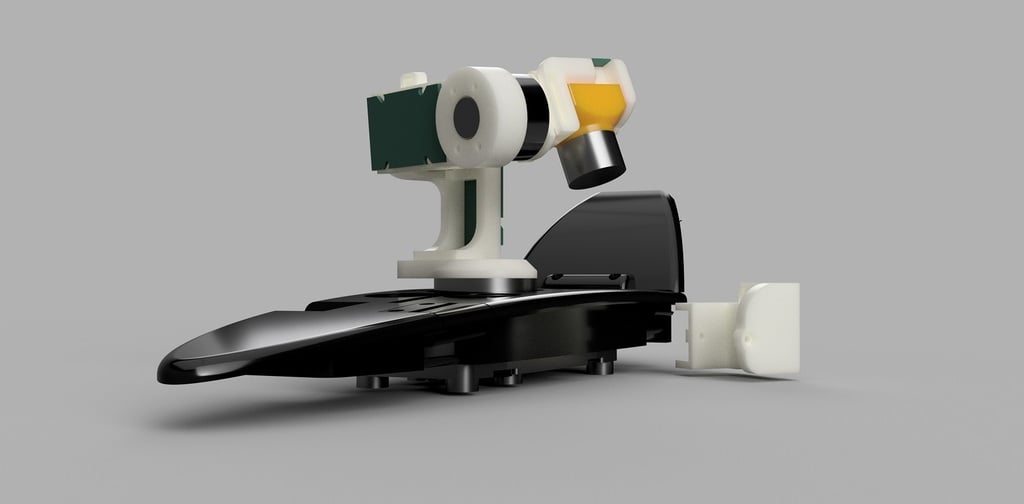
Gimbal for Ranger2000 with Storm32 NT and Runcam Split
thingiverse
<p>First build that I did to try out the possibilities with Storm32 to test it's funcionality on an RC airplane. This Gimbal is fully functional, though I would like to call it in an 'Experimental' State. Fair warning ahead, this is a pretty tough build, and I do not guarentee it to work without flaws. The gimbal is very sensitive for interference from being out of balance, or the flexibility of the wires used, and may show vibrations when less than perfect. However, if you feel daring, I encourage you to build. Please keep in touch with me if you do!</p> <p><u>If you found this useful, please consider to buy the needed parts through my affiliate link (or make any purchase at the website below after visiting these links)</u>:</p> <p>The electronics can be hard to obtain. There is some people that sell, such as Gapey and Ensys (see wiki page), but I would be willing to sell you my own surplus too. You would be supporting me to build an even better gimbal if you did the latter. You are able to reach me:<br /> E-mail: herre.vermeer@gmail.com or<br /> Facebook: https://www.facebook.com/herre.vermeer/</p> <p>Please read all of my instructions below.</p> <p>First of all, for this project you need to be familiar with Storm32:<br /> <b><a href="https://github.com/olliw42/storm32bgc">Github</a></b> - Over here you can find the schematics and board files as designed by OllieW as well as the GUI with which you can install and modify the software on these little boards. For this build I made use of the v332m main board, with V25E square motor drivers and V2.11 IMU <br /> <b><a href="http://www.olliw.eu/storm32bgc-wiki/Main_Page">Wiki Page</a></b> - Detailed instructions and manuals written by OllieW on how to use Storm32 and its basics and Essentials.<br /> <b><a href="https://www.rcgroups.com/forums/showthread.php?2055844-STorM32-BGC-32-bit-3-axis-brushless-gimbal-controller">RC Groups Discussion Page</a></b> - Mention if you are a storm32 user is appreciated. Feel free to say hello over here. Talks about development with storm32 NT also happens over here.</p> <p><b><u>Build Materials</b></p> <p> <p><b>PET-G or PLA</b> - Choose whatever you like. I used PLA for the gimbal because it is more stiff and PET-G for the canopy parts because I find it easier to print. For all Gimbal parts I used a 0.4mm nozzle with 2 layer width, 25% infill and 0.1mm layers, 8 Top and Bottom Solid layers. For the main canopy part I used only 3 Solid layers on bottom and 5 on top. For the vertical part I used only 1 layer width and only 15% infill.<br /> <b><a href="https://nl.aliexpress.com/item/4000761313682.html?spm=a2g0s.9042311.0.0.27424c4d9rBrCJ">Roll and Pitch Motors </a></b> 2204 450KV motor. I used 2 of these. <br /> <b><a href="https://nl.aliexpress.com/item/33030297601.html?spm=a2g0s.9042311.0.0.27424c4djLtPAl">Yaw Motor</a></b> Get one of the 2206 260KV type. MiToot<br /> <b><a href="https://www.banggood.com/custlink/KDGytmKA8h">Runcam Split v3 mini</a></b>The most important piece! Note: you MUST get a split type of camera with an M12 lens, because otherwise it can't achieve a perfect balance. Replacing the stock lens is also mandatory<br /> <b><a href="https://nl.aliexpress.com/item/32866191547.html?spm=a2g0o.productlist.0.0.9b0270d7YV9dWD&algo_pvid=83be4682-a6c0-432b-9f53-1b844092c9ac&algo_expid=83be4682-a6c0-432b-9f53-1b844092c9ac-0&btsid=0b0a0ae216015752710492540ea921&ws_ab_test=searchweb0_0,searchweb201602_,searchweb201603_"> TREEYE 10MP Distortion Free Lens Replacement</a></b>Mandatory Upgarde! This lens is needed to achieve good enough balance. Image Quality wise it is also a big upgrade<br /> <b><a href="https://nl.aliexpress.com/item/4000774099080.html?spm=a2g0s.9042311.0.0.27424c4dqO8j6r">Arris Rubber Damper Balls</a></b> You need to get the big ones. 4 needed.<br /> <b><a href="https://www.banggood.com/custlink/3DvvUMUZAS">Hex M2 Self Tapping Screws</a></b> - Make sure to get a whole variety of these screws. They are neat to use with 3D printed parts and I use them on all my designs. They are really useful<br /> <b><a href="https://www.banggood.com/custlink/mDDhVGvbon">Hex M2.6 Self Tapping Screws</a></b> - Same goes for this type. Several short lengths needed<br /> <b><a href="https://www.banggood.com/custlink/vGvRP3mAlq">Mex M3 Self Tapping Screws</a></b> - Only 6mm length needed for this one.<br /> <b><a href="https://nl.aliexpress.com/item/32810872544.html?spm=a2g0s.9042311.0.0.27424c4dXjdsOU">M1.6 screws</a></b> - 6mm and 8mm lenths needed for these<br /> <b>30AWG Silicon Flexible Wire</b> - I can't recommend any, as I haven't been able to find any wire that is good enough yet. Suggestion is more than welcome</p> <p><b>Flight Footage</b><br /> <a href="https://youtu.be/Uox1gcnZ17g">First Succes Scenic Sunset</a><br /> <a href="https://youtu.be/astM5z4Jaz4">Slight setback with new lens, new PIDS and slight vibrations</a><br /> <a href="https://youtu.be/OXJvpX_UTYo">Flight with some light Post Stabilisation</a></p> <p><b>PID Settings</b><br /> Pitch P: 7.0<br /> Pitch I: 1200<br /> Pitch D: 0.0750<br /> Pitch Vmax: 60<br /> Roll P: 8.5<br /> Roll I: 1260<br /> Roll D: 0.2500<br /> Roll Vmax: 60<br /> Yaw P: 9.5<br /> Yaw I: 270<br /> Yaw D: 0.1100<br /> Yaw Vmax: 72</p> <p><u>Last Notes:</u><br /> - You need Windows to run setup on this build<br /> - Not setting Vmax on the motor First thing will result in the Gimbal melting</p>
With this file you will be able to print Gimbal for Ranger2000 with Storm32 NT and Runcam Split with your 3D printer. Click on the button and save the file on your computer to work, edit or customize your design. You can also find more 3D designs for printers on Gimbal for Ranger2000 with Storm32 NT and Runcam Split.