Glass Bed Automatic Cooling System
thingiverse
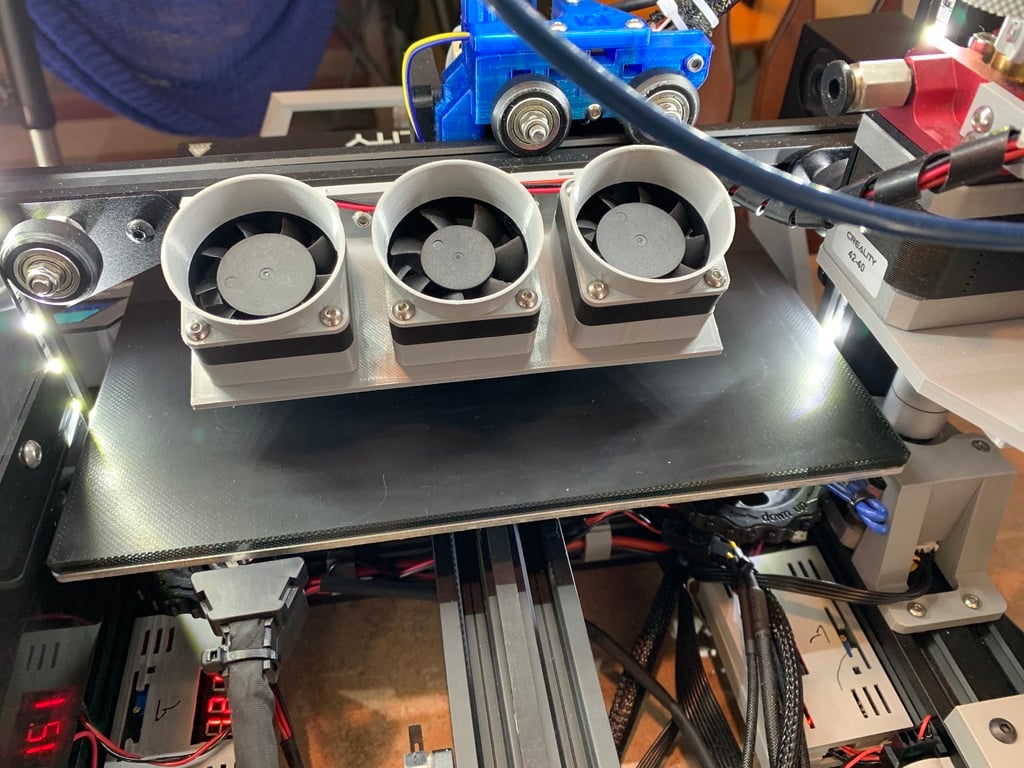
I added a Creality glass bed to my Ender 3 Pro and I love it. The only "problem" is that it takes too long (yes, I'm impatient) to cool down before it will release the print. I just don't like waiting. So I came up with a bed cooling system that will speed up the process. There may be better ways to do this but here's my design criteria: 1) I wanted to use parts I had laying around. 2) I didn't want it to take up any unnecessary space or be in my way. 3) I wanted to see how much I could get out of those little cheap 4010 fans. The way it works is that when the print is finished, the bed slides forward, trips a limit switch and turns on a set of 3 fans to cool the bed faster. Why 3? Because I had them and more is better! So, you may ask, does this really work? First, the fan stack: - Part 1 is the 40mmFanFunnel that I borrowed from clough42. You can find his original design here: https://www.thingiverse.com/thing:343026 I did a lot of testing and putting this inlet on the front of a cheap 4010 fan does quiet it down and improves its efficiency - Part 2 is the fan. I used a cheap pack from Amazon but you can find them less expensive on AliExpress. Here are the ones I used: https://www.amazon.com/gp/product/B07Q5R9HF4/ref=ppx_yo_dt_b_search_asin_title?ie=UTF8&psc=1 - Part 3 is the turbine duct. I designed this myself but all the ideas came from a great video by Alex Kenis. I recommend you watching it. https://www.youtube.com/watch?v=SX-okOHvh1Q. Adding this outlet duct actually doubles the output of these little fans. So does it work? Here was my test. With an ambient temp of 22 deg C, I heated the bed to 60 deg C and let it stabilize. Then I let it cool down to ambient 3 times and averaged the times - 38 minutes. I did the same test with the 3 fans running - average 18 minutes. Because the fans are mounted on the x axis, the amount of cooling time changes with the part height. 60mm and below takes about 21 minutes to cool and 60mm and above takes about 16 minutes to cool. The bottom line is that this system cuts my cooling time to better than half! Installation: - Assemble the 3 fan stacks and mount them on the bracket. You can use 12 M3x25 bolts and M3 nuts to hold the stacks in place. Even better is to use a hand drill and drill out the holes for brass threaded inserts (see my picture). It's a cleaner install and uses 12 M3x25 bolts and no nuts. - Mount this assembly to the back of the x axis rail. I used 2 M2x8 bolts with T nuts. It won't hit the printed part because I set the angle to keep it above the level of the nozzle. - There are slots in the bracket for wire ties to keep the wiring neat. - Find a Creality limit switch. You can get them on Amazon and AliExpress. I had one laying around. You can use the limit switch screws that come with it to screw the switch to the bracket I made. Then use 2 M3x10 bolts and t-nuts to secure the bracket below the Y axis near the front of the printer. Adjust the height and distance from the aluminum rail so that the Y carriage rollers trip the switch when the Y carriage moves forward. - Wire everything up. I've provided a handy and simple wiring diagram. Note that the limit switches have a normally open and normally closed contacts. You need the normally open one. If you get it backward, you'll know because the fans will run at the wrong time. On the wiring diagram, you can see that the NC switch is the left two pins. There you have it.....happy bed cooling!
With this file you will be able to print Glass Bed Automatic Cooling System with your 3D printer. Click on the button and save the file on your computer to work, edit or customize your design. You can also find more 3D designs for printers on Glass Bed Automatic Cooling System.