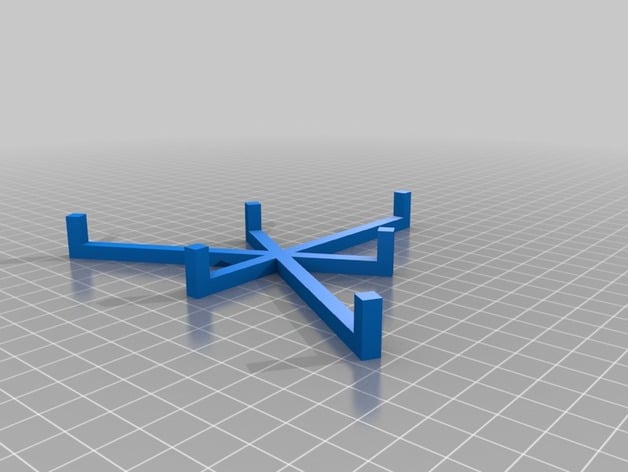
Glass cooling stand
thingiverse
I use a sheet of glass on top of the heated print bed on my Solidoodle 2 printer. This makes it much faster to switch between parts. The glass plate also makes it tons easier to remove parts after printing. If you haven't experienced the wonderful workflow of glass print beds, you are really missing out (see basics below)! I designed this thing to be a cooling rack for the glass plates after they come off the bed. I have 3 plates that I rotate through as I'm printing different items. I happened to have a small heated box (used for hot towels) hanging around so I use that to store and pre-heat my glass plates. Using this method, my turn time between parts is less than 5 minutes. Quite an improvement from using just the heated bed where turn times were 45 minutes or more between parts. To use, simply print the cooling stand and then put the glass plate on top after taking it off the heated bed. Having the glass plate up off the table / desk / whatever surface allows it to cool much faster. How to print on glass Here are the basics of using glass for your print bed. Google for something like 3d printer heated bed glass hairspray to learn more. Go to your nearby hardware store (I went to Lowes) and ask them to cut you several 150mm x 150mm pieces of standard 1/8" plate glass. Most places will do this for free or for a very small fee (less than $1 per cut). I found a piece of 12" square glass and had them cut it into four 6" (150mm) squares. Find the least expensive "maximum hold" hairspray you can at the dollar store, Wal*Mart, Walgreens, grocery store, etc. You want the cheap stuff like Aqua Net, etc. I personally use Suave Extreme Hold and it works great. One can will probably last many times longer than your printer. Spray a light coating of hairspray on ONE side of each glass plate and allow the hairspray to dry (takes about 60 seconds). You will need to reapply this occasionally as you use the plates for printing. I probably reapply hairspray every 5-10 prints on each plate (so not very often). When heated, the hairspray creates a tacky surface that holds ABS to the plate very well (much better than I ever got a print to stick to the kapton tape). Place a glass plate, hairspray side up, on your heated bed and hold it in place with a couple of office supply binder clips (I put them on opposite corners). IMPORTANT: Make sure you reset your Z axis stop to account for the added thickness of the glass or you will ram your hot end into the plate and break the glass, your hot end, your printer or all of the above. Print as you normally would (again, make sure you reset your Z axis stop to account for the thickness of the glass). Once the print is finished, remove the binder clips and slide the glass off the print bed (watch out, the glass will be HOT! I learned in my high school chemistry class that cold glass and hot glass look identical! Caveat maker!). Place the hot glass on top of your shiny new glass cooling stand and wait. You will hear one or more 'tink' sounds (it sounds like the glass is shattering but it is not) as the printed part and glass plate cool. Once the glass and part have cooled you will be surprised to find that the part just lifts off the glass with no scraping, prying, crying or cursing required! You can immediately put a new piece of glass on the bed and start your next print within a few minutes (the time it takes to heat the glass). I have the gcode in my printer set to NOT turn the bed heater off at the end of each print since I don't need my bed to cool down. With my pre-heated glass from my little heat box, I can go from one print to the next in under 5 minutes. Printing on glass is so much more awesome than printing on kapton tape. If you try this once, I guarantee you will never go back. Instructions The attached STL is sized for the 6" print bed of the Solidoodle 2. If your print bed is larger or smaller, simply change the armLen variable at the top of the scad file. Note that the thing is moved slightly off center so that the arm does not extend all the way to the edge of the glass when printing.
With this file you will be able to print Glass cooling stand with your 3D printer. Click on the button and save the file on your computer to work, edit or customize your design. You can also find more 3D designs for printers on Glass cooling stand.
