Glide+
thingiverse
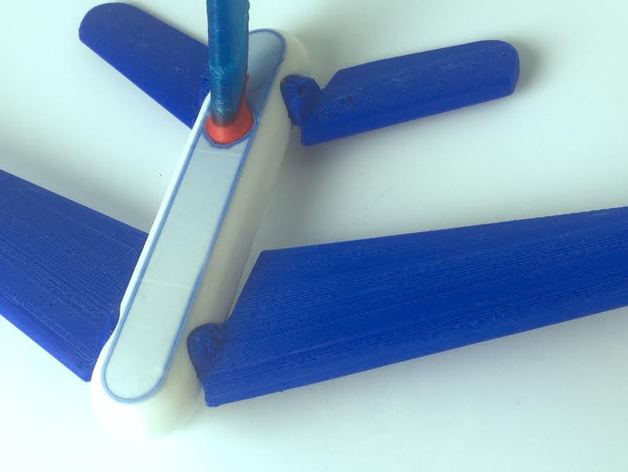
This project empowers you to build your own airplane using a set of 3D printed parts. Multiple types of wings are included that can be attached to the hull to discover the configuration that flies best according to your preferences. A launcher was designed for lift-off under different angles and launch speeds. This is a starter model that now includes a small wing, large wing, reverse angle wing, high aspect ratio wing, and stabilizer. Additional wing types will be added over time. Print Settings Printer Brand: Ultimaker Printer: Ultimaker Original Rafts: No Supports: No Resolution: 0.1-0.2mm Infill: 5-20% How I Designed This The project was designed using Solidworks. The wings are created by lofting a flat-bottom airfoil profile suited for 3D printing over two guide lines. They are attached to the hull with friction fits and can be set at three different angles of attack (AOA): -15, 0, and 15 degrees. The connections are designed so the wings can also be tilted slightly upwards for a dihedral configuration. The hull is of a simple design to make it as lightweight as possible while easy to launch and safe enough to prevent injuries. Project: Glide+ Project Name: Glide+ Overview & Background: In this project, you will learn the basics of airplane aerodynamics. Using a 3D printer, you will build your own version of an airplane model and perform several flight tests. Objectives: To gain an understanding of basic aerodynamics including wing lift and drag, angle of attack, aspect ratio, airfoil shape, and wing configurations. To gain basic experience with a 3D printer, slicer software, and knowledge about optimal settings for different parts. Teamwork and overall effort: 10% Duration: 6 clock hours total including 3 class periods. A 3D printer will be used for approximately 2 hours per group. Preparation: In case a tutor is not available, students will need to have read about the principles of aerodynamics and airplane configurations as well as the basics of 3D printing. See references (1), (2) and (3). During the flight tests, one smartphone with a good camera and fully charged battery will be required per group. References Wing Configuration. https://en.wikipedia.org/wiki/Wing_configuration How Do I Understand Basic Aerodynamics. http://amaflightschool.org/getstarted/how-do-i-understand-basic-aerodynamics 3D Printing Basics. http://www.instructables.com/id/3D-Printing-Basics/ Rubric & Assessment: At the end of the project, per group one 3D printed glider airplane needs to have been 3D printed, tested in three different configurations and three times per configuration for a total of nine tests, each recorded on video and documented in a report. Each test counts as a try, and the first tries are counted the highest, so the best judged configuration should be launched first. A proposed grading structure is as follows: Quality of research and documentation: 20% Design choices: 20% Quality of the 3D print: 10% Overall airplane performance: 30% Teamwork and overall effort: 10%
With this file you will be able to print Glide+ with your 3D printer. Click on the button and save the file on your computer to work, edit or customize your design. You can also find more 3D designs for printers on Glide+.