Glock CQR carbine kit
thingiverse
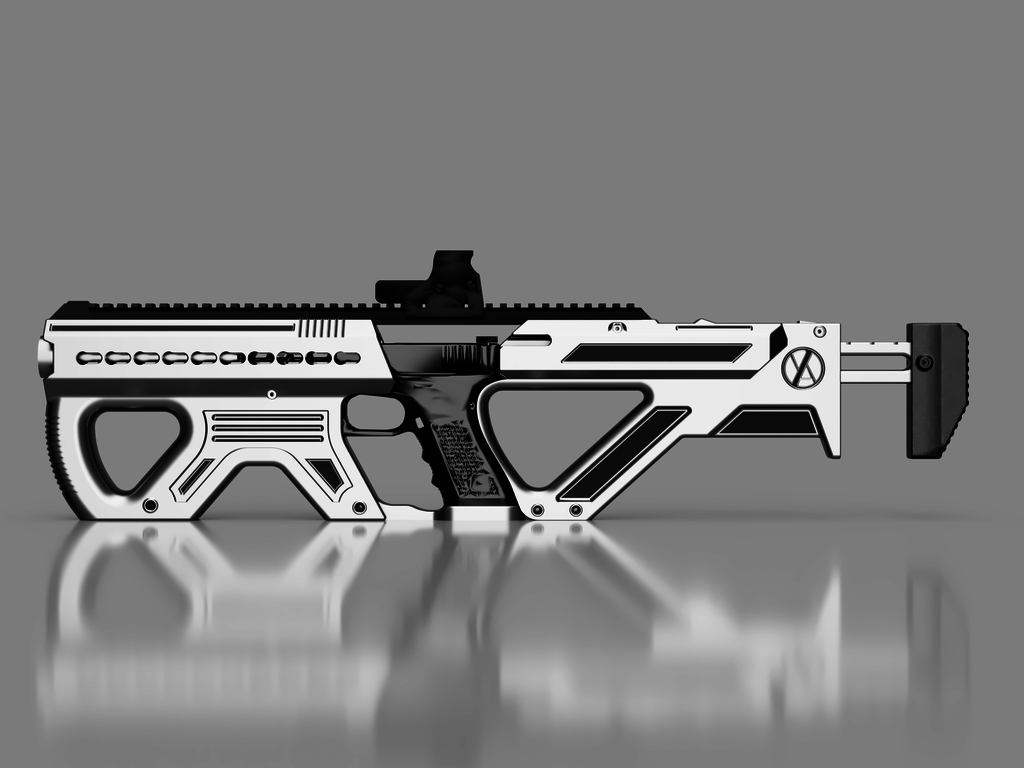
UPDATE!: Decided to share the STEP file with the community. Feel free to edit it and share back with me. For Glock lovers. Another different carbine kit. -Adjustable rear stuck -Keymod side mounting (possibility to add Mlock design if you want) Install the charging handle mount where the rear glock sight is. (you first need to remove the rear sight. use the same little screw.) You will need: -------- Top rail: Front part: • 2 x 15mm M3 hex Socket Cap Head screw + 2 x M3 Nuts Rear parts: • 3 x 15mm M3 hex Socket Cap Head screw with 3 x M3 Nuts Mounting block to rail: • 2 x 20mm M3 hex Socket Cap Head screw with 2 x M3 Nuts Mounting block to rear end body • 1 x 35mm with 1 x M3 Nuts -------- Front End body: • 3 x 30mm M3 hex Socket Cap Head screw with 3 x M3 Nuts -------- Rear End body: Lower mount with read end body: • 2 x 25mm hex Socket Cap Head screw with 2 x M3 Nuts Top stock latch mount: • 1 x 20mm hex Socket Cap Head screw with 1 x M3 Nuts • 1 x Pen spring cut in half --------- Rear Stock: • 1 x 25mm hex Socket Cap Head screw with 1 x M3 Nuts --------- Charging handle mount: • 1 x 40 M3 hex Socket Cap Head screw -------- Total: -5 x 15mm M3 hex Socket Cap Head screw -3 x 20mm M3 hex Socket Cap Head screw -3 x 25mm M3 hex Socket Cap Head screw -3 x 30mm M3 hex Socket Cap Head screw -1 x 35mm M3 hex Socket Cap Head screw -1 x 40mm M3 hex Socket Cap Head screw -15 x M3 Nuts -1 pen spring cut in half (for the latch)
With this file you will be able to print Glock CQR carbine kit with your 3D printer. Click on the button and save the file on your computer to work, edit or customize your design. You can also find more 3D designs for printers on Glock CQR carbine kit.