GoPro Hero 2 Camera Naked Mounting Clip
thingiverse
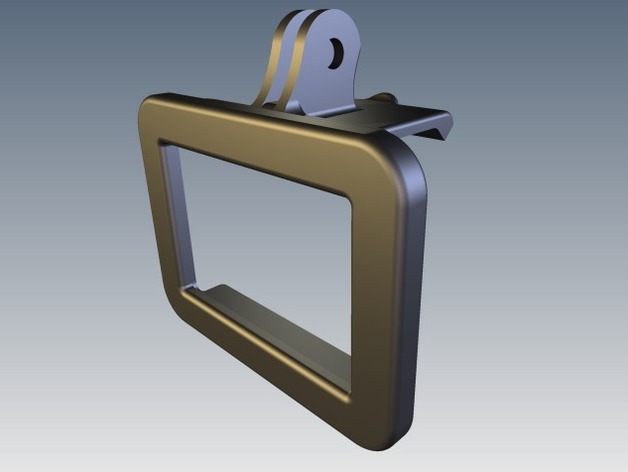
This is a mount that you can click your naked (just the camera without the clear polycarbonate waterproof case) GoPro Hero 2 camera into, and mount it on any standard GoPro mount mechanism. I created this because my family and I are going on a 2 month cross-USA road trip, and I want to shoot a time-lapse video (1 frame every minute) from inside the car through the windshield looking out at where we are going (the final video will be about 42 minutes long!) But I encountered several problems with the GoPro camera the way it is supplied from the factory: 1.) The GoPro's clear waterproof case with the mounting mechanism blocks the USB cable, but I need to run power to the camera through the USB cable during the entire trip (the battery only lasts about 4 hours of time-lapse shooting at 1 frame per minute). Plus, I don't need to waterproof the camera inside the car. 2.) I don't want to leave the GoPro camera in the car overnight or while we are seeing attractions, so I want to be able to very easily take it out but not lose registration on the aiming of the camera from day to day. 3.) Mounting the GoPro camera to the inside of the windshield with the supplied mounts requires the camera to be mounted upside down and the software set to flip the image upside down, and the mounting pieces that are required makes quite a large mounting mechanism that blocks a lot of the windshield. It was just really not possible to mount the camera where I wanted it with the standard mounting mechanism. In my application, I just want a simple mount that points the camera right out the windshield as close to the top center of the windshield (in front of the rear view mirror) as possible. This mount connects to the short GoPro static mount which snaps in to a baseplate that is stuck to the inside of the windshield with the included VHB tape. The naked GoPro camera can then snap in and out of the mount quickly and easily without losing position or registration from day to day. It really is amazing how snugly the GoPro camera snaps into this MakerBot-printed mount. I think if I wanted to spend the time to re-print it before our trip, I would take a few thousandths off the length of the arm that clicks onto the back of the camera. I am unable to shake the camera loose from the mount, but it still feels a tiny bit loose. I think GoPro should manufacture an injection-molded version of this mount, but if they don't, maybe I will. Hey, GoPro management...if you want to license this design from me, we can definitely make a deal that will be very cheap for you (you give me a dozen GoPro Hero 2 cameras) I'll give you the Autodesk Inventor live design files and all the rights to manufacture these. Let's talk! This design was created in Autodesk Inventor 2012 at TechShop, and printed on a MakerBot Replicator in black ABS plastic. Instructions Here's how I make this thing: 1.) First, with this and all things you print on your MakerBot or Replicator, brush or spray your HBP (heated build platform) with a thin coating of liquid ABS right on the Kapton or a sheet of glass held in place with binder clips (use liquid ABS if you will print your thing in ABS, and use liquid PLA if you will print in PLA) and allow to dry (this will make the model stick fast to the HBP and completely eliminate warping of your model! Liquid ABS is simply a mixture of ABS scraps and acetone completely dissolved in a glass jar covered with a metal lid. Liquid PLA is a mixture of PLA scraps and acetone. The liquid ABS or PLA should have a consistency of maple syrup, or maybe just a little bit thinner than that.), 2.) Load the STL file into ReplicatorG, 3.) Click the "Model To GCode" button, 4.) Set the GCODE settings to: o Raft/Support: No o Support: None o Infill: 25% o Layer height: 0.20 o Number of shells: 2 o Feedrate: 40 o Travel feedrate: 55 5.) Print your thing (I used black ABS), 6.) After it is done printing, which takes about 1 hour and 45 minutes on my Replicator with these settings, remove the model from the HBP and remove all the rafting and support, 7.) Attach any GoPro mount to the mount point and install a GoPro thumbscrew, 8.) Snap your naked GoPro Hero 2 into the mount lens-first (it will fit either with the top of the camera towards the GoPro mount, or upside down with the top of the camera away from the GoPro mount), 9.) Peel off the backing of the 3M VHB (Very High Bond) tape on the GoPro mount and stick it to the inside of your windshield or whatever surface you wish, 10.) Shoot some cool video in a dry dust-free environment! Disclaimer: Duh! Obviously, this case, just like the GoPro Skeleton case, is NOT waterproof. Use this thing only in an environment where there is no water, dust, or other contaminates that could ruin your GoPro camera. Your GoPro camera is NOT waterproof when it is outside of its clear polycarbonate shell case, and is vulnerable to all sorts of moisture, salt, dust, fog, sand, playa dust, lens scratches and fingerprints, and other contaminants. Enjoy!
With this file you will be able to print GoPro Hero 2 Camera Naked Mounting Clip with your 3D printer. Click on the button and save the file on your computer to work, edit or customize your design. You can also find more 3D designs for printers on GoPro Hero 2 Camera Naked Mounting Clip.