Govee Water Sensor Wire Harness
thingiverse
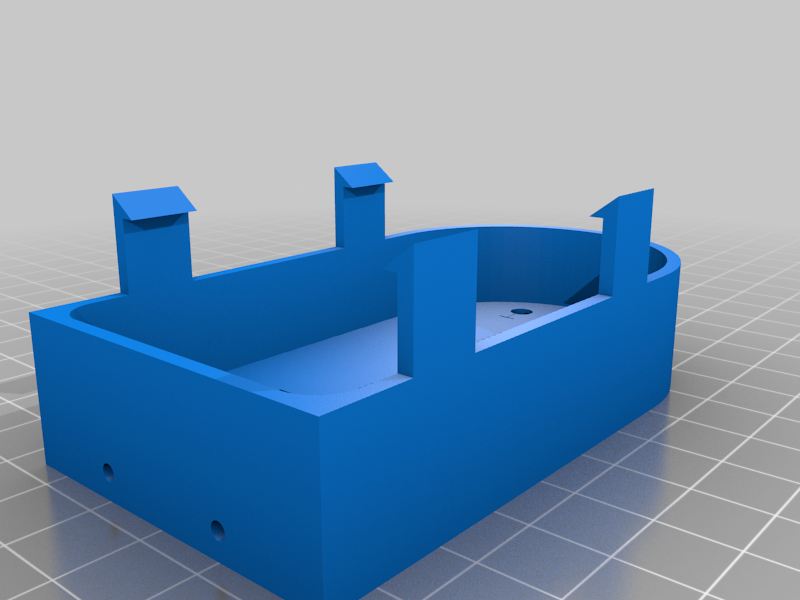
I bought these Govee WiFi water leak sensors. In general, they work great! https://www.amazon.com/dp/B07J9HZ5VN My problem was that a couple of spots where I wanted to put the sensor were in difficult-to-reach places and would be very inconvenient getting to them when batteries need replacing. I wanted to keep the sensor body itself in an easy-to-reach place but run a wire to where the water might be if there were a leak. I tested first to verify that connecting a wire to the electrodes on the sensor and touching the other end of the wire into water still set off the sensor. It did, so the next step was to figure out how to secure the wire to the sensor. Thus, I created this harness where you can feed in wire on each end which will be contacted by the sensor electrodes when he sensor is snapped into the harness. It even has mounting screw holes. The holes for the wire accommodate 22 AWG solid core wire. I used 2-conductor “bell” wire. Note, the sensor has two sets of electrodes, one pair on each end. Either pair of electrodes contacting water will set off the alarm. So for this wire harness you don’t necessarily need to put wire in both ends. But you can use both ends either simply for redundancy in the same spot (if the wire connection comes loose on one of them, you still have the other), or you could also monitor two different but close-by locations with the same sensor (as long as you trust the connections of the electrodes to the wires inside the harness). NOTE: *** If you do want to use both ends, test both sets of wires very well after you get it all together. I’ve had trouble getting both sets of electrodes and wires to actually work. One set will work and the other won’t, so you press down on the sensor on the end that doesn’t work to get it to make contact with the wires, and now that end works but the other end that worked before now doesn’t work. It’s a delicate balance to get the sensor seated in the harness just right to get both ends working, and even if you do, I’m not confident that both ends will stay working. I’m trying to think of how I can tweak the harness design to ensure the electrodes make contact with the wires on both ends. *** You’ll see additional recessed slots on the bottom of the harness. This provides a way to secure the wire so it doesn’t simply pull out of the harness. Feed the stripped wire in through the end, through the spot where the sensor electrode will contact it, then back down the hole on the other side. Then on the underside, bend the wire back into the recess. It won’t completely stop the wire from pulling out with enough force, but it secures it for normal use. And the recess still allows the harness to sit flat with the wire bent under. Getting the wire to feed down through the hole on the other side to the bottom can be a bit tricky. Luckily you only have to do it once for each wire. The layer lines in the 3D print can cause the end of the wire to get hung up as you try to push it in and down the hole. I’ve included pictures for reference. Measure and cut the wire to whatever length needed to reach the water location from where you want to place the sensor. I recommend adding a foot or two of length just in case. Strip off about 1 inch of one end of the wire, then bend just the very tip of the bare wire just a tiny bit. As you push the wire in the hole from the end, it may catch and hang up a bit. Move the wire around a bit, and twist the wire a bit, while pushing lightly. It’ll eventually go all the way in. Once the end of the wire gets to the electrode hole, twist the wire so the bent end feeds down the hole on the other side, again, pushing lightly. Eventually it should feed down that hole and you can push the wire the rest of the way through and you’ll see the end of the bare wire come out the bottom. Feed the wire in so you just see the insulation of the wire appearing in the electrode hole. Then pull the wire back to where the insulation just disappears again and you have only bare wire in the electrode hole. Then on the bottom of the harness, bend the bare wire back into the recess and cut off any excess length so the wire fits inside the recess. Now simply snap the sensor into the harness. On the end of the wire that will be where you want to check for water, strip off just a bit of insulation so you have a short amount of bare wire. Test the alarm by placing that end of the wire in a cup of water. The alarm should go off. Now of course, place that end at the spot where you want to detect water. You might need to tape down the wire to keep it where you want it. And that’s it!
With this file you will be able to print Govee Water Sensor Wire Harness with your 3D printer. Click on the button and save the file on your computer to work, edit or customize your design. You can also find more 3D designs for printers on Govee Water Sensor Wire Harness.