granite tile mounting plug - 5 mm hole, M3 thread
thingiverse
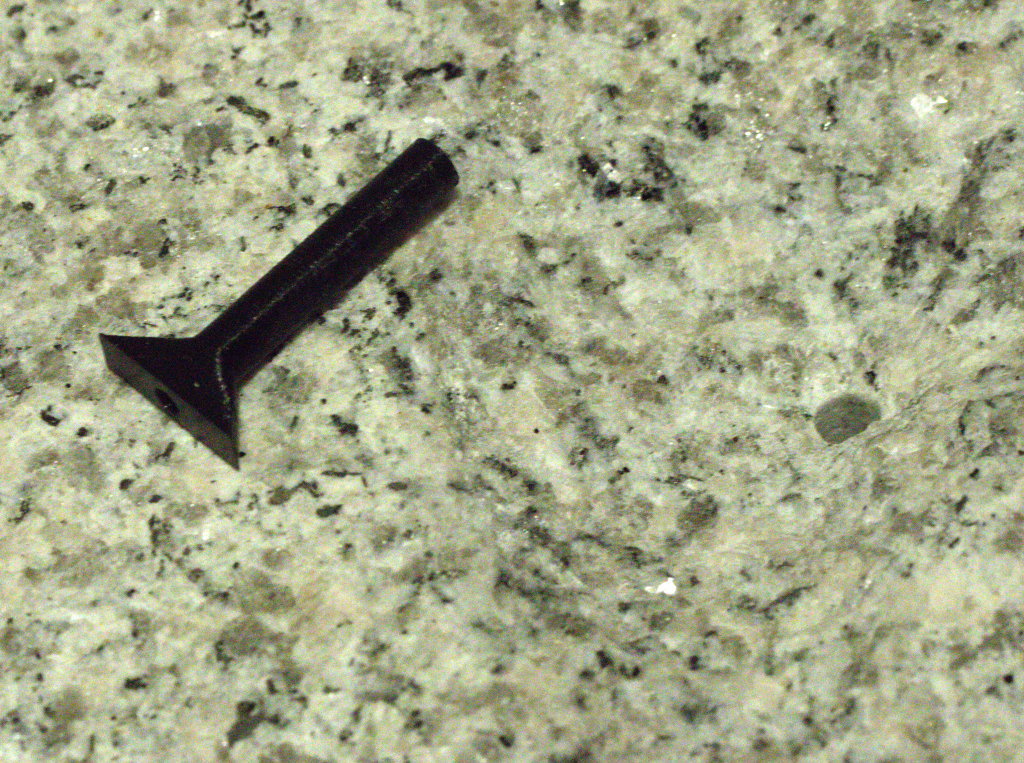
How do you mount a printer to a granite tile? Well, with brackets, of course - see https://www.thingiverse.com/thing:2859409. But how do you get the screws into the plate? The default would be to drill a hole, stuff in a nylon plug and put in a wood screw. But: after drilling these holes, I had four large craters at the back of my tile (ok, I had expected something like that), and didn't want to risk breaking it completely by using expansion plugs. Next best option would have been to cement threaded rods into the holes and then secure the mounting clips with nuts on those rods. But this would have meant that i'd have to lift the printer over these rods whenever I had to remove it from the base plate. Not good. So, I needed something to put in these holes which would accept a screw inside and could be stuck to the hole. I.e. a tube with a thread on the inside and some sort of wing on the base, to prevent it from rotating in the hole. Stick it in from the back, fill the craters with mortar and I should be good. Test print went well, at 0.1 mm resolution I could (with a bit of force, admittedly) squeeze an M3 screw into what, according to Fusion 360, should be an M3 hole. Four plugs are printing right now, and I'll mortar them in on the weekend.
With this file you will be able to print granite tile mounting plug - 5 mm hole, M3 thread with your 3D printer. Click on the button and save the file on your computer to work, edit or customize your design. You can also find more 3D designs for printers on granite tile mounting plug - 5 mm hole, M3 thread.