GRS Flight Yoke using OpenCADE base
thingiverse
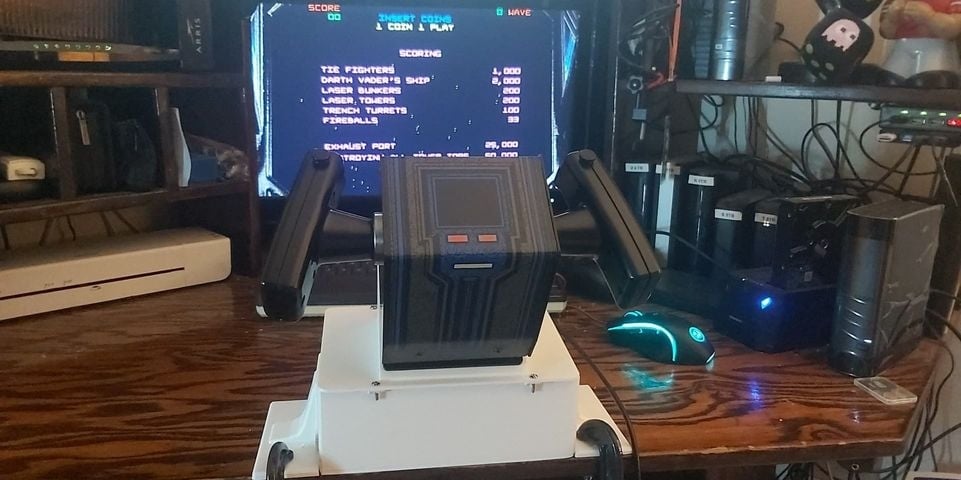
GRS Star Wars Yoke Assembly Video: https://youtu.be/NPqFm8X4k0g Assembly Instructions: http://wagnerstechtalk.com/grs/#New_GRS_Arcade_Flight_Yoke These files will allow you to create a self-contained GRS Flight Yoke Desktop control panel. While the original design of the GRS Yoke was to be used as a replacement for the original Star Wars Arcade or Arcade1UP cabinets, using the models below you can build an enclosure so you can use it with your PC/Raspberry Pi on your desk. It's great having options and this is what this design provides. Check out Glen's Retro Show (GRS) Game-play video here: https://www.youtube.com/watch?v=jDuxgkzC3JE&t=5s Things You'll need: • GRS Flight Yoke (Amazon: https://www.amazon.com/gp/product/B08L7TVCM2/ref=as_li_tl?ie=UTF8&camp=1789&creative=9325&creativeASIN=B08L7TVCM2&linkCode=as2&tag=wagnerstech09-20&linkId=3c28c2bd813c4b4f082673f2aadb5ba2 - NOTE: May show unavailable, should be re-stocked soon) • Moukey 2 PCS C Shape Desk Table Mount Clamp (Amazon: https://www.amazon.com/gp/product/B08L7TVCM2/ref=as_li_tl?ie=UTF8&camp=1789&creative=9325&creativeASIN=B08L7TVCM2&linkCode=as2&tag=wagnerstech09-20&linkId=3c28c2bd813c4b4f082673f2aadb5ba2 ) • OpenCADE Base - See here: https://www.thingiverse.com/thing:3445410 , you can pick a base with no front hole cutouts or one with two front hole cutouts. • M3 Screws (Amazon: https://www.amazon.com/gp/product/B08L7TVCM2/ref=as_li_tl?ie=UTF8&camp=1789&creative=9325&creativeASIN=B08L7TVCM2&linkCode=as2&tag=wagnerstech09-20&linkId=3c28c2bd813c4b4f082673f2aadb5ba2 ) • M3 Nuts (Amazon: https://www.amazon.com/gp/product/B08L7TVCM2/ref=as_li_tl?ie=UTF8&camp=1789&creative=9325&creativeASIN=B08L7TVCM2&linkCode=as2&tag=wagnerstech09-20&linkId=3c28c2bd813c4b4f082673f2aadb5ba2 ) For this build, you'll need to 3D print a left+right Yoke support (there is an option above to print both at the same time). Each will be screwed into the sides of the Base. You'll also need the GRS_YokeCP (Control Panel) and the OpenCADE Base mentioned above. Assembly: • Remove the loose metal plate from the GRS Yoke. • Using the large screws included with the GRS Yoke, slide the screws through the top of the GRS Yoke into the control panel and use the included nuts to secure (*NOTE: rotate the yoke for easier access to the screw holes). • Mount the left+right supports to the OpenCADE base using the M3 screws+nuts. • Route the USB cable out the top of the OpenCADE base and bundle all other cables for the yoke inside the base (cable tie, electrical tape, etc.) • Wrap some electrical tape or cable tie around the USB cable to keep it from sliding out the back of the OpenCADE base/notch at the top. • Using the M3 screws + nuts, secure the control panel to the Base. • Use the clamps mentioned above (or use your own) to clamp the assembly to your desk. ** WARNING ** - The GRS Yoke is top-heavy and can easily be tipped over. Until secured to your desk, use extreme caution to eliminate the possibility of it tipping over and falling off your desk.
With this file you will be able to print GRS Flight Yoke using OpenCADE base with your 3D printer. Click on the button and save the file on your computer to work, edit or customize your design. You can also find more 3D designs for printers on GRS Flight Yoke using OpenCADE base .