GRS Style Graver Sharpening jig
thingiverse
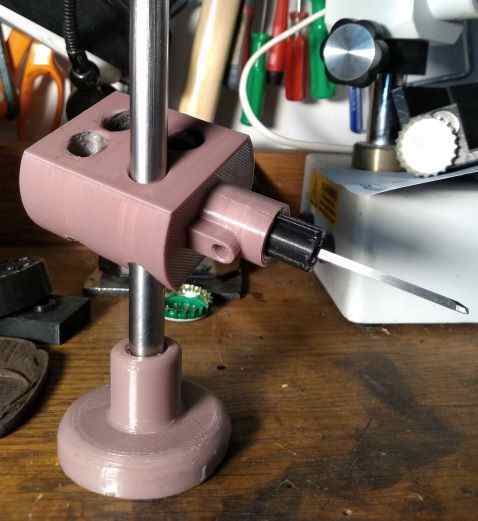
A proof of concept for sharpening gravers using the GRS style sharpening jig. The jig slides on a pillar which means it holds the angle independent of height and stick-out so might be better for electric sharpeners. I used a 10mm steel post. Printing on my Ender 3 v2 followed by 10mm drill results in interference fit which is ideal for press fit into the base, but no good for the sliding fit for the jig on the post. To get sliding fit I cut a slot in a spare bit of 10mm rod and (because of the the burr) it made a perfect sized reamer - you can adjust the size by burnishing the burr appropriately. You might find the clearance on the key for the tool holder is too much and doesn't lock the tool adaptor rotational position accurately enough - if so you can either lock it with an m6 bolt or adjust the cad files which are parametric. The latest jig is for 105 degree V, 20 degree heel and includes relief angles. A 45 degree face is assumed (the jig doesn't include that). Parameters in cad file can be adjusted for other values. This jig also has flats parallel to the sharpening faces which also lower the minimum sharpening height. A base of 50mm diameter seemed too small unless you stuck it bit of metal to give more stability. The current 60mm and 20mm overall height seems OK on its own. v6 Update is to change the keyway from square to triangle, and tighten up the clearance a bit. And flip the text. And provide parametric adaptor for sq graver blank. I think this is better as it is important to minimise rotation between adapter and jig. Jooler might have a better version: https://www.youtube.com/watch?v=LbZU2UV58Pk
With this file you will be able to print GRS Style Graver Sharpening jig with your 3D printer. Click on the button and save the file on your computer to work, edit or customize your design. You can also find more 3D designs for printers on GRS Style Graver Sharpening jig.