Grönö LED
thingiverse
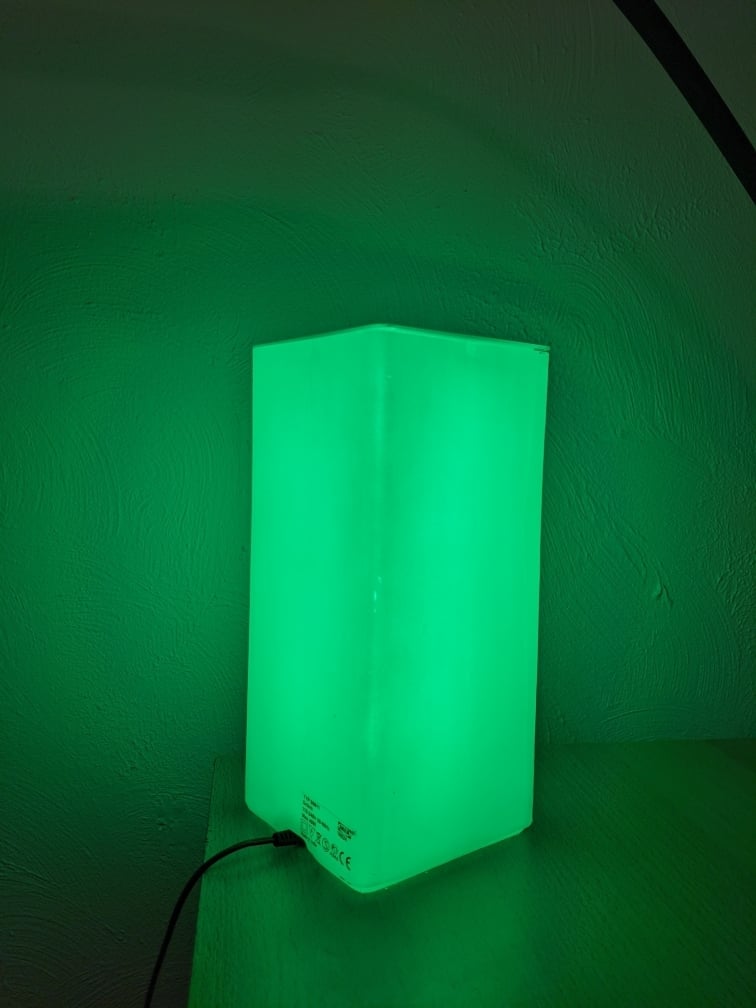
**This is still work in progress! Open points are:** * There is no holder/attachment for the microcontroller Board, I justed hotglued it... * The two notches on the bottom should grab on two bumps on the bottom of the lamp. This did not work, but it's tight nevertheless. * The adhesive tape is not strong enough to keep the LED strips attached, the keep getting loose, probably also because of the heat * I added some "wings" to the nut, because it wasn't very easy to screw tight in the glass. they are untested so far # Grönö LED I had some old IKEA Gröno lamps I didn't use any more. So I decided to combine one of them with some WS2812b LED strips and a Wemos D1 mini board (ESP8266). Together with the lid from https://www.thingiverse.com/thing:2623376 you have a nice little Lamp to use with home automation. ## Hardware You need: * 1 IKEA Grönö lamp * self-adhesive WS2812b LED strip (I used 4 x 17 LEDs; depends on the LED density) * Wemos D1 mini (or another ESP8266 board you are capable of flashing) * USB power Adapter * a rod of square aluminium tube; 15 mm * 15 mm * some wires to connect the strips * Hot glue **Assemble the base part** The printed base parts is combined with a short piece of square aluminium tube (15 mm * 15 mm) on which the LED strips are glued with their adhesive side. Measure the length and cut it to size. It should press fit into the square hole. Now cut four LED stripe segments to fit on the four sides of the aluminium profile. Solder some short cables to the pads on the input (mind the arrows indicating the data line direction) of one of the segments and feed them through the cable hole in the printed base part. Use the adhesive side of the strip to glue it to the aluminium profile. On the adjacent side of the profile glue the next segment, this time with the arrows pointing down to the base, then the thirs segment pointing up again on the third side and down on the last side. After that you have to solder the four segments in series. Just connect the ends of the strips. One can easily remove the original socket and replace it with the printed parts. Feed the assembled base through the hole and use the nut from the top side to attach the base to the glass lamp. Now you have to solder the LED strips to the microcontroller. Use 5V, GNd and D4 for the data line. ## Software I simply flashed the famous and excellent "WLED" software onto the Wemos D1 mini. There are lots of tutorials on how this is done. After that you can use the lamp over the web interface or go on with connections to your favourite home automation system. This is still work in progress! Open points are: * There is no holder/attachment for the microcontroller Board * The two notches on the bottom should grab on two bumps on the bottom of the lamp. This did not work, but it's tight nevertheless. * The adhesive tape is not strong enough to keep the LED strips attached, the keep getting loose, probably also because of the heat ## Remarks **IMPORTANT** I Used an older Grönö model from around 2005. It has a slightly different thickness of walls. I noticed when I printed the lid (https://www.thingiverse.com/thing:2623376) and it didn't fit well. So there could be other parts with other dimensions! ## Thanks and credits Thanks go to * 'Cuiso' for providing the used thread library (https://www.thingiverse.com/thing:3131126) * 'piflixe' for providing the lid I used (https://www.thingiverse.com/thing:2623376)
With this file you will be able to print Grönö LED with your 3D printer. Click on the button and save the file on your computer to work, edit or customize your design. You can also find more 3D designs for printers on Grönö LED.