H.Koenig MSX254 blade extractor
thingiverse
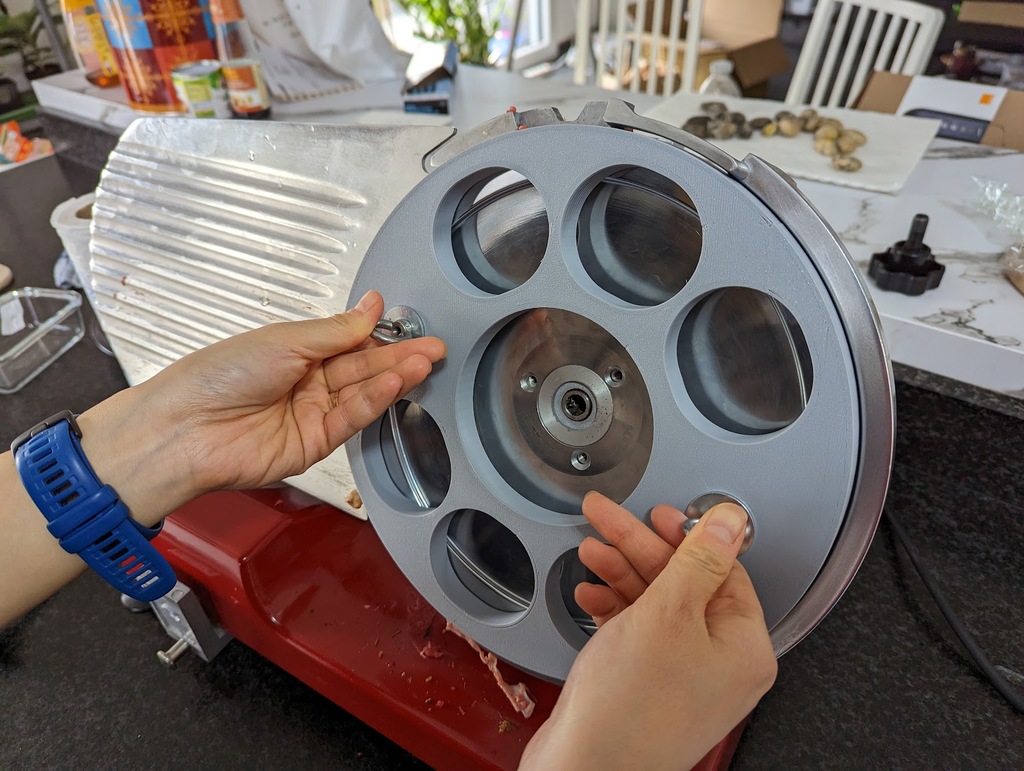
Requires 2 32mm round magnets with a m5 hole and 2 M5x26mm screws (I used https://www.amazon.fr/gp/product/B074V43297) I used the butterfly nuts that came with the magnets To use, tighten the screws so that the magnets are far from the blade. Center the tool on the blade (it should cover the whole 250mm blade so the blade is never exposed. Unscrew the butterfly nuts until the magnets make contact with the blade, then tighten them a tiny bit (1/4 turn maybe) to make sure the blade contacts the tool fully. (You should be able to lift the 2 front feets of the slicer from the table without any issue) Unscrew the blade screws. Be careful when removing the last one as the blade is not secure anymore. It should not fall on its own because it is tilted, but take precautions. Pull the blade from the slicer holding the butterfly nuts and put it in the sink for cleaning. Do not remove the tool from the blade when it is not attached to the slicer. Dry the blade properly then put it back on the machine and tighten the 3 screws. To remove the tool, tighten the 2 butterfly nuts -> the magnets are going to be pulled away from the blade and the tool can be removed easily. The file "extractor_full_infill" is not necessary but can be used to change the infill parameter to 100% between the magnet and the butterfly nut to make it stronger. I also used some metal washers to even the pressure when pulling the magnets (I have no clue if they are neccesary but it seems safer as the magnets are quite strong)
With this file you will be able to print H.Koenig MSX254 blade extractor with your 3D printer. Click on the button and save the file on your computer to work, edit or customize your design. You can also find more 3D designs for printers on H.Koenig MSX254 blade extractor.