H.R. Giger Counter
thingiverse
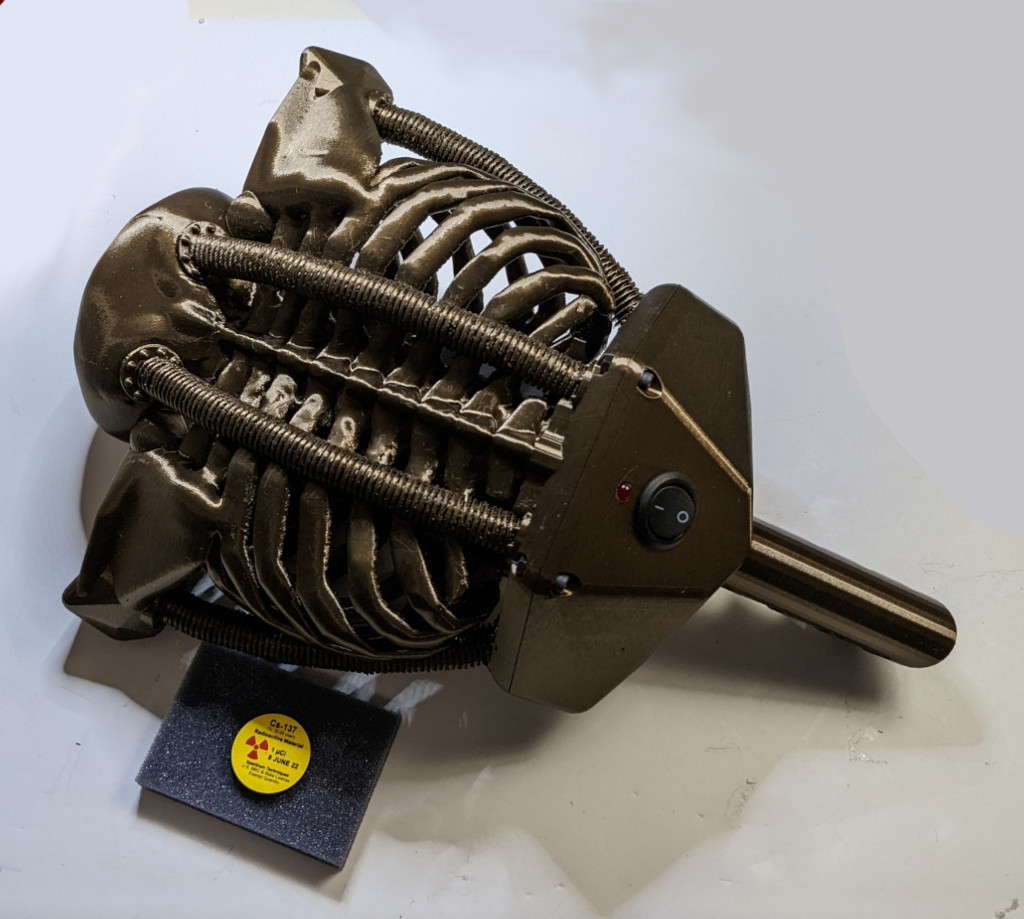
A Geiger counter in the style of H.R. Giger. Yes, it's a silly visual pun, but it's also a fully-functional Geiger counter. Best to print it using a dark metallic filament to give it that nice creepy look. I used “mocha silk” PLA for the one in the cover photo. **Printing Instructions** There are 4 different options for printing the main body: - main.stl is the complete model, which you can either print all at once, or split up as needed and glue together - main-split.stl is the model divided laterally and arranged as a single print - main-left.stl and main-right.stl are the halves for printing separately - mini-1.stl through mini-4.stl are four quadrants that can be printed on a smaller print bed You'll also need to print board-mount.stl and grip.stl Ideally, you'd print the main.stl model as a single unit, standing on end, using an mmu with soluble support material. If anyone has that capability, I'd love to see the results. In addition to the printed parts, you'll need: - a MightyOhm Geiger counter board: https://mightyohm.com/blog/products/geiger-counter/ - a rocker switch that fits a 20mm hole: https://www.sparkfun.com/products/11138 - 4 M3x12mm bolts with hex nuts - 4 M3x6mm bolts - hookup wire (plus connectors), glue, heat-shrink tubing You might also need 2 M3x20mm bolts with hex nuts if you've opted to print the laterally-split pieces. These will be used to bolt the halves together. For the mini quadrants, you'll need a total of 6 bolts and nuts. **Electronics** When constructing the MightyOhm board, follow the instructions provided, with the following exceptions: - connect the LED (watch the polarity on this) using a pair of hookup wires (preferrably with a connector in the middle) - replace the slide switch with the rocker switch (again with a pair of wires and *definitely* a connector on this one) **Assembly** Attach the MightyOhm board upside-down on the board mount using 4 M3x6mm bolts. Insert the LED is into the grip from the inside. Insert the rocker switch into the grip from the outside, threading the wires through first (this is why a connector's so important for this one). Slide the board mount into the main body, resting in the 3 notches (left and right rear, center front). Bolt the grip onto the main body using M3 bolts and nuts. **Remix Considerations** - A xenomorph face in place of the skull might be fun. - The MightyOhm board contains a serial port interface. It's technically possible to use that to feed data to a display mounted on the grip. - The MightyOhm board also has a pulse output that could trigger an "Aliens" motion tracker sound effect, with the pitch increasing proportional to the pulse frequency.
With this file you will be able to print H.R. Giger Counter with your 3D printer. Click on the button and save the file on your computer to work, edit or customize your design. You can also find more 3D designs for printers on H.R. Giger Counter.