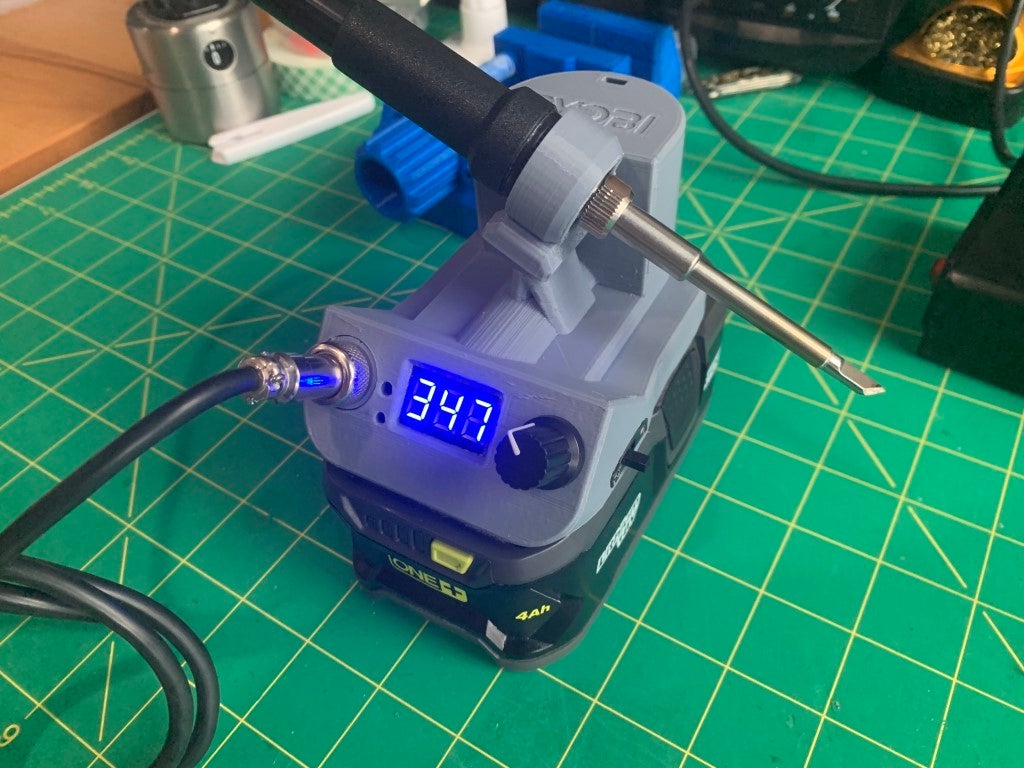
Hakko T12 & Ryobi Soldering Station
prusaprinters
<p>Remixed the awesome <a href="https://www.thingiverse.com/thing:3325510">TS100 Soldering Iron Ryobi</a> by rkolibar to encase a T12 Hakko soldering station DIY kit. Borrowing also from <a href="https://www.thingiverse.com/thing:2957767">Quicko Mini STC T12 Panel</a> I was able to combine them into an all-in-one soldering station. The holder was remixed from <a href="https://www.thingiverse.com/thing:2154905">Hakko T12 Handle (clone) Holder</a> by DonJuanito to fit my Hakko T12 soldering iron handle.</p> <p>The solution differs a little bit from others, as the main body is all one piece, no separate panel for the LCD/Controls. This makes the unit very compact, although making assembly a little tricky.</p> <p><strong><em>Just remember not to solder the connector to the board until assembly time!!!</em></strong> I got over eager and had to desolder it for final assembly (I still didn't know what I wanted).</p> <p><strong><em> Note</em></strong><br/> In the pictures the power switch is on the outside of the case, I found this to be a mistake so I made some changes to mount the switch from the inside. The uploaded version reflects that change. Switch used: <a href="https://www.ebay.com/sch/i.html?_from=R40&_trksid=p2047675.m570.l1313&_nkw=SS12F15&_sacat=0">SS12F15</a></p> <h3>Print instructions</h3><h3>Print Settings</h3> <p><strong>Printer Brand:</strong> Monoprice</p> <p><strong>Printer:</strong> Select Mini</p> <p><strong>Rafts:</strong> No</p> <p><strong>Supports:</strong> Yes</p> <p><strong>Resolution:</strong> 0.24</p> <p><strong>Infill:</strong> 20%</p> <p><strong>Filament:</strong> Inland PLA Grey</p> <p><strong>Notes:</strong></p> <p>Try to use Neon Green color to keep it "Ryobi accurate"!</p> <h3> Post-Printing</h3> <p><strong>Preparation</strong></p> <ol> <li>Desolder the white port on the hakko PCB, we need to move it to the back of the board to have all the space we need.</li> <li>Bend the pins 90 degrees back.<br/> 5.<strong><em>Taking care of polarity</em></strong> insert the connector from the back of the board making sure the red wire is still the positive (+) and black wire is still negative (-) as printed on the PCB.</li> <li>Remove the center pin (green wire) from the male connector. You can use tweezers for this. This wire is not needed.</li> </ol> <p><strong>Assembly order</strong></p> <p><strong>Use regular household solid core wire to fashion some leads for the batteries. Use image attached as reference on how to bend them.</strong></p> <p><strong>Assembly</strong></p> <p>After the printing is done. Remove support material, cleanup as much as you can.</p> <ol> <li>Grab the "Hakkobi-Fix.stl" pieces and rest them in the aviator port opening. </li> <li>Insert the GX12 (aviation port) in the opening careful not to drop the other pieces.</li> <li>Hold with fingers and turn upside down, insert washer and nut as best you can, start screwing the nut until is hard to turn it and it gets locked in place with the side wall.</li> <li>Screw the port + fix pieces from the other side until tight. Attempting to end with the GX12 notch at the top.</li> <li>Insert the circuit board from the back, taking care to align the GX12 port with the holes in the PCB while carefully Inserting the rotary encoder in the corresponding opening. </li> <li>Use washer and nut in the rotary encoder. This will keep everything in place.</li> <li>Solder the GX12 pins to the board taking care not to melt the case with your soldering iron. </li> <li>Glue SPDT switch in place.<br/> 9.Wire up, don't forget to use heat shrink.<br/> Battery(+) -> switch -> Positive(+) terminal in PCB.<br/> Battery(-) -> Negative(-) terminal in PCB</li> <li>Connect the white connector to the back of PCB.</li> <li><p>Connect to the battery and enjoy!.</p> <p><strong>How I Designed This</strong></p> <p>I just added everything together in Fusion 360, and started merging it, didn't have any particular design in mind other than it needed to have a slight slant to make it nicer. and be as compact as possible. I think I achieved both requirements.</p> <p>I also used some resources from GrabCad to get a sense of the finished product. By recreating the same real components in digital. You can get a sense of the space each component will occupy and will be able to design better.</p> </li> </ol>
With this file you will be able to print Hakko T12 & Ryobi Soldering Station with your 3D printer. Click on the button and save the file on your computer to work, edit or customize your design. You can also find more 3D designs for printers on Hakko T12 & Ryobi Soldering Station.
