Hand Held WiThrottle
thingiverse
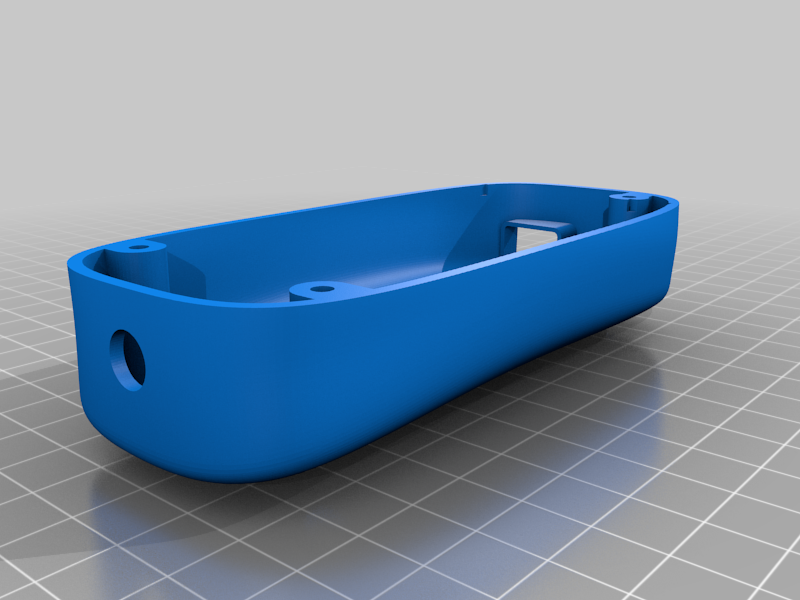
This is a somewhat ergonomic case for a handheld model railway throttle which was designed by Peter Akers (flash62au on GitHub). I designed the case for this in Fusion 360 using a new-to-me technique using a form which seems to have worked well for a case that fits nicely in the palm of my hand. The components and code are all outlined in [GitHub](https://github.com/flash62au/WiTcontroller) and there is also a project page in the [DCC++ EX documentation](https://dcc-ex.com/throttles/witcontroller.html). There is also a video of the throttle in action on [YouTube](https://youtu.be/RKnhfBCP_SQ). It's important to note that there's no guarantee all components will be the same across the various different suppliers. You will need M2 x 4mm self-tapping screws to assemble this. The WeMos Lite LOLIN32, KY-040 rotary encoder, 0.96" OLED, and LiPo battery were all sourced from eBay locally in Australia, while the keypad in use for this was sourced from [Jaycar](https://www.jaycar.com.au/12-key-numeric-keypad/p/SP0770?pos=2&queryId=64f64b3ca6871547d472e69474dde9cd&sort=relevance). I've included printing details, but different components require different settings: ## Enclosure Top When printing the top, it doesn't require supports, as I have designed sacrificial 0.5mm bracing in to act as the support material. These will need to be cut/trimmed post printing. Simply print this face up. I print the top cover at 0.08mm layer height to get the curves as smooth as possible with FDM printing, but you will need to prime and fill if you want it completely smooth. ## Enclosure Bottom You will need supports to print the enclosure bottom, and I used support blockers for the recesses where the mounting holes screw in as these areas don't need support. I printed mine at 0.2mm layer height as I was happy enough with some lines through the curves and didn't want to wait hours on hours for the print to complete. ## OLED Mount With the OLED mount, 0.2mm layer height will be fine, and it doesn't need supports. Note that OLEDs likely have slight variations in the mounting holes. If the little nubs on the OLED mount don't align with the mounting holes, you can just cut those off and it should still mount securely. ## Battery Mount Depending on the battery purchased, the mount may or may not secure it. If the battery is too thin, you can always mount it with double sided tape, or pack the mount with foam or similar. This needs to be printed upside down with supports, 0.2mm layer height is fine. ## Throttle Knob, Rotary Encoder Mount, and Reset Switch All of these are fine at 0.2mm layer height. I'm not 100% happy with the throttle knob, and you may get better mileage from simply buying a ready made knob that suits your rotary encoder. If your rotary encoder is threaded, then I recommend mounting it via the provided nut rather than using the included mount. I have found that eBay photos are misleading though, and all encoders purchased that showed threaded mounts in the photos arrive with a smooth shaft, hence the need to design the mount. To print the rotary encoder mount, print it with the larger side down, and enable supports. The reset switch is best printed standing vertically, and I used a raft for this.
With this file you will be able to print Hand Held WiThrottle with your 3D printer. Click on the button and save the file on your computer to work, edit or customize your design. You can also find more 3D designs for printers on Hand Held WiThrottle.