Hand vacuum, cyclonic
thingiverse
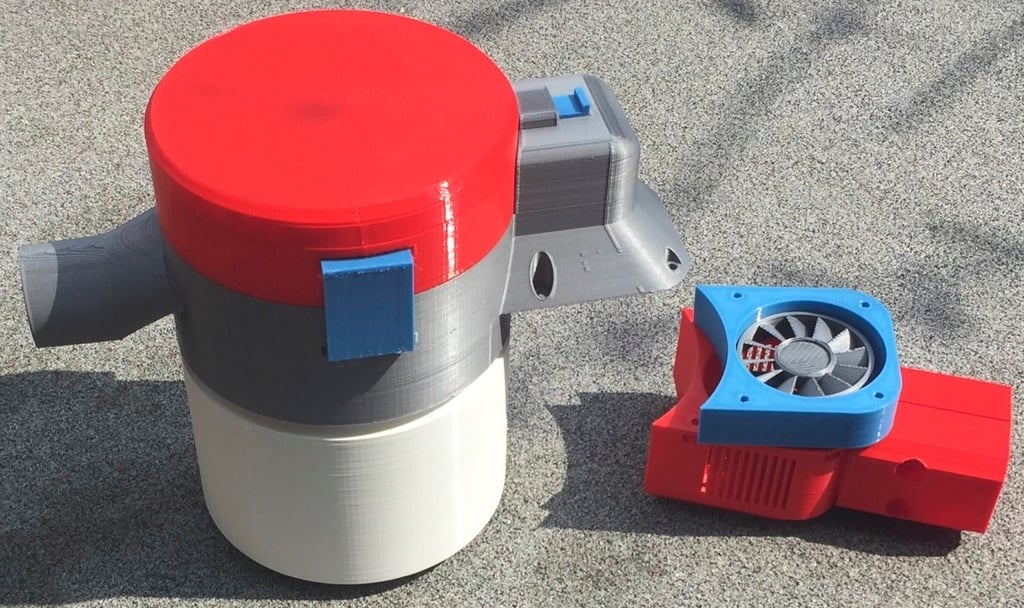
<i>##(Original post) This hand vacuum is a WORK-IN-PROGRESS... <i>Ideally, it will be able to run at 70 W (via ESC) from 2 18650's charged through USB. <i>The cyclone design is loosely based on that of an industrial unit I once purchased for the company to separate wet muck from gas. I performed absolutely zero design calculations, so the questions is: Will it suck or "suck"? Time will tell after Banggood's electric goodies have arrived. Until then, I won't bother with the pet hair attachment. Besides, the dogs are with my ex anyway. Given that: I may just run some CFD design cases after dinner... Covid hey? <i>It sure is one of the ugliest vacuums I've seen, so please assume that this project will quietly die if performance is not AMAZING. #Update, 5 May 21: It sucks! Who'd have thunk: The thing actually works quite decently:) I refreshed the STLs based on the mods I made as I went along (It just sucks that you cannot turn on section analysis in real life). Unfortunately, the handle had to grow appreciably to allow assembly by fat-fingered folk like myself. This thing has become a weapon! As I'm not a Tuber and cannot upload a vid, I've added a snapshot showing ground coffee being chugged. I am tempted to play around with some impeller designs, but that's about it. I have not included the CAD model: As a newbie, I made a fair mess of things whilst modding along and fear that the kind people of Autodesk would take away my Fusion hobby license:) That's it! <p style="font-size:10px"><b>DOWNLOAD NOW for limited access to the crack attachment:)</b></p> A working version requires the following parts: - 2 18650 batteries (>= 10 Amp, I used LG ones) and battery holders - 2 USB battery chargers (e.g. [these](https://www.banggood.com/nl/10-Pcs-TP4056-Micro-USB-5V-1A-Lithium-Battery-Charging-Module-Board-TE585-Lipo-Charger-p-1255764.html?rmmds=myorder&cur_warehouse=CN); see photo. Cheap; using one on each battery simplifies the circuit) - a 7.4 V DC motor (see photo; I used a [Chihai SKU626132](https://www.banggood.com/nl/RS-370SD-DC-7_4V-50000RPM-Motor-Adjustable-Permanent-Magnet-Miniature-Motor-p-1150028.html?rmmds=detail-left-hotproducts&cur_warehouse=CN) from Banggood) - an ESC; I used [this one](https://www.banggood.com/nl/PWM-DC-Motor-Governor-5V-16V-10A-Speed-Switch-LED-Dimmer-Speed-Controller-p-1540563.html?rmmds=product_topselling&cur_warehouse=CN&act_poa=SKUC38859) from Banggood - An on/off switch. The included button holder fits a 15 mm KCD11 switch. - Bolts + nuts: - M4x30 (4) to attach fan duct and motor housing - M4x50 (4) to connect the handle halves - M3 x 6-ish (2) to connect the motor (I cut 10 mm ones) - M3 x 10 (2) to attach the impeller to the motor shaft (drop nuts into slots impeller) Electrics: - Wire the chargers to the individual batteries (charger + to battery +, otherwise things get hot I found) - Connect batteries in series and run to ESC input, incorporating the switch at any position - Connect motor to ESC (obviously) Printing: Most parts are not fussy about printer settings; you want to go as fast as possible, given the amount of plastic. - The snaps holding the lid to the body should be printed standing on their long edge to give them good strength. I increased the wall line count to obtain 100% infill. - As the ESC and chargers get pretty warm, <b>PLA may not be the best material to use for the handle</b>. My unit holds together, but I fear eventual meltdown if I'd charge through a high-capacity USB outlet. Charging from a low-capacity one such as a laptop's USB port seems to keep temperature under control.
With this file you will be able to print Hand vacuum, cyclonic with your 3D printer. Click on the button and save the file on your computer to work, edit or customize your design. You can also find more 3D designs for printers on Hand vacuum, cyclonic.