Handwire Hot Swap Socket
thingiverse
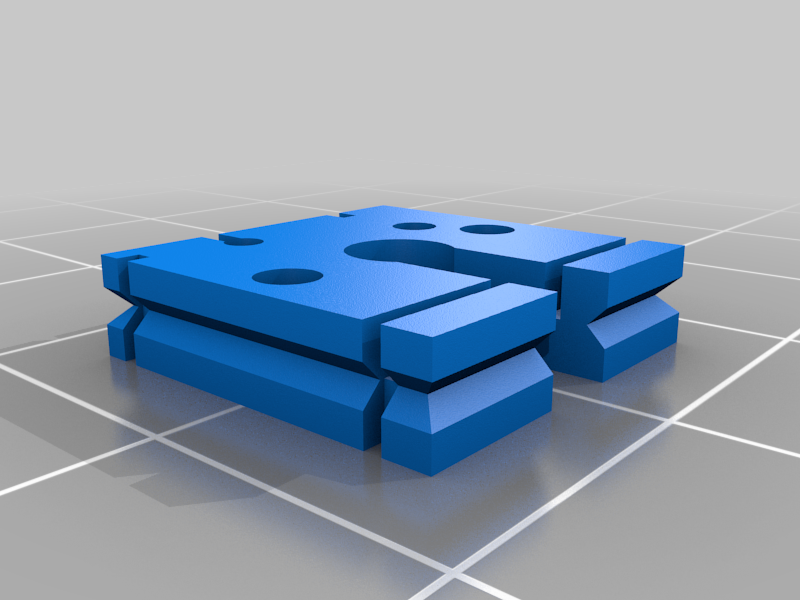
### Version 4 is out! **The STL orientation is incorrect. Please print the parts with the diode channel facing upwards.** v4 socket improvements: - Easier to print - Improved robustness of row wire connection - Faster to assemble / put in diode - Better method of connecting pin and diode ### What is it? This is a completely solderless way of wiring a keyboard matrix together. Using these 3d printed pieces, through hole diodes, and solid core wire, you can put together a keyswitch matrix that conforms to the shape of any build space, with the added benefit of being able to remove and replace all of the key switches. ### How did we get here? 1. I printed a Dactyl Manuform 2. I did not like the idea of soldering switches in a Dactyl Manuform 3. I spent a week designing and printing this project to avoid 4 hours of soldering ### Who is this for? - Handwire keyboard builders that would also like to change switches at some point in the future - Any project with keyswitches in hard to solder areas - Anyone trying to build a keyboard without a PCB, really ### How do I use it? I wrote a guide complete with pictures, and its hosted on Github. https://github.com/stingray127/handwirehotswap ### Printing Notes Due to the dimensions we are working with, if you're using an FDM printer, you really need to have a dialed in printer. I spent so much time leveling my bed I discovered that the center of my glass bed isn't actually flat. An ABL setup may greatly increase your chances of printing these well. First Horizontal Layer Expansion will really mess you up here. The wire channels on the bottom face (the face touching the switch) should err on the larger size; the bottom wire channels can be Clearance Fit to Press Fit, and not Doesn't Fit. The top wire channels, however, need to be Press Fit for their respective wires to maintain a solid electrical connection. The print itself takes very little filament. If you've got almost spent rolls of filament lying around, go ahead and use them here. If you want to print these in batches, I recommend you find out how your slicers Sequential Printing function works to minimize warpage. I printed with batches of 12 this way, but my printbed was able to fit 16. ### Other Notes: The STL file was designed for these wire sizes: - Diode Legs: 25 SWG - Solid Core: 24 SWG If you need other gauges of wire, use the SCAD file to generate your own versions of this print. As this is a hot swap socket, one should be careful to not damage the switch pins when inserting the switch into the socket. Slightly bending the switch pins a few degrees before inserting the switch into the socket may improve electrical connection stability, should you run into connection issues. While this does allow you to "hot swap" a keyswitch out, you can only really do a few at a time, otherwise the entire wiring matrix falls out of the keyboard body.
With this file you will be able to print Handwire Hot Swap Socket with your 3D printer. Click on the button and save the file on your computer to work, edit or customize your design. You can also find more 3D designs for printers on Handwire Hot Swap Socket.