Hangboard
prusaprinters
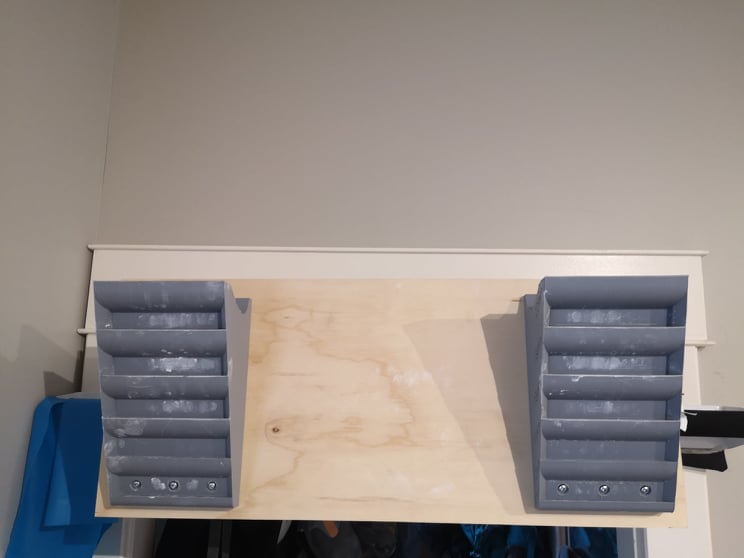
<p>------------------------------------------------------------------------</p><p>I wanted to create a 3D printable hangboard so that I could train finger strength and needed a hangboard with progressively smaller edges. This hangboard is designed for people that have been climbing for a few years. If you're interested in the types of workouts you can do with these types of hangboards I would recommend checking <a href="http://en-eva-lopez.blogspot.com">Eva Lopez</a>'s hangboard training blog. </p><p>I wanted a hangboard that would fit on the bed of the ender 3 and so will need to print two of these so that you hang on them and they take alot of filament (~700g, if anyone has any ideas on how to decrease filament let me know). The edge size on the hangboard going from top to bottom: 22mm + , 18mm, 16mm, 14mm, 12mm, and 10mm. One of my biggest worries about 3d printing a hangboard was strength and filament usage. After stumbling on the video below I thought it would be interesting to have increased infill in the areas that ran the highest stress. </p><figure class="media"><oembed url="https://www.youtube.com/watch?v=q0YsC53mFvY&list=PLBLcxh8J3jc3fpHOtSzk72HJ3FBvrKa_v&index=2"></oembed></figure><p> </p><p>------------------------------------------------------------------------</p><h4>Modifier </h4><p>This hangboard should only be printed with the modifier. To do this you can watch the video above or follow these directions: </p><ol><li>import the hangboard file in prusaslicer and position it so that it fits on the bed</li><li>On the right right bar under the hangboard.stl file click the object settings button(gear square with an orange cog in the right corner)</li><li>Select add modifier>load…</li><li>Choose the hangboard_infill_modifier.obj file</li><li>In the right bar under the hangboard_infill_modifier.obj file click on the object settings(the grey cog with an orange cog inside) select infill and change to value >70%</li></ol><p>------------------------------------------------------------------------</p><p><strong>This print should be positioned to be printed on it's side for maximum strength</strong></p><p>------------------------------------------------------------------------</p><p><strong>The printer settings:</strong></p><p>infill density: 20%</p><p>infill pattern: rectilinear</p><p>brim width: 3mm</p><p>Supports: Yes</p><p><strong>Modifier settings:</strong></p><p>infill density: 70%</p><p>infill pattern: rectilinear</p><p>------------------------------------------------------------------------</p><p><strong>Equipment</strong></p><ul><li> 6 pan socket head 8X1¼ screws </li><li>#8 steel washers. </li></ul><p>------------------------------------------------------------------------</p><p><strong>Notes</strong></p><p>I'm looking into making a parametric design so that the edge depths can be modified or creating several models with differing edge depths.</p><p>The edges of the hangboard are really sharp and need to be filed down, I will be working on a new file that has rounded edges. </p>
With this file you will be able to print Hangboard with your 3D printer. Click on the button and save the file on your computer to work, edit or customize your design. You can also find more 3D designs for printers on Hangboard.