Harbor Freight Dial Mount for OEM Fang Mod
thingiverse
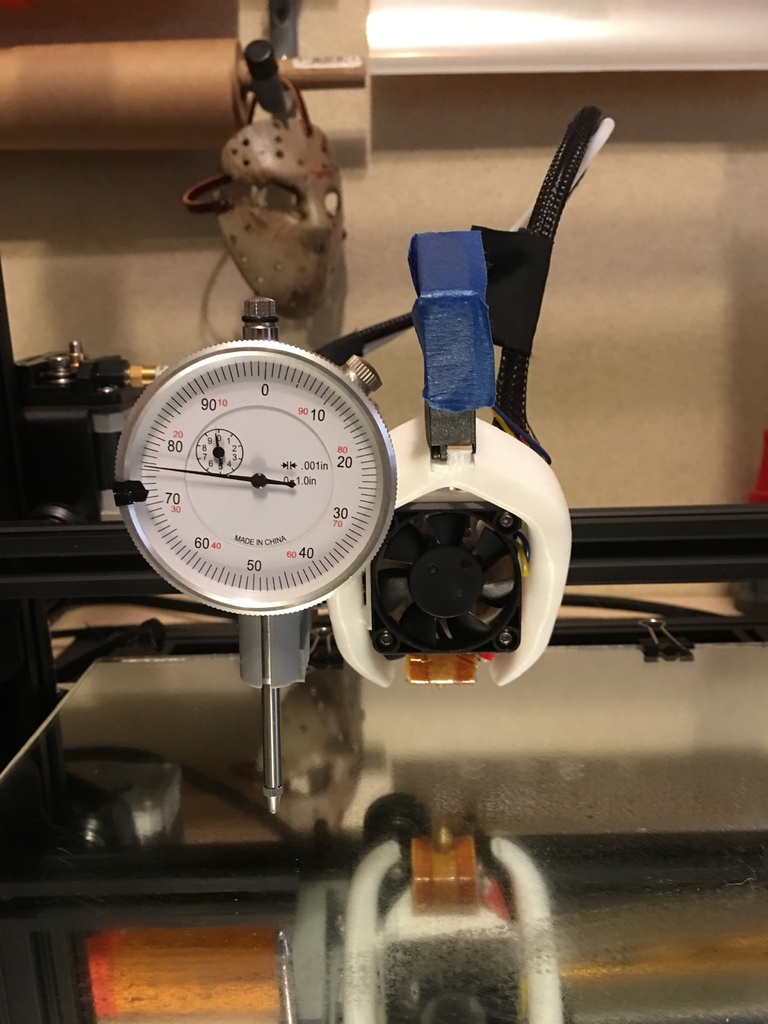
I made this for the Dial Travel Indicator you can buy at any Harbor Freight so it can be mounted to the X-Carriage on the CR-10S using the High Clearance CR-10 OEM Fang Mod by TacBlades (www.thingiverse.com/thing:2544186). This is the only fang mod that it has been tested with. It mounts to the X-Carriage using the factory fan shroud screw holes and the factory screws. So you should not need to go find new screws for it. The reason for making this is I had found other people had made similar mounts for the factory fan shroud so you could move the dial around the bed with the X axis, but nothing if you were using a fang mod. This makes it so you can mount it to the X-Carriage and move the dial using prompt commands instead of sliding it on the X-Bar. It is offset to the left of the nozzle so PLEASE remember this when you're using prompt commands and moving your X-Carriage around to check the bed level with it. If you auto home with this on and the dial inserted the dial will come off the side of the bed. The mount can be left on the X-Carriage and Travel Dial easily removed when printing. The Travel Dial CANNOT be left in the mount when printing. I made this to confirm level adjustments using a live-leveling technique similar to TacBlades Easy Live-Leveling where I print .2mm thick 20mm squares over the build plates 4 mounting screws in the corners and the center of the build plate. The pictures of it on the machine are of the prototype where excess material was removed after finding I was a bit over-zealous in the design. The changes made to the prototype were made on the original model. I just never got around to printing it back out again since the prototype works the way it is. The binder clip on it is what is holding it on for the photos because I forgot to get pics before I took it off for modification measurements and you will not need a binder clip. It was modeled in Fusion 360 and sliced with Simplified 3D. It was printed in PLA at .15 layer height with 3 wall perimeters, 5 bottom layers and 6 top layers, 20% overlap with a 25% honeycomb infill. No raft or supports should be needed if printed vertically. The screw holes are purposely a tad small so the factory fan shroud screws can be used to cut threads in the plastic. It's recommended you thread the screws into the holes to cut the threads in the plastic prior to mounting to the X-Carriage. It can be mounted without removing the fang mod. Let me know if you have any issues.
With this file you will be able to print Harbor Freight Dial Mount for OEM Fang Mod with your 3D printer. Click on the button and save the file on your computer to work, edit or customize your design. You can also find more 3D designs for printers on Harbor Freight Dial Mount for OEM Fang Mod.