HAT STRETCHER
prusaprinters
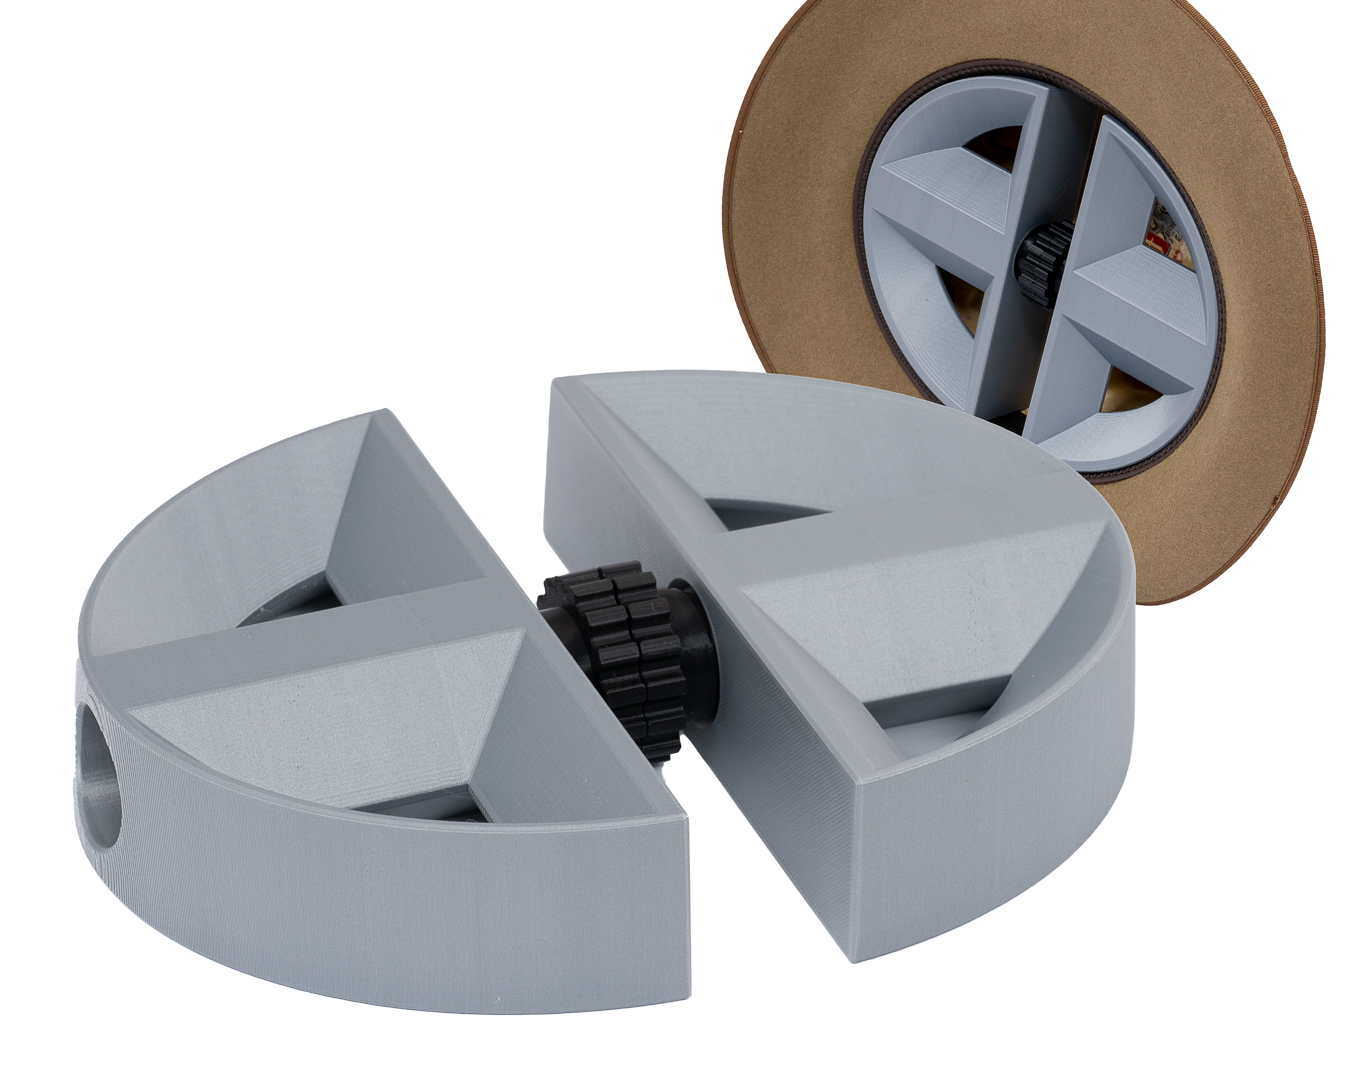
<p>This model is suitable for a Prusa Mini, and prints easily with no supports and (almost) no infill. Printing details are at the end of this description but first: </p><p><strong>SIZE</strong></p><p>Two models are attached in Small Size (EU size 54 and up), and Large (EU 57 and up), and both of these are more than adequate to cover the full range of standard hat sizes.</p><p>Using the smaller size stretcher to expand to the largest hat size will work, and will result in a narrower oval shape - this may or may not be preferable depending on your head size and shape. You can easily check your preferred fit by printing the size check template (in two parts for the Prusa Mini).<br><br>If you wish to customise the size a little for whatever reason, they can be enlarged or reduced in your slicer but PLEASE remember to use the same percentage in every axis and for every part or nothing will fit!</p><figure class="table"><table><tbody><tr><td style="border-width:0px;padding:10px 15px;"><strong>Measurement in Inches</strong></td><td style="border-width:0px;padding:10px 15px;"><strong>Hat Size</strong></td><td style="border-width:0px;padding:10px 15px;"><strong>European Size</strong></td></tr><tr><td style="border-width:0px;padding:10px 15px;">21 1/8</td><td style="border-width:0px;padding:10px 15px;">6 3/4 - S</td><td style="border-width:0px;padding:10px 15px;">54</td></tr><tr><td style="border-width:0px;padding:10px 15px;">21 1/2</td><td style="border-width:0px;padding:10px 15px;">6 7/8 - S</td><td style="border-width:0px;padding:10px 15px;">55</td></tr><tr><td style="border-width:0px;padding:10px 15px;">21 7/8</td><td style="border-width:0px;padding:10px 15px;">7 - M</td><td style="border-width:0px;padding:10px 15px;">56</td></tr><tr><td style="border-width:0px;padding:10px 15px;">22 1/4</td><td style="border-width:0px;padding:10px 15px;">7 1/8 - M</td><td style="border-width:0px;padding:10px 15px;">57</td></tr><tr><td style="border-width:0px;padding:10px 15px;">22 5/8</td><td style="border-width:0px;padding:10px 15px;">7 1/4 - L</td><td style="border-width:0px;padding:10px 15px;">58</td></tr><tr><td style="border-width:0px;padding:10px 15px;">23</td><td style="border-width:0px;padding:10px 15px;">7 3/8 - L</td><td style="border-width:0px;padding:10px 15px;">59</td></tr><tr><td style="border-width:0px;padding:10px 15px;">23 1/2</td><td style="border-width:0px;padding:10px 15px;">7 1/2 - XL</td><td style="border-width:0px;padding:10px 15px;">60</td></tr><tr><td style="border-width:0px;padding:10px 15px;">23 7/8</td><td style="border-width:0px;padding:10px 15px;">7 5/8 - XL</td><td style="border-width:0px;padding:10px 15px;">61</td></tr><tr><td style="border-width:0px;padding:10px 15px;">24 1/4</td><td style="border-width:0px;padding:10px 15px;">7 3/4 - XXL</td><td style="border-width:0px;padding:10px 15px;">62</td></tr></tbody></table></figure><p><strong>DESIGN</strong></p><p>While the device may look bulky - it's not. It's actually printed (almost) entirely hollow thanks to the miracle of Lightning Infill, and has been designed effectively as a box beam structure, making it more than strong enough for the purpose.<br><br><strong>ASSEMBLY</strong></p><p>Note that the two screws are opposite handed, one left thread, one right. There's no need to glue them together but it's a lot easier in use if you do - just a tiny drop of super/crazy glue on the mating surfaces of the screws is enough - use the “x” shaped key to ensure a nice alignment. From there, you just have to make sure you mate the right stretcher part with the right screw and everything will be fine.<strong> </strong><br><br><strong>USE</strong><br><br>I prefer to slightly dampen leather bands if they are to be stretched, but once the hat fits, simply popping it onto the stretcher after use will prevent it from shrinking as it dries over time. (I have hats including a panama with a leather band, a woven wool cap and a beret that I keep on these forms to preserve their shape)<br><br><strong>PRINTING</strong></p><p>This is the really fun part! Of course printing with traditional infill is fine, and I recommend 15% Gyroid infill for the screws, no supports are necessary.<br><br>For the stretchers I use 15% Lightning infill and no supports are necessary. <br><br>Use 0.2mm layer heights, the standard two perimeters and a 0.4mm nozzle for a very light, strong model.<br><br>For simple printing orient as follows:<br><br> </p><figure class="image image_resized image-style-align-center" style="width:50%;"><img src="https://media.printables.com/media/prints/315391/rich_content/58927748-6e50-4bb4-bb54-2724a1d96149/screen-shot-2022-11-12-at-10629-pm.png#%7B%22uuid%22%3A%2261553779-1b88-4b41-a579-436df4cbc46b%22%2C%22w%22%3A1772%2C%22h%22%3A1360%7D"></figure><figure class="image image_resized image-style-align-center" style="width:50%;"><img src="https://media.printables.com/media/prints/315391/rich_content/c269d165-e26b-484b-bf50-0fe53f5201ad/screen-shot-2022-11-12-at-10554-pm.png#%7B%22uuid%22%3A%22ba84b9eb-9eb6-445c-acfa-0d1d31af2eef%22%2C%22w%22%3A1506%2C%22h%22%3A1138%7D"></figure>
With this file you will be able to print HAT STRETCHER with your 3D printer. Click on the button and save the file on your computer to work, edit or customize your design. You can also find more 3D designs for printers on HAT STRETCHER.