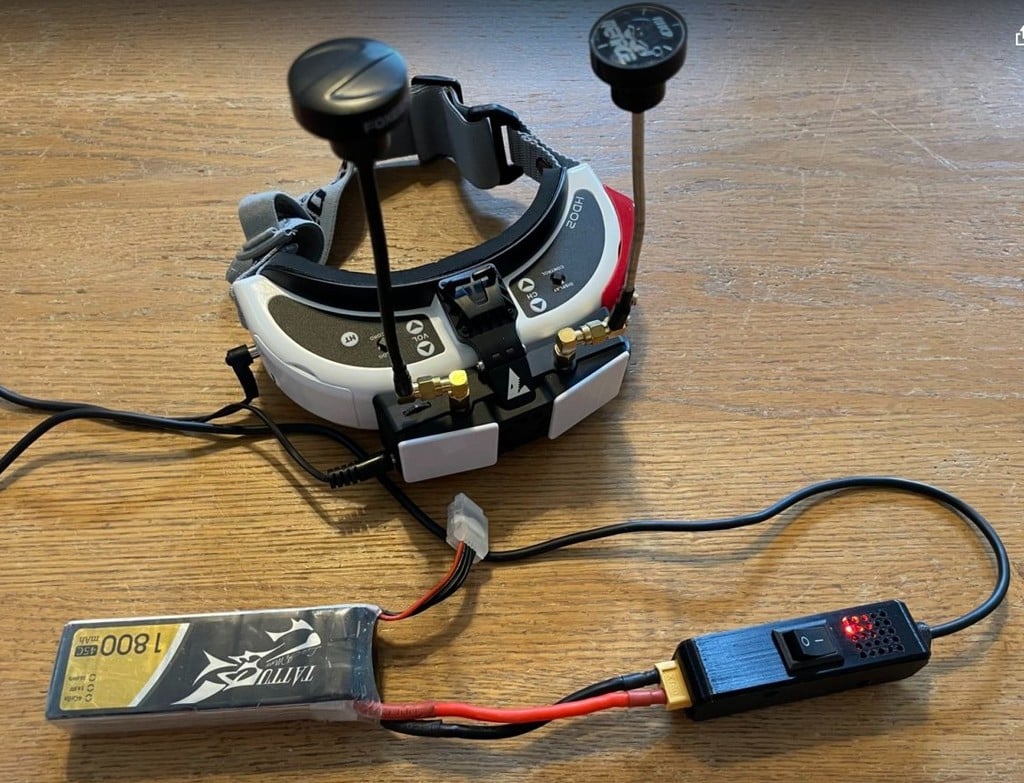
HDO2-SHARKBYTE Single Battery Voltage Regulator Cord
thingiverse
Fellow HDZero/Sharkbyte users, I have designed and fabricated a new power cord to power a set of HDO2 and Sharkbtye/HDZero (2-SMA) VRX from- a single battery. When I purchased the VRX, it came with a power cord that was supposed to do this, but I had a number of issues with video feed dropping out in middle of flight related to the VRX. Their included cord had a voltage regulator that I measured at ~7.9v output while supplied from a 4S-1800mah battery. Looking up the specs, the HDO2 goggles have a voltage spec range of 7-13V and the SharkByte VRX has a range of 8-16V. I suspected that the voltage regulator of the provided cord was on the ragged edge of range for the VRX module and when it would get hot (regulator would feel quite warm after some time) the power would drop some. To overcome, I tried using separate batteries for the goggles and VRX module. This did improve the performance, but still had some drop issues and was also inconvenient requiring separate batteries and power cables. The new cord I fabricated has worked flawlessly (~10 flight packs so far) -even seems to provide improved video range/quality, and also provides convenience of an on/off switch. In case anyone is having similar issue and looking for a solution, this is the design specs/BOM: 1) XT-60 Connector https://www.racedayquads.com/products/amass-xt60h-connector-1pc-choose-your-version?_pos=2&_sid=8b8e1e5a9&_ss=r 2) Matek Micro BEC 6-60V to 5V/9V/12V https://www.racedayquads.com/products/matek-micro-bec-6-60v-to-5v-9v-12v?_pos=1&_sid=de820c21c&_ss=r 3) On/Off Switch https://www.amazon.com/dp/B094FWYWL5?psc=1&ref=ppx_yo2ov_dt_b_product_details I decided to modify the cord that came with the VRX module since it already had the barrel connectors that I needed for the goggles and VRX. I removed the XT60 connector/regulator – opposite end of cord from the barrel connectors. For the Matek BEC, I could have chosen 9V or 12V output for this application. I decided to go with 12V, so I soldered across the 12V jumper pad on the BEC. The attached schematic shows all of the connections I made. I used 18awg for connections between the XT60 connector, switch, and terminating wires from the existing powercord. I designed and grew several 3D printed components. The main case and cover plate are two separate pieces grown from PLA and are attached with (2) M3 screws and nuts. The cord grommet is grown from TPU. All components were grown on an Ender 3 Pro with direct drive. I attached the gcode if you are growing on similar setup. Including the STL and 3mf files showing my build orientation and settings in case you are growing on different setup or want to adjust. Materials: PLA - Inland Black Standard PLA, 1.75mm https://www.microcenter.com/product/485634/inland-175mm-black-pla-3d-printer-filament-1kg-spool-(22-lbs) TPU - Inland Black TPU, 1.75mm https://www.microcenter.com/product/610047/inland-175mm-black-tpu-3d-printer-filament-1kg-spool-(22-lbs) After completing the case and cover builds, I cleaned up BEC vent holes and screw clearance holes with drill bit - did same with hex nut pockets with tweezers/razor. Hope this can help others similar to myself who love the HDZero system but have had issues with the provided Sharkbyte VRX cable - Happy to answer any questions.
With this file you will be able to print HDO2-SHARKBYTE Single Battery Voltage Regulator Cord with your 3D printer. Click on the button and save the file on your computer to work, edit or customize your design. You can also find more 3D designs for printers on HDO2-SHARKBYTE Single Battery Voltage Regulator Cord.
