Head Strap Magnifier + Super Bright Flashlights + 3D Printed Parts = Multifunction DIY Headlamp
prusaprinters
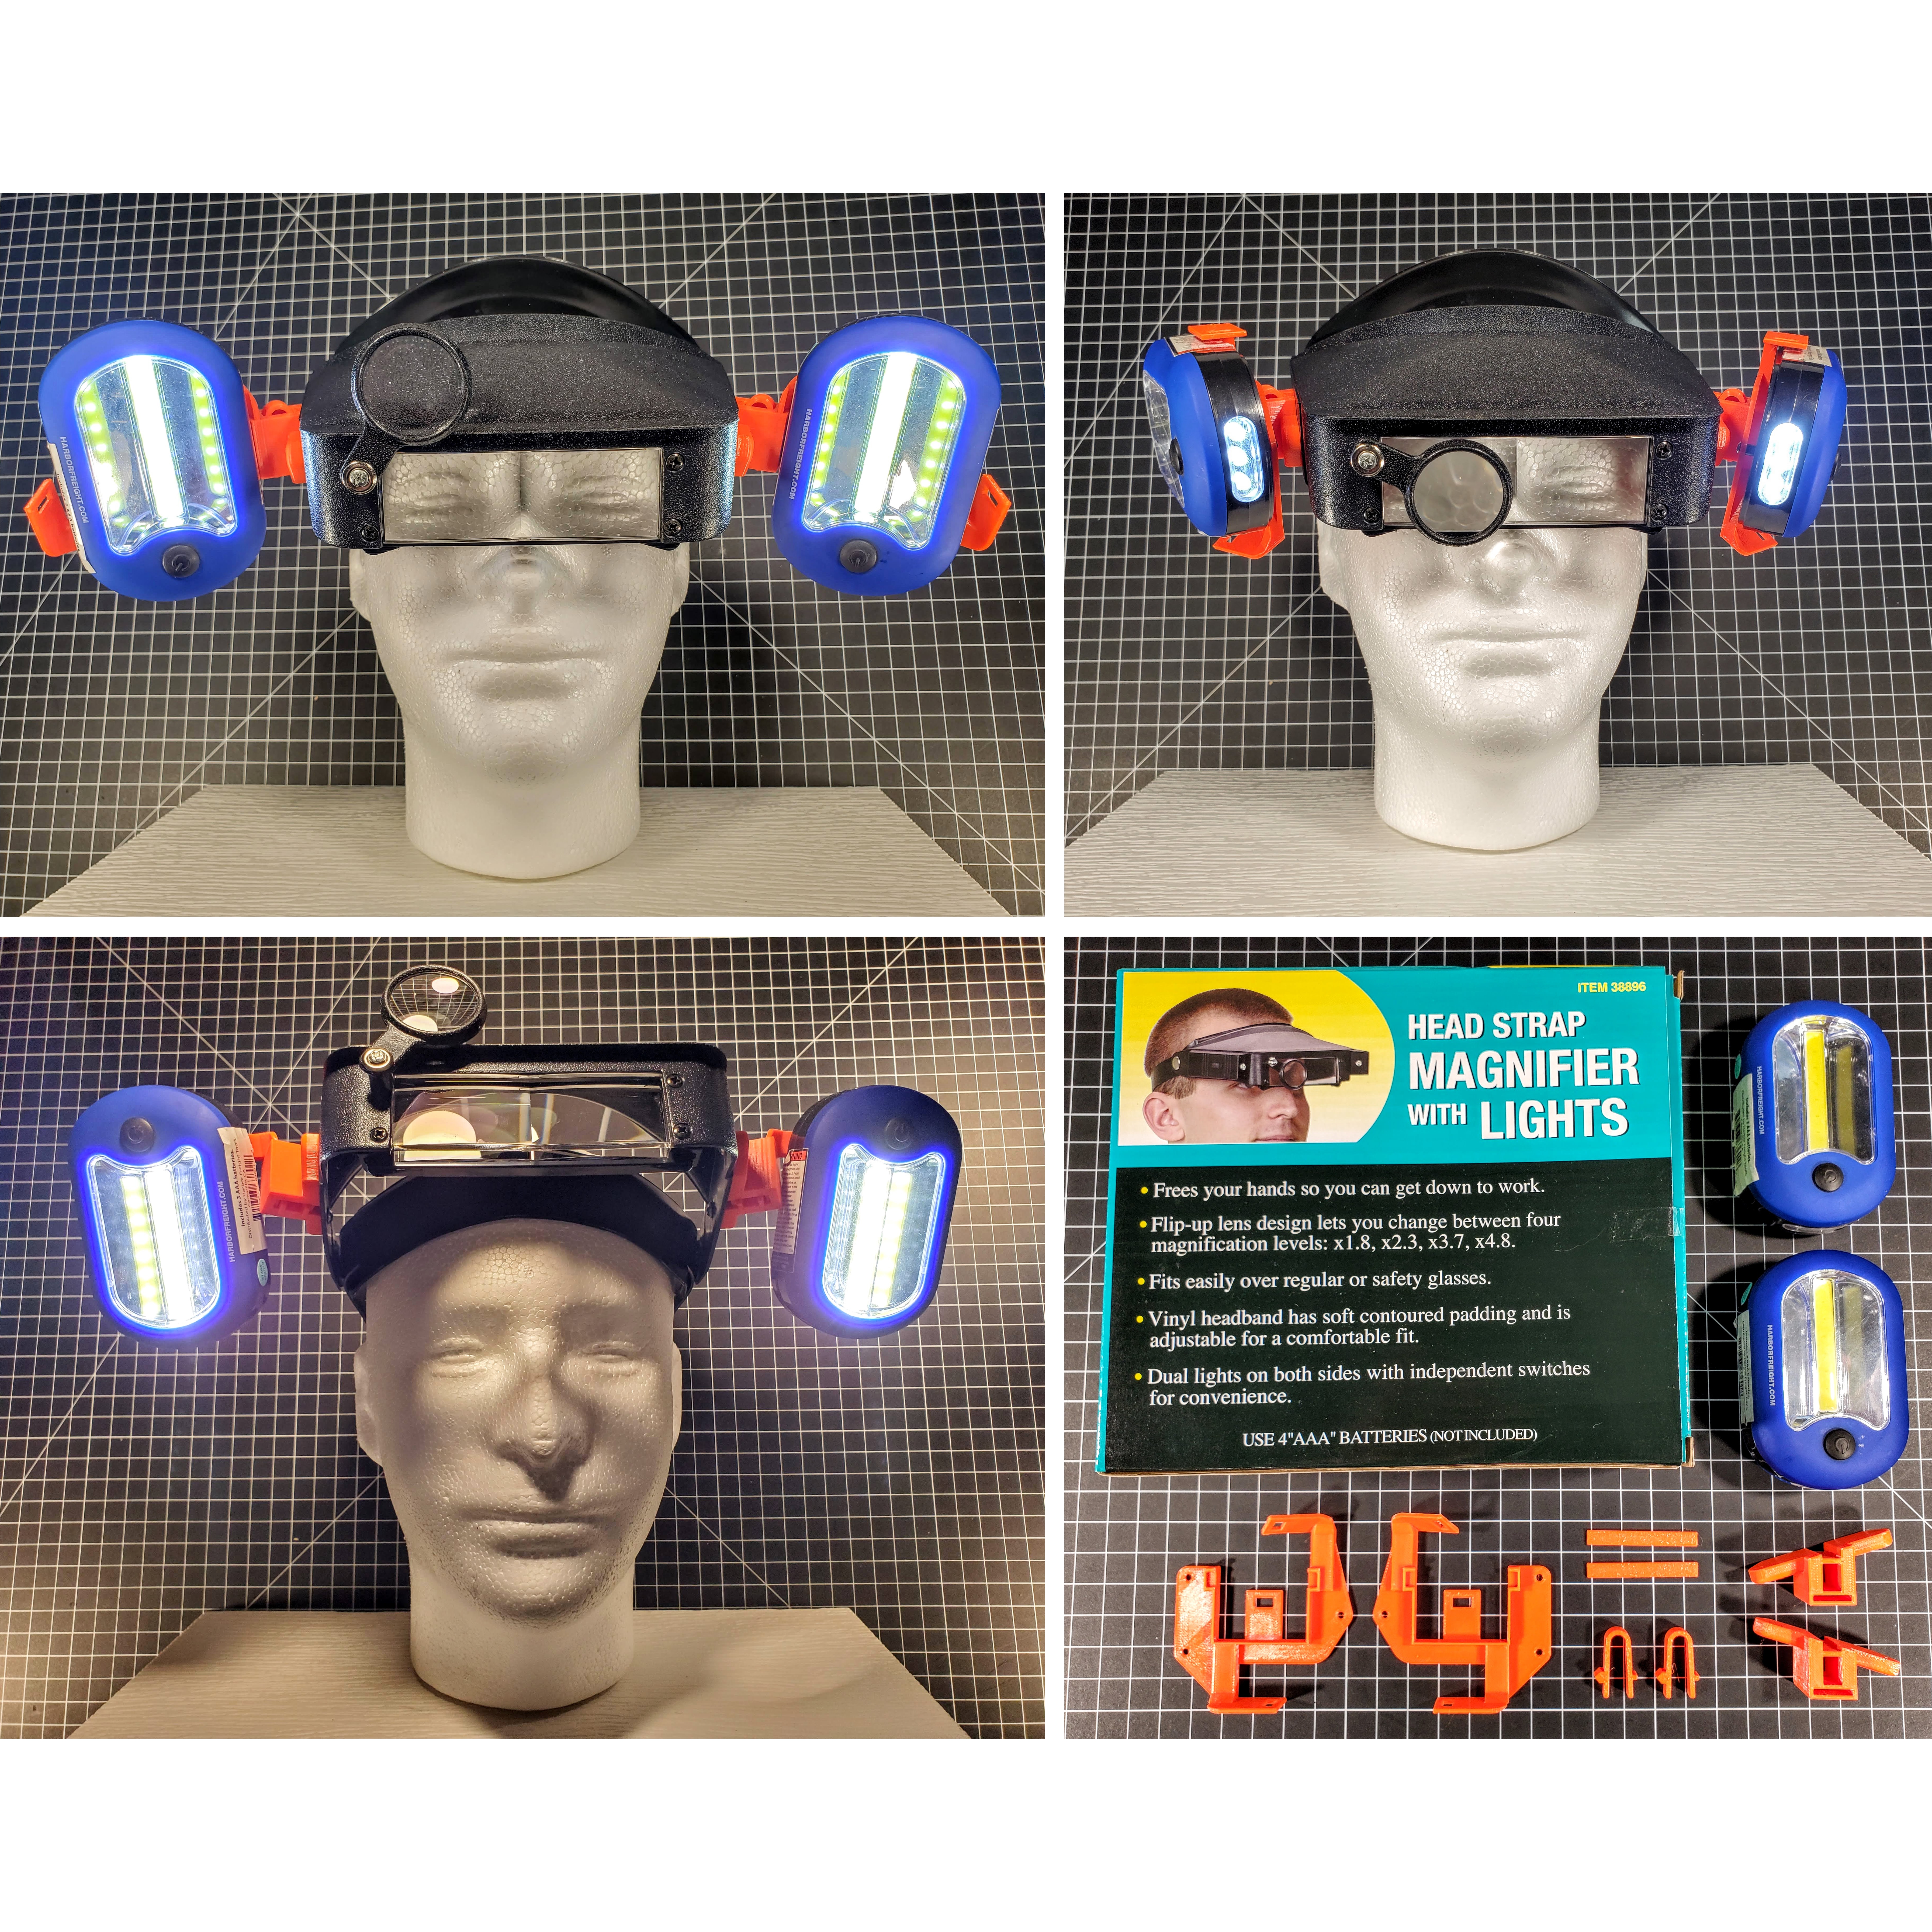
<p>It seemed that I could have either good light or good magnification, but not really both at the same time. While trying to use the terrible incandescent lights supplied on this head strap magnifier and also holding one of these flashlights, it occurred to me to combine both. The result is a DIY headlamp with great light coverage and magnification options, and flexibility for use in several ways.</p><figure class="media"><oembed url="https://youtu.be/tMQECsKoONI"></oembed></figure><p>The 3D printed backplates have 3 tongues designed to simply click in and out of buckles attached to the head strap visor - no buttons or tools needed. The 3D printed spring holds the tongue with just enough force to prevent the light from falling out but not enough to make removal difficult. This design offers 4 ways to use the head strap and lights:</p><ul><li>Floodlight with magnification</li><li>Spotlight with magnification</li><li>Headlamp for dark rooms or outside at night</li><li>Lightweight magnification with handheld flashlights</li></ul><h5>What You'll Need</h5><ul><li>1x Harbor Freight “<a href="https://www.harborfreight.com/magnifier-head-strap-with-lights-38896.html">Magnifier Head Strap With Lights</a>”.</li><li>2x Harbor Freight “<a href="https://www.harborfreight.com/144-lumen-ultra-bright-led-portable-worklightflashlight-63878.html">144 Lumen Ultra Bright LED Portable Worklight/Flashlight</a>”.</li><li>6x AAA batteries (if replacing).</li><li>3D printed parts:<ul><li>Left and right backplates.</li><li>Left and right buckles.</li><li>2x braces.</li><li>2x springs.</li></ul></li></ul><h5>Tips for Printing</h5><p>Open the 3MF file in PrusaSlicer. All the necessary parts are properly oriented and arranged. For strength and flexibility PETG is a good choice. The prints shown were produced with a 0.4mm nozzle and 0.2mm layer height. Fairly close tolerances are needed for the buckle click mechanisms to work properly.</p><p>The backplates shown were printed in Prusament PETG without supports. The braces are designed as separate parts to avoid the need for supports. Depending on your printer, material and settings you may need to add support for the tongue that overhangs. If in doubt, add one backplate in PrusaSlicer, rotate 90°, cut off the tongue, rotate back and test print just that area. </p><figure class="image image_resized" style="width:25.03%;"><img src="https://media.prusaprinters.org/media/prints/80755/rich_content/ed5198fb-00fd-406c-ade6-38cd993af112/test-print.png#%7B%22uuid%22%3A%22a3103942-36ba-445e-8f5d-10df267da0ee%22%2C%22w%22%3A1300%2C%22h%22%3A824%7D"></figure><h5>How to Assemble</h5><p>1. Remove 3 screws from each flashlight. Cut the stickers on either side and discard the backplates. Replace the batteries if needed.</p><p>2. Insert a brace into the slots in each 3D printed backplate.</p><p>3. Install a 3D printed backplate on each flashlight using the screws removed in step 1. The first layer faces out.</p><figure class="image image_resized" style="width:50%;"><img src="https://media.prusaprinters.org/media/prints/80755/rich_content/09c95574-c21e-47ff-9c9d-5d6fc73c0c07/20211016_155155.jpg#%7B%22uuid%22%3A%22ff0804a7-9d9f-4a18-b0bd-07f26362ff07%22%2C%22w%22%3A2802%2C%22h%22%3A3024%7D"></figure><p>4. Insert a 3D printed spring into each buckle such that the rectangular tab engages the slot in the back of the buckle. </p><figure class="image image_resized" style="width:50%;"><img src="https://media.prusaprinters.org/media/prints/80755/rich_content/6d2b2733-45ea-433c-9f04-eaafb00e3495/20211016_161000.jpg#%7B%22uuid%22%3A%22d6c45306-faa0-4f83-b735-6d366dd4d942%22%2C%22w%22%3A2748%2C%22h%22%3A2606%7D"></figure><figure class="image image_resized" style="width:50%;"><img src="https://media.prusaprinters.org/media/prints/80755/rich_content/70f07d7d-af77-4df6-ac81-7ec77d0d0d2f/20211016_162103.jpg#%7B%22uuid%22%3A%22beb99a62-1fd9-45df-9152-1e32c42fb723%22%2C%22w%22%3A3220%2C%22h%22%3A1600%7D"></figure><p>5. Remove the 2 screws that attach each light to the head strap. Discard the lights.</p><p>6. Attach the buckles to the head strap using the screws removed in step 5. The open end of the spring faces downwards. Tighten the screws in the center of the slots. Avoid over-tightening. </p><figure class="image image_resized" style="width:50%;"><img src="https://media.prusaprinters.org/media/prints/80755/rich_content/bd040bcc-6928-4119-ae72-92c4411f647e/20211016_164240-1.jpg#%7B%22uuid%22%3A%22758c48db-245a-40df-88f2-ddbfc6a9f616%22%2C%22w%22%3A2572%2C%22h%22%3A2197%7D"></figure><p>Congratulations! Your multifunction DIY headlamp magnifier is ready to use.</p><h5>Adjustments and Troubleshooting</h5><p>To aim the lights up or down loosen the screws holding the buckles, adjust within the slots, then retighten the screws.</p><p>The click mechanism works more smoothly after several uses. If necessary, remove the spring and lightly sand the point that engages the tongue.</p><p>In my experience the rivets holding the visor to the head strap are usually manufactured with enough friction to support this heavier upgrade. To guarantee the visor stays put you could add a strap that runs over the top of the head, attached to the visor, and Velcro at the back of the head strap for adjustability.</p><h5>Product Warranty</h5><p>Voided, I assume. It is possible to reassemble the head strap and flashlights.</p>
With this file you will be able to print Head Strap Magnifier + Super Bright Flashlights + 3D Printed Parts = Multifunction DIY Headlamp with your 3D printer. Click on the button and save the file on your computer to work, edit or customize your design. You can also find more 3D designs for printers on Head Strap Magnifier + Super Bright Flashlights + 3D Printed Parts = Multifunction DIY Headlamp.