Heat-set insert press
prusaprinters
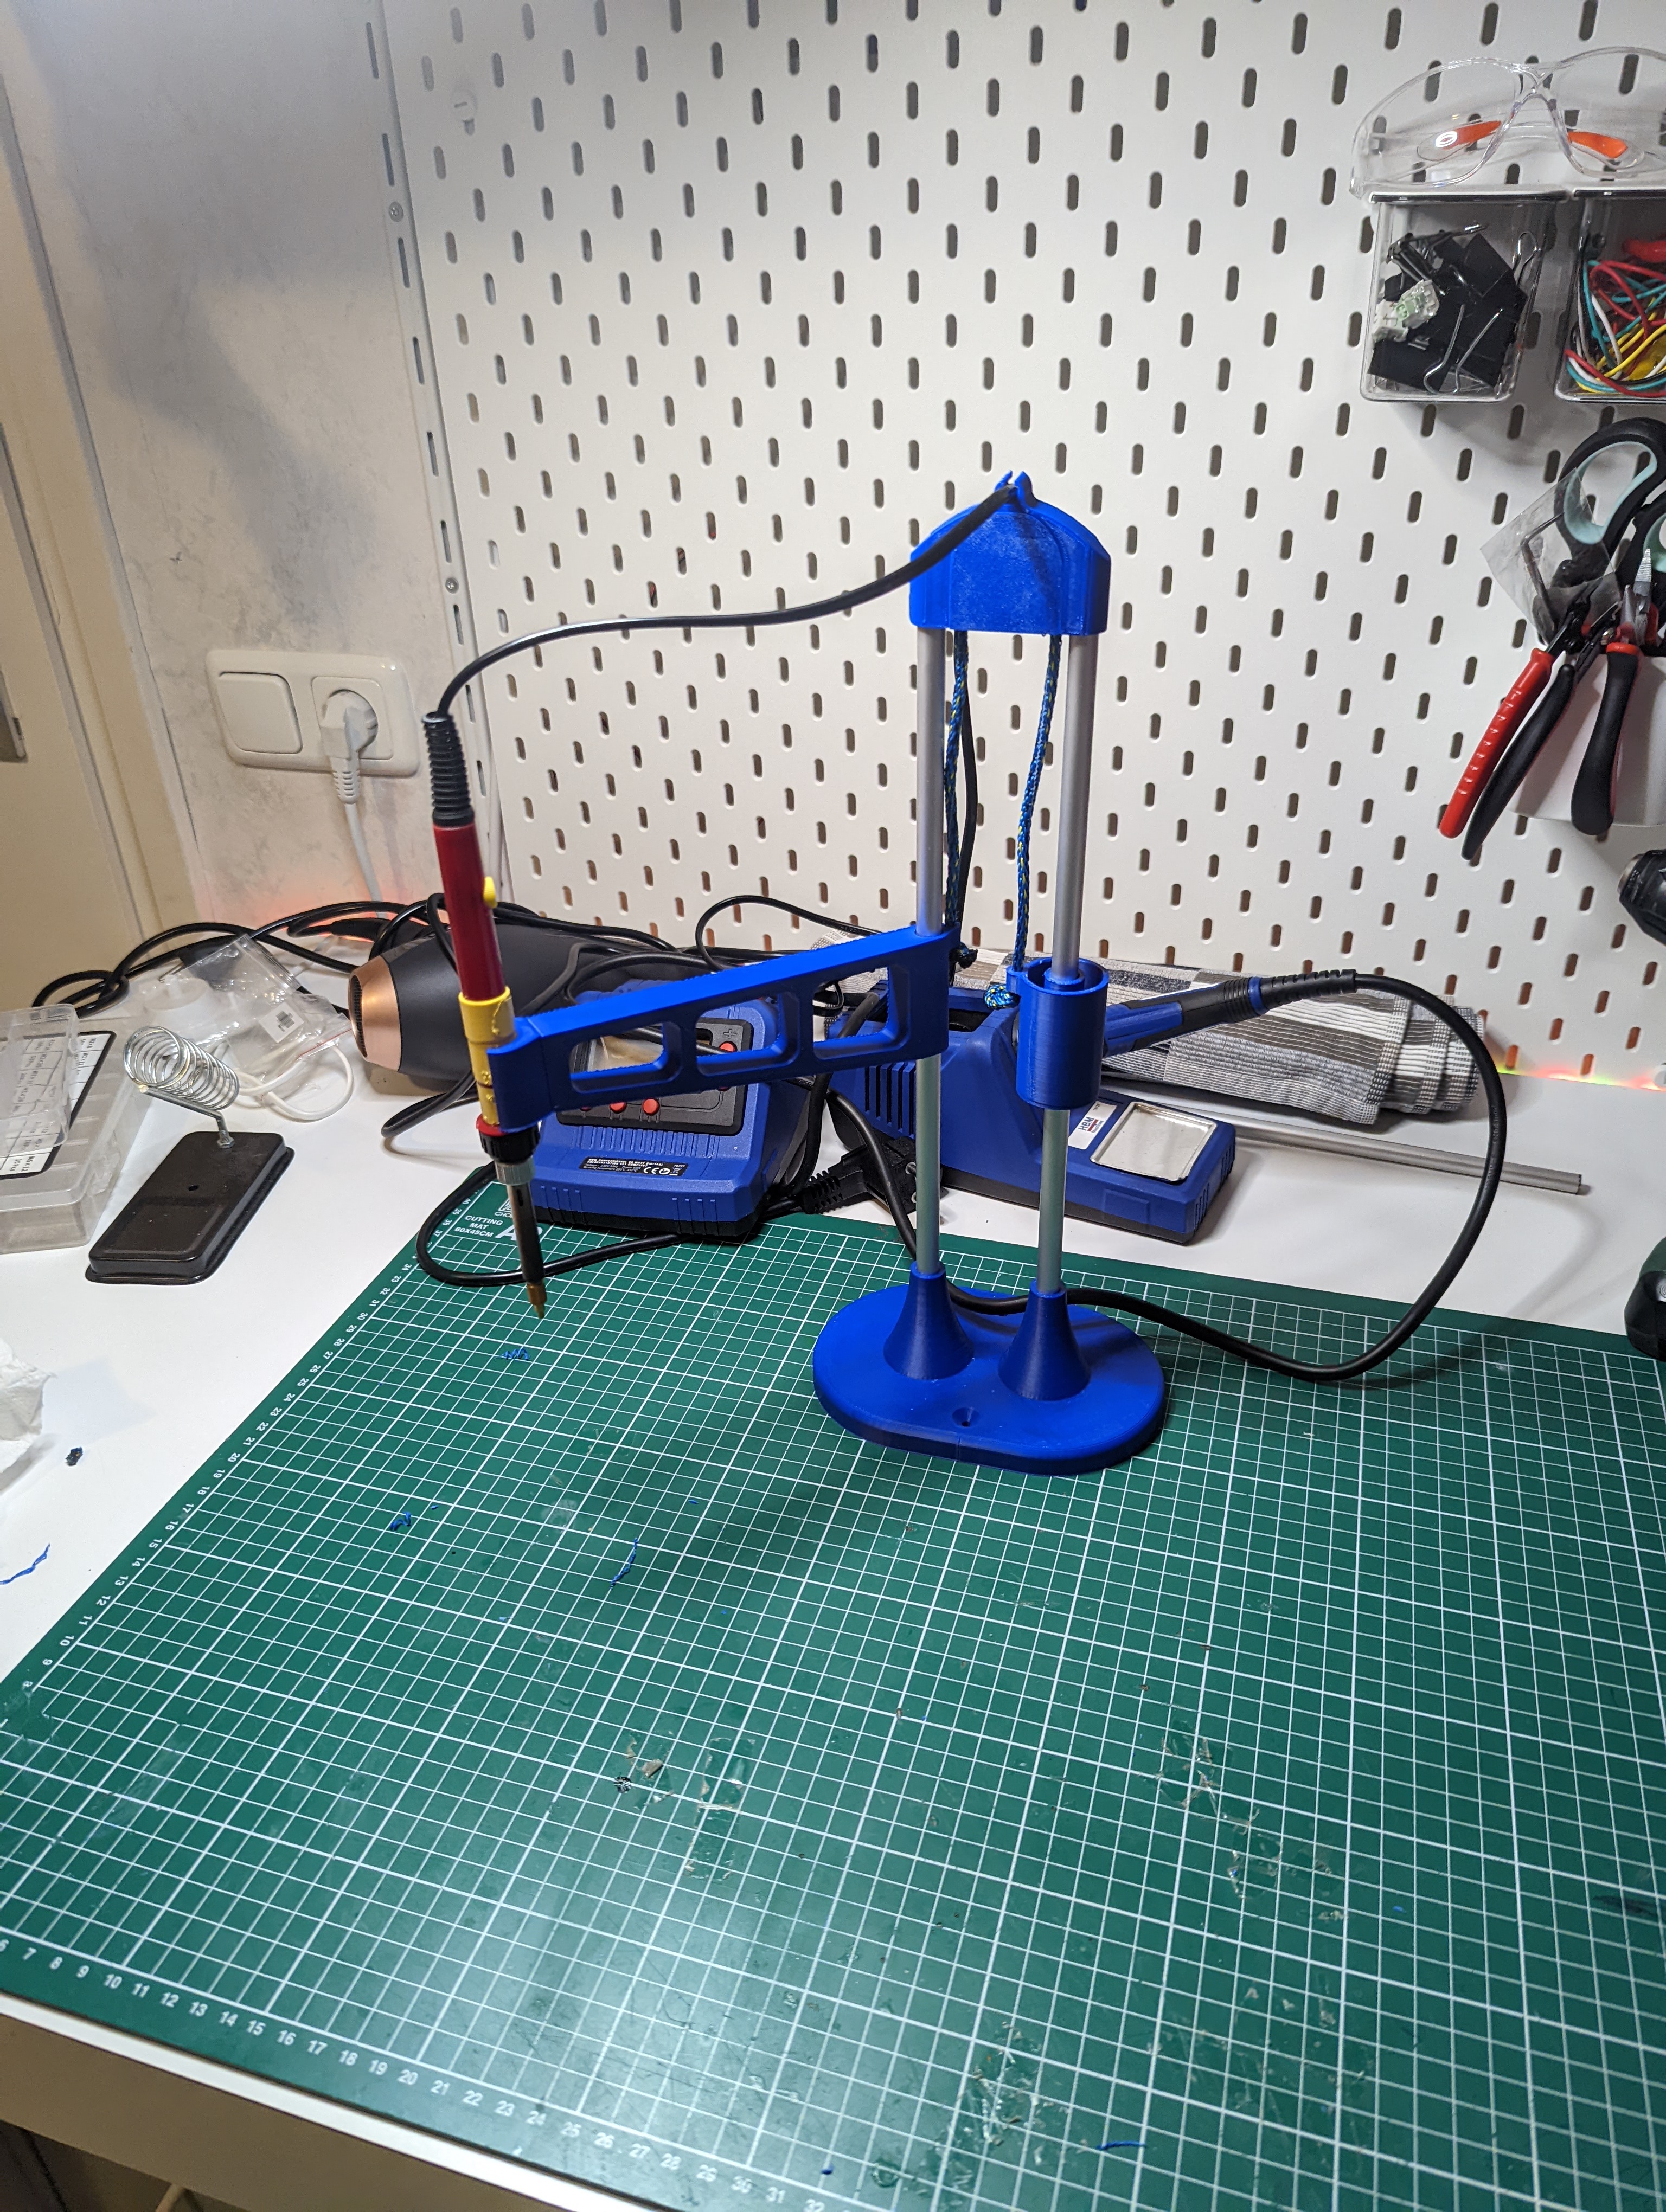
<h3>Introduction</h3><p>I wanted to build a quicky and dirty heat-set insert press, but most models online required alot of non-printed parts(mainly wheels and aluminium extrusions), so I decided to build my own version using only a aluminium rod and a bearing. Optionally 2 heat insters and 2 screws can be used to make the soldering iron holder detachable.</p><h3>Parts list</h3><p>2x 10mm diameter rod, the lenght can vary of the rods.</p><p>1x 608 ball bearing</p><p>weights, I used 15mm inner, 28mm outer diameter washers.</p><p>a piece of string, max 4mm diameter</p><h5>Optional</h5><p>2x M3 heat-set insert</p><p>2x M3x8 SHSC</p><h3> Build</h3><p>After printing all the parts, start by pressing the two bearing guides onto the bearing. Install the two rods into the baseplate, and insert the carriage arm onto on of the rods. Tie one end of your string to the carriage arm, and inert the other end through the counter weight and put the it on the other rod. Install the pully body onto the top of the rods, and with the string on the bearing, insert the bearing into the pully and put the cover on. Lastely cut your string to lenght and tie a knot on the counterweight, and fill it with weights. </p><h3>Changelog </h3><p>28-8-22 - uploaded initial design V1.0</p>
With this file you will be able to print Heat-set insert press with your 3D printer. Click on the button and save the file on your computer to work, edit or customize your design. You can also find more 3D designs for printers on Heat-set insert press.