Helicopter
thingiverse
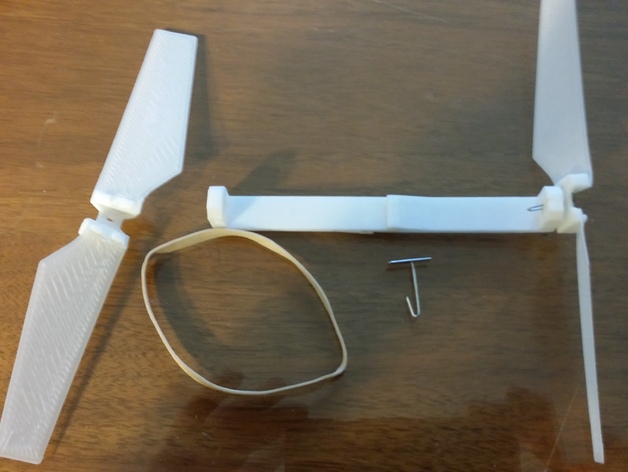
Dual rotor, rubber band powered helicopter. Instructions This is designed to successfully print on a Printrbot Simple. No overhangs, or support material. Print one of each part, with the exception of the rotor blade... Print 4 of those. The body is in two pieces, and snaps together. Rotors snap to the rotor hubs. The helicopter will fly snapped-together. But, it will loosen quickly if you don't glue the pieces in place. Testors plastic cement works really well. To assemble, you'll need a straightened paperclip (cut in half) and a rubber band. Bend each piece of wire into the shape shown in the picture. The rotor hubs will be held securely, but loosely in place by the rubber band, which is looped over the wire hooks. They should be able to freely rotate. A small droplet of 3in1 oil helps. Use a thick rubber band that does not pull the rotors too tightly together. I've found the unit will fly to the height of our second floor ceiling if wound approximately 50 revolutions. Note that that all of the pointed rotor edges are aiming downward. Once wound, hold the bottom hub between your forefinger and thumb. Hold the top rotor by the tip of one blade. Release the top first, and the bottom second. This will keep the helicopter pointed upward as it flies out of your hands. Good luck and have fun!
With this file you will be able to print Helicopter with your 3D printer. Click on the button and save the file on your computer to work, edit or customize your design. You can also find more 3D designs for printers on Helicopter.