Helicopter - rubber band powered
thingiverse
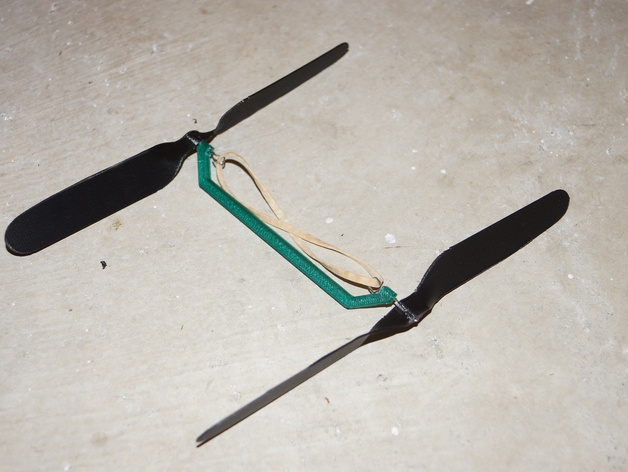
A fun little flying model helicopter. As simple as it gets! Two propellers held apart by a body and a paper clip, and powered by a rubber band. Quick to print and build and really easy to get it flying. I made the propeller design as an upright flat so that it prints quickly without needing support. The pitch on the propellers is added after printing by heating and bending. http://youtu.be/ShZxD3JiJlY Instructions I made the propellers with ABS but PLA should also be fine (but more likely to break if the helicopter crashes into anything hard). Keep the body light - I used 2 perimeters and 20% fill. The propellers are very thin - I used a 2mm brim to help keep the ends stuck to the print bed. They are 200mm long so should just fit diagonally on a 150mm square print area. I found that the small holes closed up on the first layer and I needed to open them up with a 1mm drill. Note there is a second hole just off-centre that goes about half way thru the hub. Unfold a paper clip to use as the propeller shafts. You could use piano wire (from a model suppliers store) if you want stiffer, more durable wire. Paper clip wire works OK for this model but it does bend easily in use. One straightened paper clip gives enough wire for two propellers. Bend 3mm on one end thru 180° to make a hook that will fit into the off-centre hole when the wire is fitted to the propeller. Fit a shaft into each propeller. You can add a drop of glue to keep it there but it shouldn't really be necessary. Now you need to bend the propellers. I used a fan heater to warm the centre section. If your propellers are PLA you could trickle boiling water over the centre section. When warmed - twist the narrow section between the hub and the wider part of each blade. Twist about 60°. Once you have both blades twisted, do the same with the second propeller - taking care to ensure that the second propeller is a mirror image of the first one. They need to be opposite so that they will both lift when spinning in opposite directions. I used a belt sander to radius the square corners of the propellers but you can skip this step if you are keen to get flying. Slip the propeller shafts thru the holes in the ends of the body and bend the shafts to make hooks to suit the rubber band. Fit a rubber band or two and wind it up - holding one propeller and the body and then spinning the loose propeller. To launch - decide which way up it needs to be (see the video clip) and let it go. Experiment with the strength and number of rubber bands and number of turns to get the best out of it. Be warned - flying it indoors may mark ceilings and walls. Flying it outdoors it can easily end up on the roof. Have fun.
With this file you will be able to print Helicopter - rubber band powered with your 3D printer. Click on the button and save the file on your computer to work, edit or customize your design. You can also find more 3D designs for printers on Helicopter - rubber band powered.