Hero Me Gen5 mod for Ender 5 Plus with Micro Swiss Direct Drive and Hotend
thingiverse
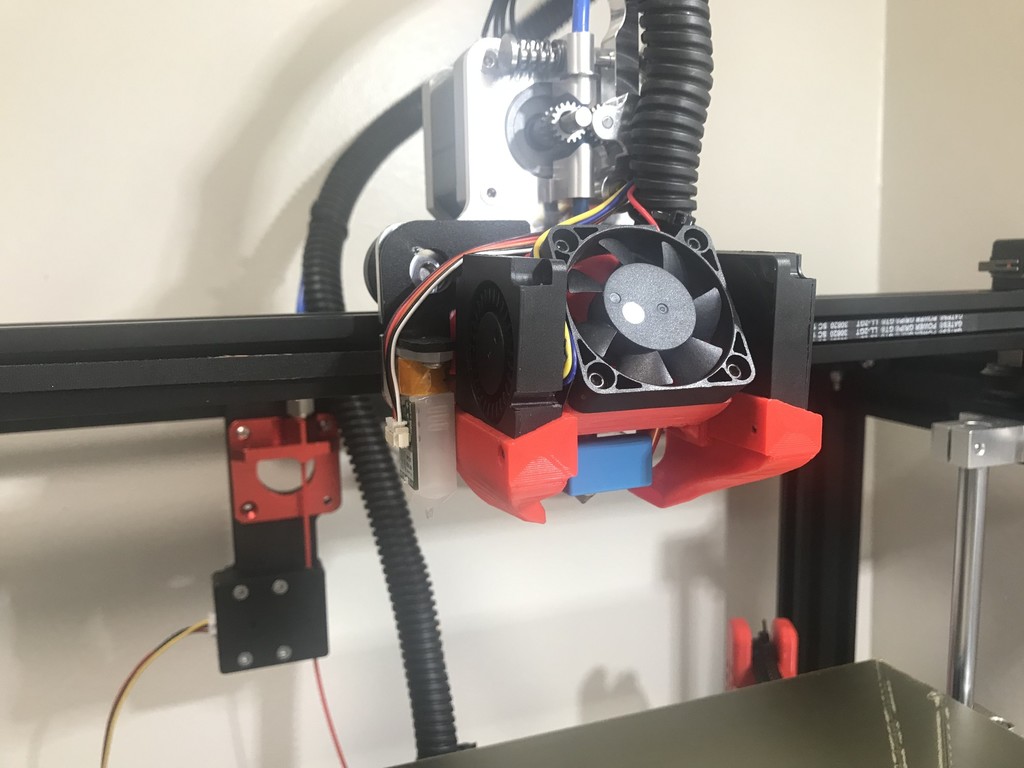
<h1>Mod of the Hero Me Gen 5 for the Ender 5 Plus with the Micro Swiss Drive.</h1> <p>Only the base has been customized to the Ender 5 Plus Micro Swiss Drive. the 2 ducts are the original ducts from the Hero Me Gen 5 suite</p> <H2>Main design features:</H2> - Only works with 4010 fans - Works great with a 360x360 print area. - No clash with the front bar - No clash with the corners (plastic brackets) - No clash with the vertical guide holders - No vibration in the X bar - No offset of the Nozzle - Y distance between Nozzle and BL Touch increased by 2.5mm approx (to be controlled after print with a caliper) - X distance between Nozzle and BL Touch unchanged - Original BL-Touch support bracket re-used - Proper clearance between the hot-end and the base <H2>MTO:</H2> <p>You only need to print these 3 parts (the base and the 2 ducts). No additional part from the original HeroMe Gen 5 package is required.</p> <p>Additional (not printed) parts needed to install this cooling system:</p> - 1x 4010 fan 24v (identical to the original one) - 4x M3 nuts - 1x M3 8mm - 1x M3 8mm flat head - 2x M2 12mm <p>Everything else you'll need is reused from original parts removed for the installation.</p> <H2>Install Tips:</H2> - Depending of the 4010 fan design you've got, you may have to rework after printing the ducts the area where the fan sits. - Preferred installation sequence: 1. Install the direct drive and hot-end first, 2. The base + BL-Touch bracket with 3 screws: Top bracket hole and the 2 holes on the right. Use the flat head screw for the bottom right hole. Note that the 4 nuts must be pre-positioned before installing the base 3. install the ducts: using lowest base holes and the highest duct position works great for me 4. Rotate the BL touch bracket to install the BL-Touch. the BL-Touch connector must be positioned outside. 5. Put the bracket back in position and install the last (4th) screw on the base to fix the bracket position - during this operation you may have to push slightly down the belt end 6. Install the fans. use only one screw for the duct fans
With this file you will be able to print Hero Me Gen5 mod for Ender 5 Plus with Micro Swiss Direct Drive and Hotend with your 3D printer. Click on the button and save the file on your computer to work, edit or customize your design. You can also find more 3D designs for printers on Hero Me Gen5 mod for Ender 5 Plus with Micro Swiss Direct Drive and Hotend .