(Hero Me Gen6) Improved Gantry Adapter - Ender 3 v2 for E3DV6/Revo Six/BMO, type A
thingiverse
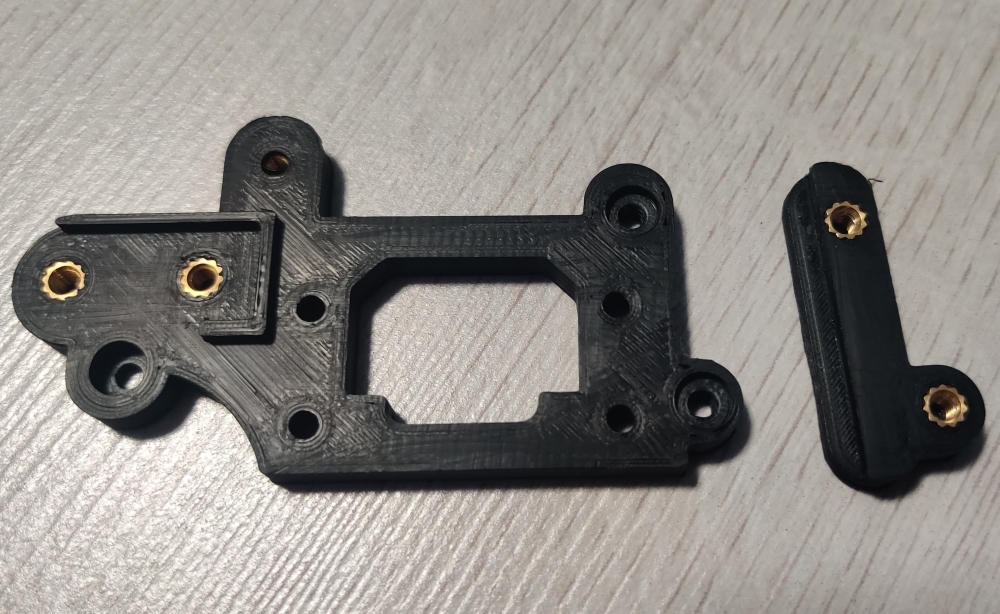
Please note that there are various different version of the mounting plate for the ender 3 v2 x carriage. I posted a picture of the one on my printer, if yours is the same type, then this will work for you. Not quite sure what the other variations look like. So, it might still work, or it might not. I edited this to fix what I personally see as a design oversight of the "Ender 3V2 E3DV6-Revo Six-BMO Gantry Adapter A" part for the hero me gen 6 hotend kit, august update. Maybe I just couldn't figure out how to properly mount it, but still. Everything worked fine for me with the stock hotend version of the adapter, but I was struggling to get a good, stable mount with the E3D V6. The main issue I was facing was that in particular, the top left and bottom right screws would be meant to go in holes in the carriage that are larger than m3 and not threaded. so they'd need to be mounted using a nut on the other side, which is a bit awkward to do every time. The mounting hole in the bottom right in particular, I couldn't for the life of me figure out how to use at all. The hero me assembly order makes it so that as soon as you assemble the hotend shroud onto the mounting plate, you won't be able to reach that caphead anymore as it'll be blocked off. furthermore, putting a nut on the other side (while technically possible, clearance-wise) would be impractical, as to properly tighten it you'd need to remove the X carriage from the gantry every time. I tried to mount the plate to the carriage without the bottom right mounting screw, but I believe this led to increased vibration of the nozzle during certain movements. This wasn't an issue with the stock hotend, as its use of the default mounting points would keep everything stable, but as the E3D v6 is meant to be supported only by the hero me itself I noticed a change in print quality for the worse. What I changed in this mounting system: - Added a bit more support to the base mounting point, to try and make it a bit more sturdy - Changed the top left mounting point to take a M3 heat set threaded insert instead of a caphead. It's now meant to be mounted with a caphead from the back of the X carriage plate (same way you'd do with the screw for the stock shroud) - Reworked the right-side mounting system to make use of a modified clip. The new clip is included in the files and replaces the original mounting clip. Instead of locking only the top right corner with one screw, it will now run along the entire right side of the carriage, and be fixed in place with two screws instead. I believe this should offer a good compromise between increased stability and ease of assembly. - Removed the original bottom-right mounting point as it serves no purpose anymore - Raised the top border of the plate's central hole by 0.2mm. I found that it was resting a bit too close to the stock hotend's threaded sockets, which led the whole assembly to sit in place at a very slight angle, which in turn kept the nozzle from being parallel with the bed (tilted very slightly towards the right) - While I was at it, I enlarged the bottom of the hole with a cutout to match the hole in the metal plate sitting behind it. I doubt it makes any difference, but the cutout is there so might as well use it.
With this file you will be able to print (Hero Me Gen6) Improved Gantry Adapter - Ender 3 v2 for E3DV6/Revo Six/BMO, type A with your 3D printer. Click on the button and save the file on your computer to work, edit or customize your design. You can also find more 3D designs for printers on (Hero Me Gen6) Improved Gantry Adapter - Ender 3 v2 for E3DV6/Revo Six/BMO, type A.