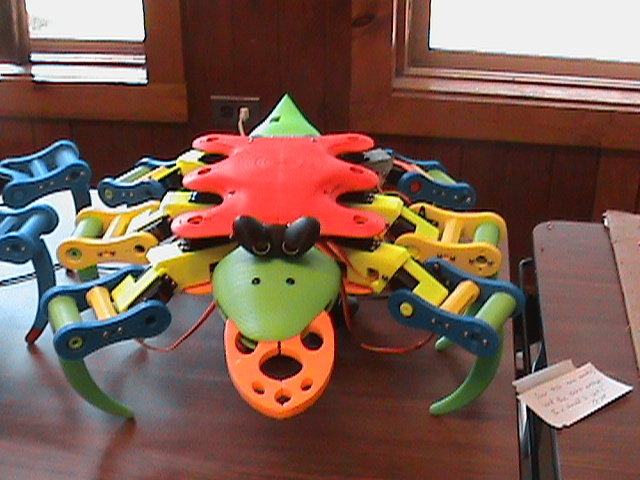
Hex-a-pod I made for a Boy Scout High Adventure, 18 boys and 5 adults each built one of these arduino based hexapods.
thingiverse
This is a remake of Barry Scott's Hexapod Ant, many thanks to him! I spent about 500 hours converting his design into this, I was learning Blender as I went ;-P Also a thanks and credit goes out to danf at: http://astromech.net/forums/forum.php for helping me get Bill Porter's ( http://www.billporter.info/2010/06/05/playstation-2-controller-arduino-library-v1-0/ ) PS2 Wireless Controller arduino library working. I recommend printing most of the parts at 35% to keep weight down, except the upper leg and mid leg pieces, I print them at 65% due to them needing to be strong, the 4 main body parts at 20% to conserve weight . Also the Jaws I print at 100% and am thinking of upgrading them to accept a metal servo horn, the servo connection is certainly a weak spot. Our arduino code is available and open, feel free to use it and if you improve it please upload your code for all to share: https://github.com/ari86m/Kinne-Hexapod-Software RGB LED's in his nostrils and ultra-sonics in his eyes , still need code to operate at this time. You will need to print: 1 head 1 tail 1 body spacer both tops and both bottoms and then we fused them together using acetone since we build our hexapods from ABS. 6 upper legs 6 mid legs 6 leg spacers 6 feet 6 servoless legs 12 lower legs 1 eyes 1 Arduino mount 1 left pincher 1 right pincher 53 parts in total, about 120 hours of printing, depending on your printers speed. BOM: 1 arduino mega 1 5300 mAh battery or close 1 9volt battery 13 MG996 servo's 1 PS2 wireless controller 1 ultra-sonic sensor We made our own arduino shield to plug the servos into. We run the arduino off the 9volt battery and the servos off the 7.3 or 7.4 volt 5300 mAh battery to avoid problems with noise electrically. The Body Tops can use either the plastic servo horns or a metal ones, I recommend metal servo horns because I have stripped some plastic ones causing a broken leg ;-P Since this was a Scouting project, we had a budget. We spent about $175USD for everything except the plastic for the 3D printers. $5 servo's, $20 battery, $14 Arduino Mega, $13 PS2 Wireless Controller, the cheapest eBay has to offer. A better battery would be smart, but the rest works just fine. If you wish to add a third degree of movement to the legs you just replae the "servoless leg" with a "midleg" servo holder, they are the same. We used 2 degrees of motion to keep the osts and weight down. We had a Scout budget and when I did add the third servo to each leg the hexapod had a hard time with the weight. It may have been the fault of the cheap batteries we used, I am not sure. I will add wiring diagrams and advice soon. Some videos: https://www.youtube.com/watch?v=RH3sS--7Cvs https://www.youtube.com/watch?v=kSAhqxDhP_E https://www.youtube.com/watch?v=SAkhP33Q4Kg https://www.youtube.com/watch?v=KN3hOfVMdiU
With this file you will be able to print Hex-a-pod I made for a Boy Scout High Adventure, 18 boys and 5 adults each built one of these arduino based hexapods. with your 3D printer. Click on the button and save the file on your computer to work, edit or customize your design. You can also find more 3D designs for printers on Hex-a-pod I made for a Boy Scout High Adventure, 18 boys and 5 adults each built one of these arduino based hexapods..