HIC TECH Prusa mendel I3 y axis belt tensioner
thingiverse
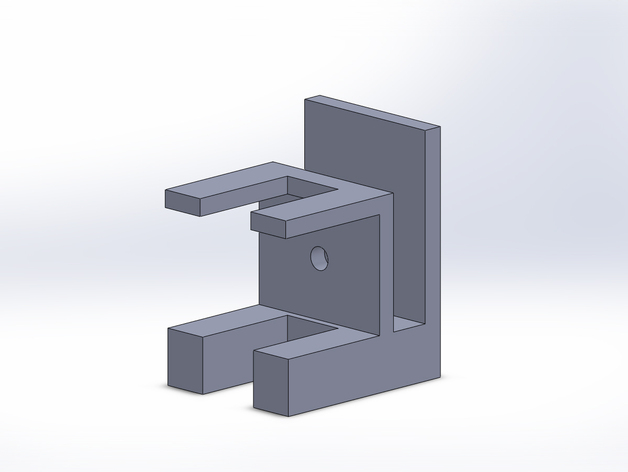
So there are many x-axis tensioners out there but i never found a y-axis tensioner that fit the HIC TECH prusa I3, so i made one..... This part aims to help keep the y-axis belt nice and tight, to help maintain the highest quality prints all the time. Now all you need to do this is to spin the nut to the right located on the front side of the part (the screw and nut i used was a #6 1 inch machine screw and nut, but im including the sdlrpt file so you can adjust it for any size screw you want). but be careful with adding too long of a screw because then the carriage may bump into it when printing, but the 1" screw works perfectly fine for me. Hope this helps some of you and happy printing! Print Settings Printer: HIC TECH prusa I3 Rafts: No Supports: Yes Resolution: .2 Infill: 15% (you can go higher wouldnt go less than this) Notes: personally i'd print this with thicker walls (i did 1.2mm), but you can probably get away with a .8mm thickness Post-Printing tools/items needed ok so you're going to need a few things 2 screws and nuts: i used a #6 1" screw for the tightening screw and a 10-24 x 1 1/2" for the roller (one is what tightens the y-axis and the other is what holds the roller for the y-axis belt) a drill with drill bits that is big enough for your screw to fit through without the threads catching into the plastic, but small enough so the head doesnt slip through. carboard or washers: for keeping the belt straight and from slipping off sand paper step 1 using the sandpaper, clean up both parts so that they slide on each other smoothly step 2 make the holes bigger if needed by using the drill, and place base part into position. (which would be in the middle) step 3 using the hole in the front as a guide, drill a hole through the front HIC TECH piece, and see if your screw will fit. you may need to slide the base piece out of the way a bit and use a bigger drill bit to allow the screw to go through uninterrupted. Now you can put the head of the screw in the front or in the back, personally it was easier to put the head of the screw in the back and place the washer in the front step 4 slide the tensioner part into position and put first the 2nd screw perpindicular to the other one (so that it sticks out, so you can feed it through all the holes in the base part and the base of the printer) then the belt, the belt roller, and the washers or cardboard, on the screw going left/right across the front. look at the pictures if this confuses you step 5 now all you have to do is reset the band under the carriage, and then tighten the screw, but make sure when you reset the band under the carriage that you put the screw as far out as it can possibly go, then tighten the screw/bolt. this way it wil give you 3-4mm of tightening space for the future.
With this file you will be able to print HIC TECH Prusa mendel I3 y axis belt tensioner with your 3D printer. Click on the button and save the file on your computer to work, edit or customize your design. You can also find more 3D designs for printers on HIC TECH Prusa mendel I3 y axis belt tensioner.