Hictop Prusa i3 - X Axis Carriage
thingiverse
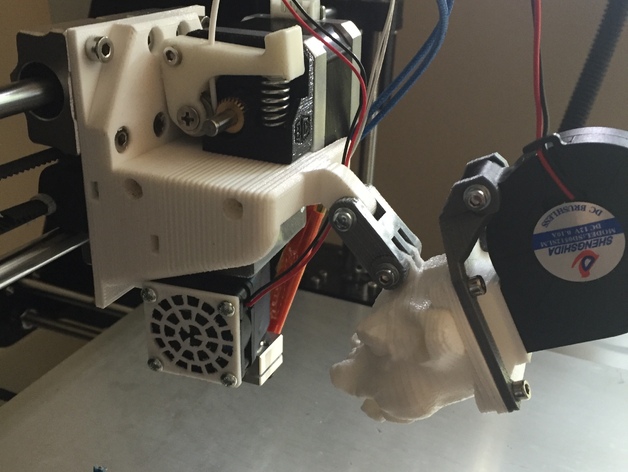
New Update 9 Feb 16 I've uploaded my 3rd and (hopefully) final version of this design. I've printed and installed the final version which contains alot of adjustments making things fit together much better. There shouldn't be any need for any kind of post-processing anymore. This finally represents what I imagined a finished product for this to be, I hope it helps you as much as it does me! This is an adaptation for the Hictop Prusa i3 to use the E3D V6 Extruder. This is my first forray into designing parts for my printer. I have already been successfully using a previous version of this setup very successfully and this corrects most of the issues I had with it as well as adds some visual flair. I DO use a piece of PTFE tube from the motor to the E3D. It fits directly in the hole underneath the extruder motor and should be cut flush. This is meant to work with Hictops stock extruder motor assembly. But feel free to adjust the .stl as you see fit This works in conjunction with these things Dragon Fan (Friggin Awesome!) http://www.thingiverse.com/thing:26310 Blower fan conversion http://www.thingiverse.com/thing:1146509 Print Settings Printer Brand: RepRap Printer: Hictop Prusa i3 Rafts: Doesn't Matter Supports: Doesn't Matter Resolution: .1 Infill: 60% Notes: I reuse alot of screws from the Hictop carriage, but I used some other odds and ends to make it work. This first print was using PLA and so far after a good 24 hours + of printing its has been spectacular. I do plan to upgrade to a more heat resistant plastic for version 2.
With this file you will be able to print Hictop Prusa i3 - X Axis Carriage with your 3D printer. Click on the button and save the file on your computer to work, edit or customize your design. You can also find more 3D designs for printers on Hictop Prusa i3 - X Axis Carriage.