Hictop Right Side X & Z Axis Lift Screw
thingiverse
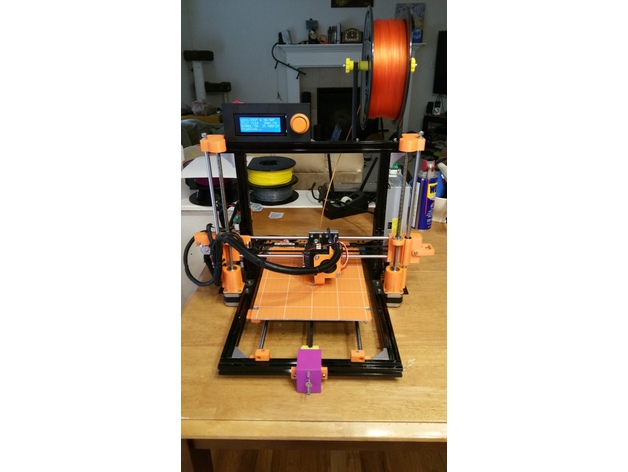
I do not have a picture with this installed on my printer. I did install it on my other hictop i3 printer that Is sold to someone. It worked perfectly. The picture of the orange and black printer has it installed. Sorry it is the only picture I have. When assembled the Tension Arm pulls on the bearing that the x axis belt wraps around. when you tighten the m3 screw going through the Tension arm and the spring the belt will loosen. When you loosen the m3 screw that goes through the tension arm and spring the belt tightens. It worked better than I thought. I am waiting until I have all of the parts printed for my new printer I am building until I install this upgrade on my printer. When I do I will create detailed assembly and installation instructions. Here are some instructions if you want to try and install it before I get a chance to make the better instructions: On the Z Right Printer inside the block sticking off of the right where the spring is, on the inside there is a M3 nylon lock nut that the screw that goes through the tension arm and spring screws into. How you get the nut into the recessed hole for the nut is you need to get like a 60mm long m3 screw and push it all the way through. with a pair of needle nose plyers go through the left side of the Z Right Printer and screw the m3 60mm screw into the nut. Once you have it on the screw pull, pull the screw to the right and rotate it until it seats into the recess hole for the nut, then pull it to lock it in. Then you can remove the M3 60mm screw. Find a m3 screw that works with the spring and the tension arm. When putting the tension arm on I put a m3 fender washer between the Z Right Printer and the Tension Arm where they meet. you will notice a slot in the Z Right Printer where the tension arm slides against it. There are also m3 fender washers on the side of the screw head and nut. The m3 screw that goes through a m3 fender washer then the tension arm, z right printer with the belt bearing in the middle is a little tricky. Being as the bearing for the belt is made up of two bearings, I put a piece of blue painters tape around them to hold them together. You basically have to sew the m3 screw through the tension arm, the m3 fender washer, the z right printer, through the bearings, then through the other side of the z right printer, then the m3 fender washer, and finally through the other side of the tension arm capped off with another m3 fender washer and a m3 nylon lock nut. You can get the springs here:https://www.amazon.com/gp/product/B015CLFIYO/ref=oh_aui_detailpage_o09_s00?ie=UTF8&psc=1
With this file you will be able to print Hictop Right Side X & Z Axis Lift Screw with your 3D printer. Click on the button and save the file on your computer to work, edit or customize your design. You can also find more 3D designs for printers on Hictop Right Side X & Z Axis Lift Screw.