Hinged Hotend PCB mount for Artillery Sidewinder X1/Genius
prusaprinters
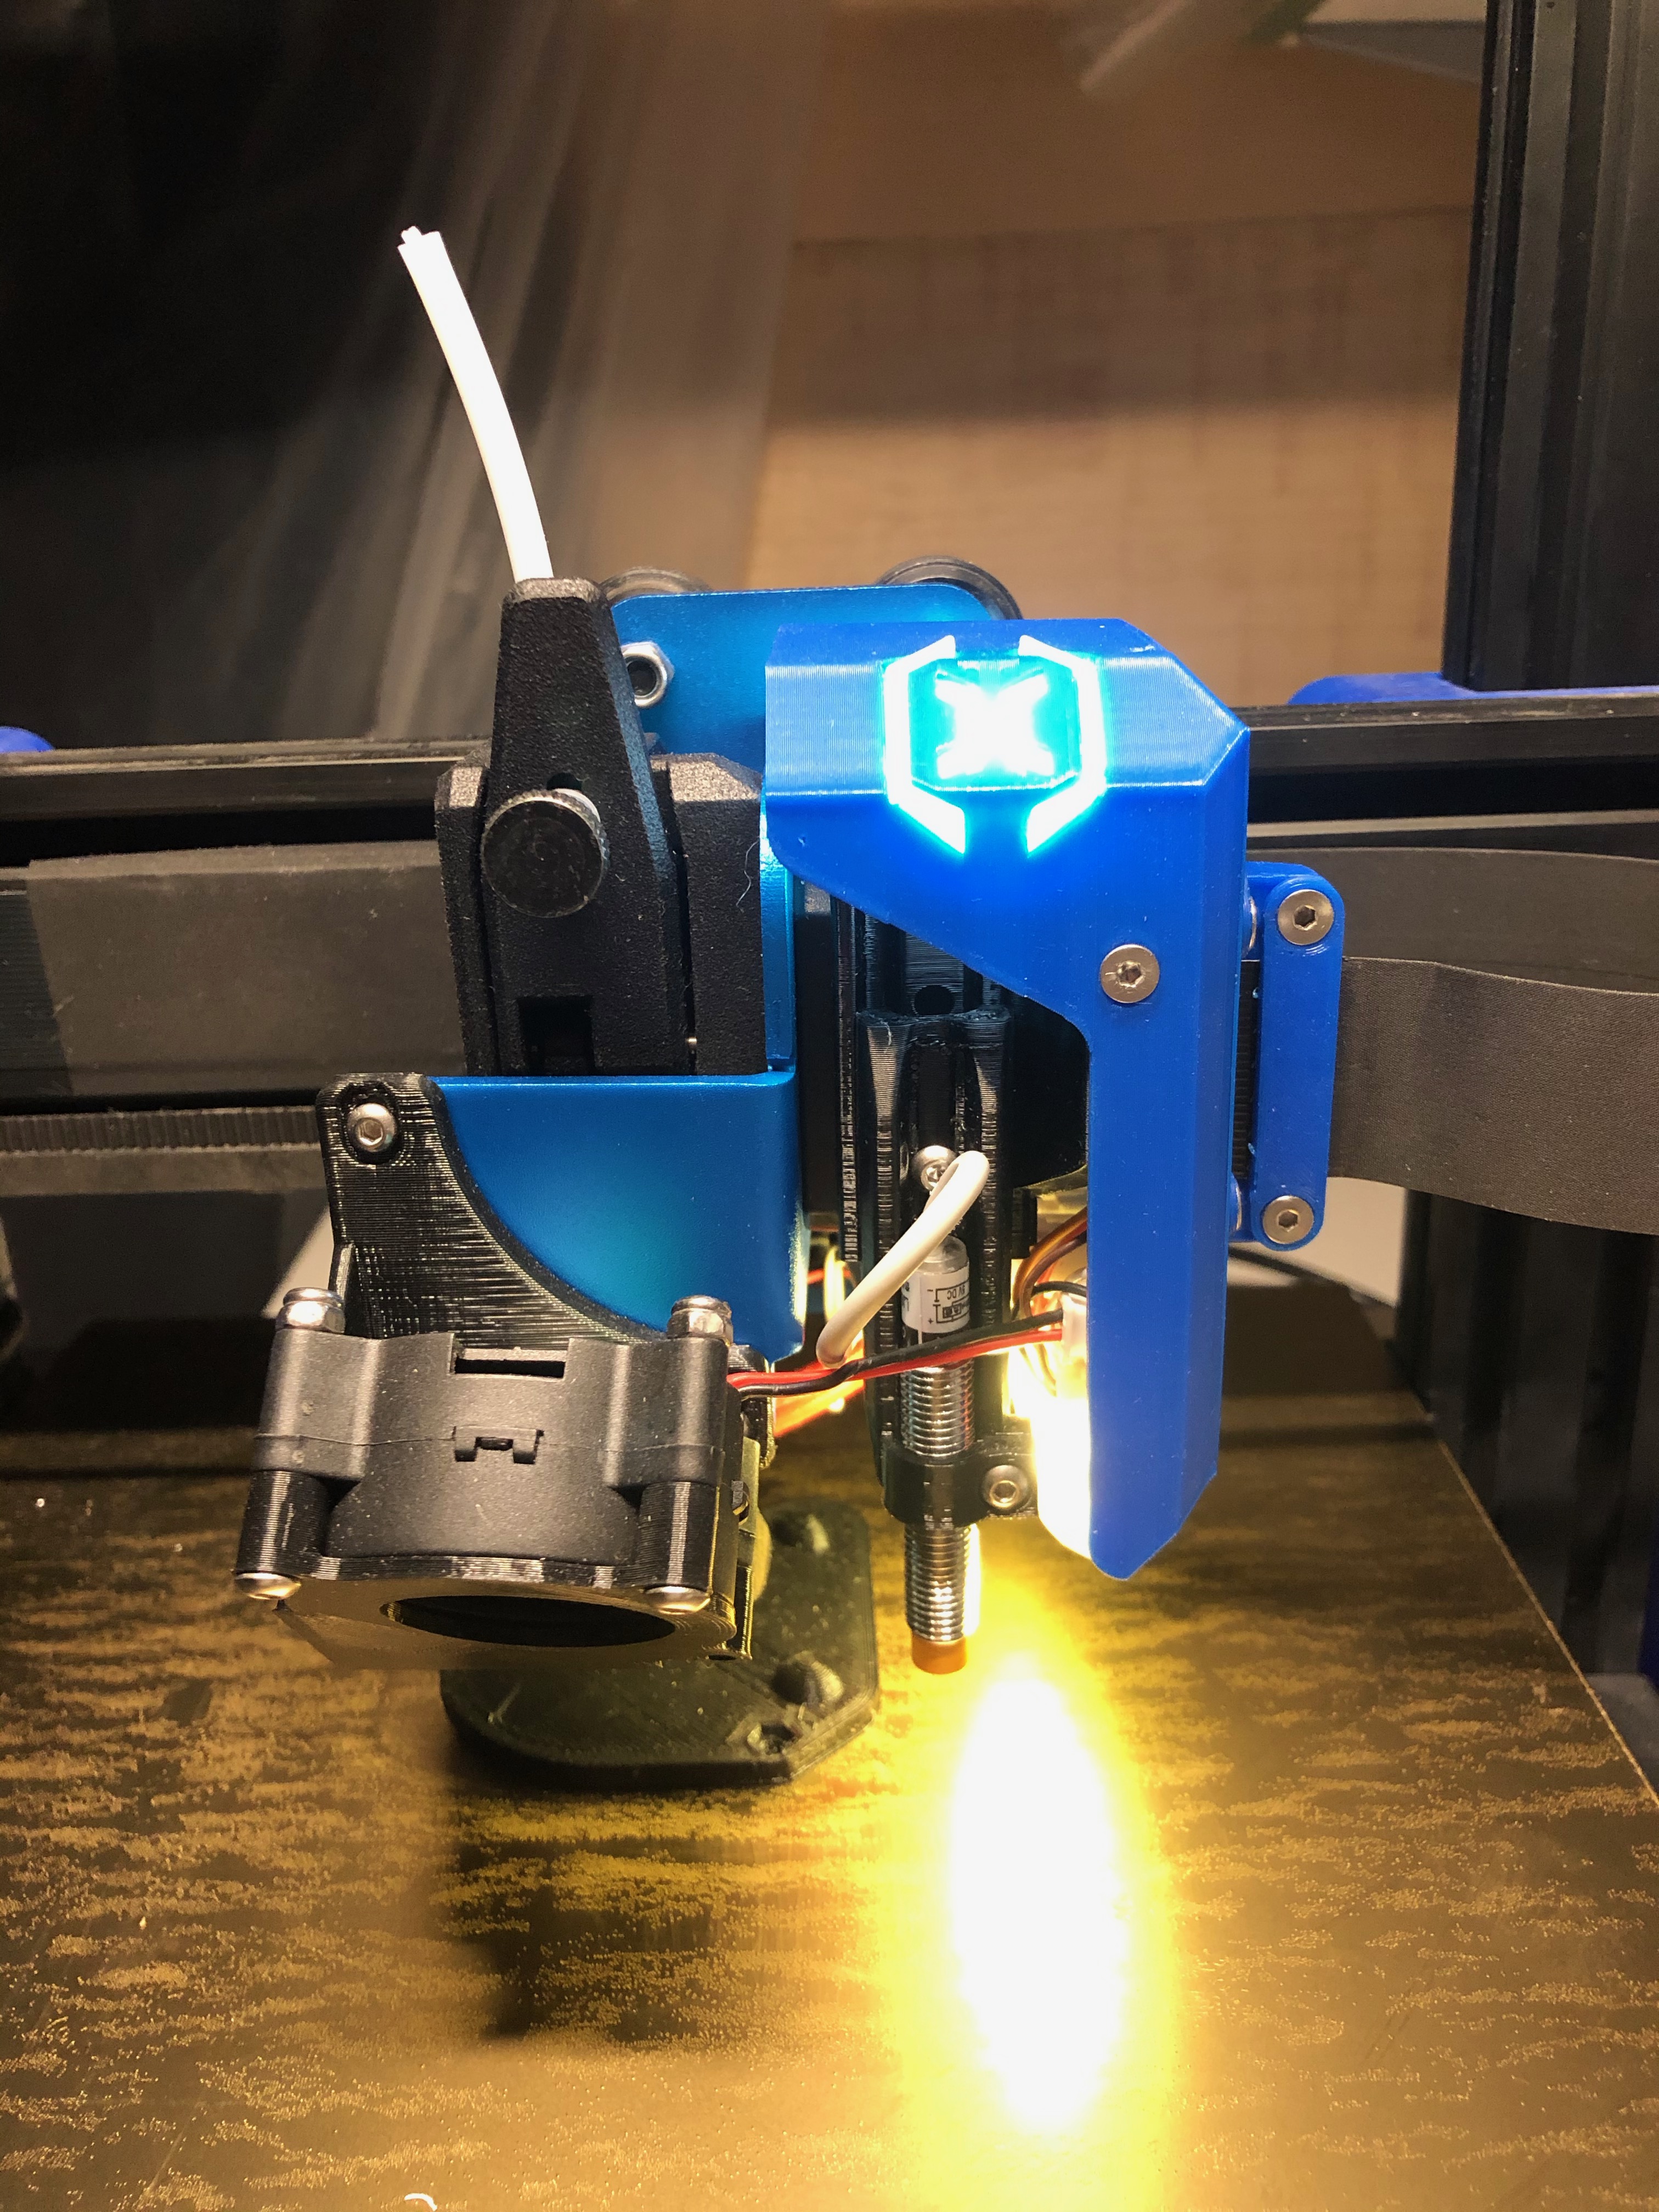
<p>I hate taking the carriage cover on and off when I need to replace a wire on the hotend. I designed this cover to allow you to hinge the PCB open, without removing the ribbon cable, for easy access to the hotend breakout PCB. This also allows a very robust ribbon cable strain relief.</p><p>Travel is limited to 70° to prevent pinching the ribbon cable when open, and there is a place to secure it closed with a small M3 screw. This also permits addition of an integrated Z probe mount, which I hope will be nice and secure.</p><p>Haven't printed this one yet to test! Will update as soon as I have a chance.</p><p>EDIT: I have given this a shot on my Genius, and it is not exactly plug-and-play! When I designed this, I had forgotten that the Genius stepper connector and BLTouch header are soldered on the opposite side of the board to the Sidewinder X1. To get it to work, I desoldered the original connectors and soldered in new headers on the other side of the board (pictured). The stock stepper wires were also not long enough to allow full extension of the cover; I will probably eventually wire up a longer harness.</p><p>As-is, it should work fine for the X1. I am working on a no-rework-necessary version for the Genius.</p><p>The latest version includes an optional Neopixel Artillery logo diffuser for the top of the cover, as well as a combination 5V LED strip light diffuser / wire retention element for the bottom. It also fixes an error in the previous version in which the hinge hole sizes were misaligned; this version uses a 45mm M3 bolt as a hinge pin.</p><p>It also includes mounting lugs on the stationary plate for affixing and ADXL345 accelerometer breakout for input_shaper tuning in Klipper.</p><p>EDIT 2021-02-23: Added STEP and F3D files. </p><p>EDIT 2021-02-23: Added probe-nozzle offsets image. According to CAD, for BMG: (40.3, -28.9); for stock: (29.7, -21.8)</p><h3>Print instructions</h3><p>I printed the structural components in PETG, and the two diffusers in natural PLA.</p><p>The top Neopixel diffuser takes a single Neopixel breakout, and requires that you use side cutters or an Xacto knife to remove and clean out the built-in supports in the shell Artillery logo cutout. I then mounted the Neopixel and diffuser with superglue.</p><p>To affix the PCB, I used M3 screws to attach the cable clamp using hex nuts on the inside of the shell. These nuts also function as standoffs for the PCB. (You might want to use Nylon nuts or washers if you have them.) I then used another pair of nuts to secure the PCB on the inside.</p>
With this file you will be able to print Hinged Hotend PCB mount for Artillery Sidewinder X1/Genius with your 3D printer. Click on the button and save the file on your computer to work, edit or customize your design. You can also find more 3D designs for printers on Hinged Hotend PCB mount for Artillery Sidewinder X1/Genius.