HK G3 Welding Alignment Jig Remix
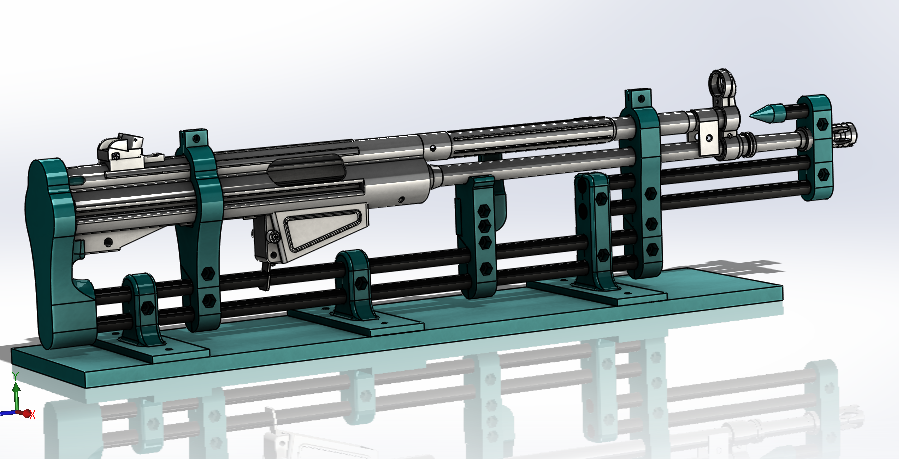
thingiverse
I've included NTBayerische's original text on this remix, but there was a flaw with piece 7-1 and piece 6 of which a screw in the piece obstructed 1/2" rod/dowels from going through the object. Some additional tips/references, Tractor Supply sells 1/2" x 36" steel rod in the welding aisle, I would recommend using that and cutting down the rod to pieces as needed. Unlike NTBayerische not everyone works in a commercial machine shop environment. Go to HarborFreight's website and look up SKU67624 it's still available and is exactly what you need to finish the jig. Original Text ----------------------------------------------------------- Hey all Here is a jig I created for help aligning an HK prior to welding cocking tube and trunnion into the receiver. It is meant to hold the assembly together similar to the jig formally available on RobertRTG. The entirety of this jig was made to contribute to the same community that gave me the G3 bending jig, sight alignment jig, and shelf alignment jig. I believe we are getting closer and closer to being able to produce fun things that go boom with much less than complex metal tooling and the like. This jig was used to complete a G3K clone, and had to be slightly fitted for perfect fit to factory parts (minor sanding if parts are out of spec, perhaps a ring of tape around cylindrical parts where the jig sits on them to provide a uniform clamping from the pieces). The parts are adjustable and should be able to be used with different lengths of builds. You could build a G3 length on the same jig as an HK51 with only minor adjustment in loosening bolts and sliding alignment pieces to different locations on the rods. The materials list are as follows: -1 Harbor Freight nut and bolt set SKU67624 (Best value for what you'll need, I used various washers from this kit. I believe all of the parts are set around M6x50 bolts and nuts) -some 3 ft lengths of 1/2" Aluminum rod (possibly wooden dowels if you can't find aluminum/ don't want to spend the money. I only used aluminum because it is generally more uniform in straightness and had some free scrap to take from work. If you are going to be using this for a G3K/HK51 build then you can use 26" or less rods) -less than a roll of ESUN PLA+ (depending on desired infill) Print Settings Printer brand: Creality Printer: Ender 3 Rafts: Yes Supports: Yes Resolution: .2 Infill: 40-80% Filament brand: Esun Filament material: PLA+ Notes: *I have the pieces flipped weirdly due to exporting from CAD and flipping in my slicer. Make sure everything is flipped flat side down when possible I printed these at 80% gyroid infill with 6 walls. Way too strong for what it needs to be and I assume cutting the infill in half should be fine Post-Printing Finish Parts Knock out support material in the bolt hole channels using a punch and mallet, use a small pry tool/chisel or similar to make sure the small slots are open enough for movement when bolts are fastened down. The nuts slip into the hexagonal insets, and the bolts mate through the parts with a flat washer in between the bolt and hole. I used a rubber mallet to tap the pieces onto the rods, starting with the butt-end side plate. I then loosened all the bolts so things would have more wiggle rooms, and once the rods were pressed into the butt plate, I then put the plate flat side down on the floor, and used the mallet to hammer press the rest of the pieces onto the rods. I used some wraps of tape around the places where the jig clamps the parts, to provide a little more of a secure clamping around the parts. If you'd like to clamp this jig to a work surface, the flats on the bottom of the uprights should be plenty of room to clamp to. I personally drilled holes through a board and used more bolts and nuts to secure the uprights to the board. Keep in mind, I made this to work with my parts, I'm not an expert of G3/CETME parts and tolerances, so if this doesn't fit your build perfectly, you can always shim things to take away gaps and sand pieces for better fitment if things are too tight.
With this file you will be able to print HK G3 Welding Alignment Jig Remix with your 3D printer. Click on the button and save the file on your computer to work, edit or customize your design. You can also find more 3D designs for printers on HK G3 Welding Alignment Jig Remix.