HO Scale Mukilteo Lighthouse with Lighted Rotating Beacon
thingiverse
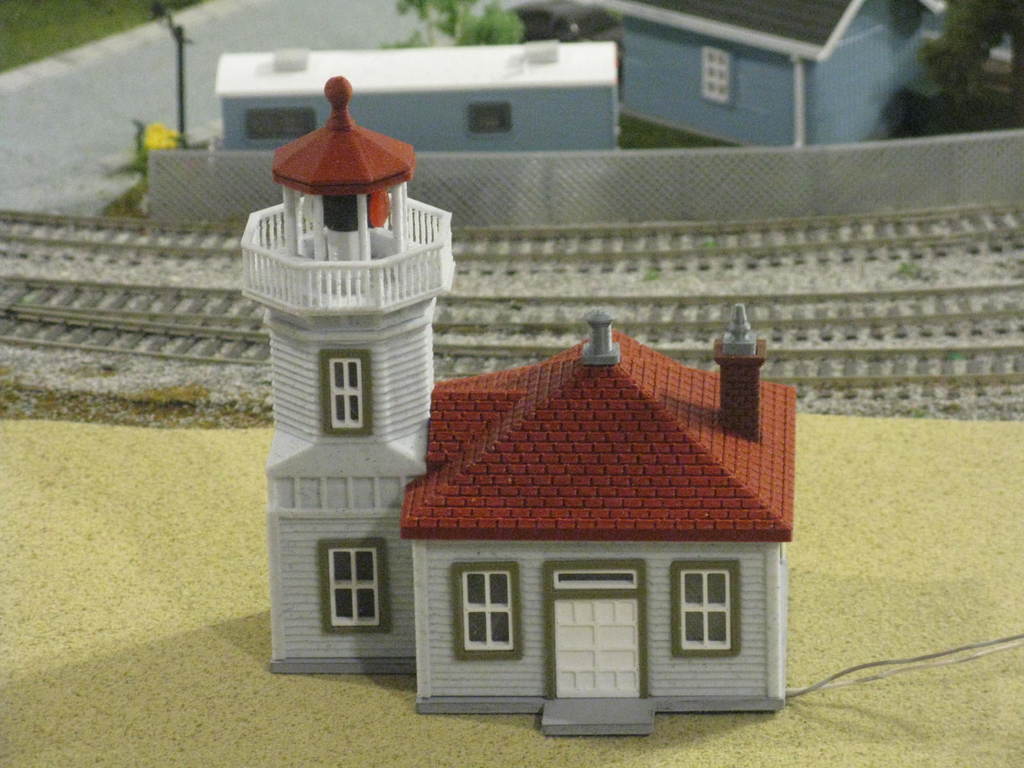
Video: https://youtu.be/XDJ9-vy3KgA This is my model of the Mukilteo Lighthouse in Washington State. I am especially pleased with it as it turned out really nice. I have it posted in two zip files. The first one is the lighthouse without a lighted rotating beacon, and the second one includes the parts to make it light and rotate. As always my models are free and tips are not necessary. But, they are fun. Kim 1. The non lighted/rotating Lighthouse is pretty self explanatory to assemble. 2. Before you set out to make one that rotates make sure you can get a motor. It’s fairly common but not always under the same name etc. I recommend you search for DC 12V Geared Motor, 40mm Electric Motor Gear. See the image named “Motor”. It needs to have the flat shaft to fit the pulley on. You will also need: a. One M3-6 screw to attach the pulley to the motor b. One 3mm Bright White LED c. A resistor for the LED. I used a 270ohm 3watt resistor. Nice and bright but I needed the 3watts to keep the resistor from getting too hot. d. Small gauge wire (I recommend solid vs. stranded) e. Transparent Red and Clear filament for the lenses f. Rubber belt. See the image “Belt” to see what I used. 3. Print all the parts before assembling anything. 4. Start by assembling all the windows, doors, and trim as shown in image 1. 5. Assemble the motor mounts by gluing the two halves together. Ensure you align the holes before gluing. 6. Attach them to the building as shown in image 2. They should align with the top of the walls. 7. The roof and the foundation are not glued on. The need to be free to install or replace the belt. See image 3 and 4. Test fit the roof and foundation to the walls. You want them to snap on and off and hold together fairly firmly. Glue the red and white lenses to the Light Shroud. See image 5. 8. Locate the motor in the lighthouse and use the pins to adjust the belt tension. The motor can be installed either direction for more adjustment options. The roof will keep the pins in place. 9. Attach the pulley with the screw. Use the pulley with the raised shoulder. See image 6A, 10. Assemble the other pulley to the shaft. 11. Place a belt around the shaft and pulley and put in place in the bottom of the tower. Leave the belt loose for now. Just make sure it’s around the shaft. 12. Carefully align and assemble the handrails to the braces below the handrail. 13. Test fit them on the shaft to ensure the shaft is turning freely. Little bumps will make the light rotate with jerks. 14. Feed the shaft through the handrails and deck. Choose where you want the human access opening to the light to be, rotate the handrails to where you want them and glue them on. 15. Using tweezers, attach the belt to both the pulleys. Yes, this is easier said than done, but with patience it will happen. 16. Test the motor, belt, and pulleys to ensure they are working smoothly. 17. Test fit the light shroud, (slides on easily and does not ride on the deck) and then glue the light shroud and lenses to the top of the shaft. Make sure it is level and straight. 18. Again test motor, belt, and pulleys to ensure they are working smoothly. 19. Align the light mount to the handrail posts and glue on. Make sure it’s right side up. See image 8. Your light mount will be hollow in the middle. 20. Prepare the LED as shown in image 7. Bend the leads over about 1/8” (3.2mm) from the light to enable the light to fit down into the light shroud. Identify the anode (+) side and mark it on the wire or something. Cut the leads short and solder the wires on. Leave them long enough to work with later. 21. Route the wires “similar” to image 8. Yours will pass through the light mount and handrail deck. Route them all the way down to inside the foundation. Ensure they will not drag on the belt. When everything else is completed you can glue the wires out of the way. 22. With the motor running and the light shroud turning, locate the LED down into the light shroud. Adjust it to where you like it and carefully glue the wires in place. The wires will route down along two of the handrail deck posts and be glued to them. The handrails and posts are fragile. 23. The tower roof does not get glued on either; in case you need to replace the LED. It should snap on. 24. Wire up the motor (it has a + mark on one of the tabs) the resistor and the LED. 25. Enjoy. Kim
With this file you will be able to print HO Scale Mukilteo Lighthouse with Lighted Rotating Beacon with your 3D printer. Click on the button and save the file on your computer to work, edit or customize your design. You can also find more 3D designs for printers on HO Scale Mukilteo Lighthouse with Lighted Rotating Beacon.