HO track clearance gauge
thingiverse
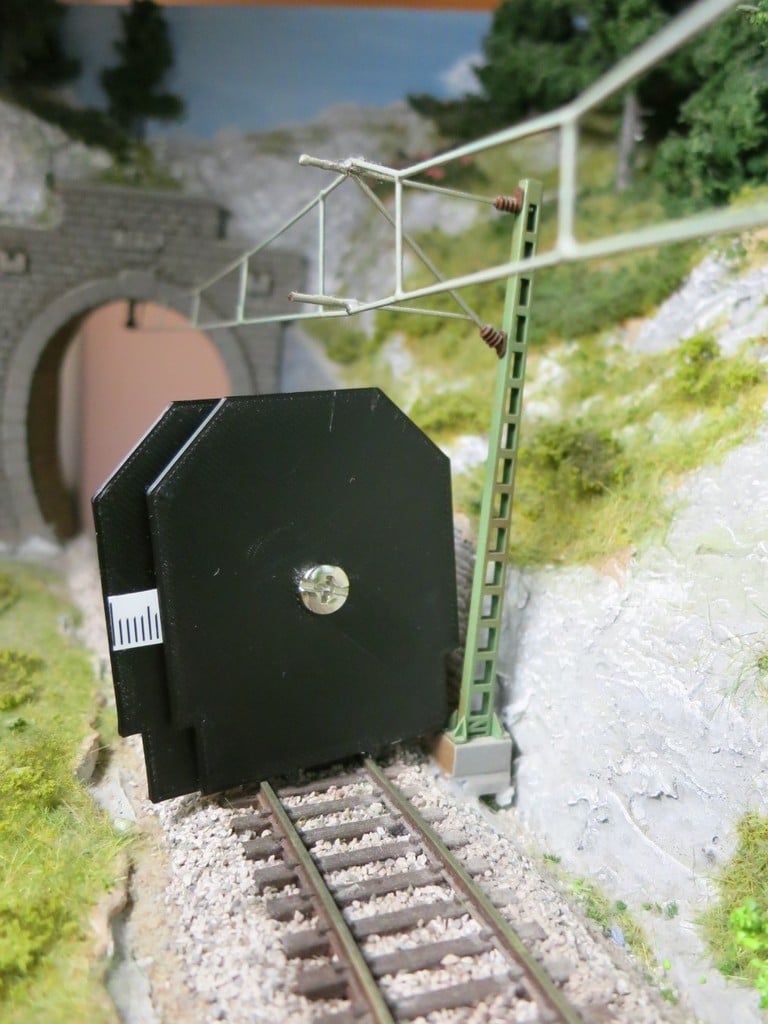
HO track clearance gauge This gauge allows you the check the lateral track clearance for HO (1:87) and is based on the European norm NEM 103 (www.morop.org). Print out the 2 shapes. The shape with the rectangular hole goes behind. On this shape, indicate a scale in mm (you can print one out and glue it or just trace 1mm spaced lines with a pen). The two shapes are attached together using a metal nut (diameter 4mm) and bolt. How to use the scale: you need to read the table that is part of NEM 103. For example, if you longest car on your layout is 28cm long (“group C” as defined by the NEM) and the radius of your curves is 60cm, then the back shape needs to be moved by 9mm. Once the spacing is correct, screw the bolt so that the shapes do no longer move. You can then slide the gauge (using the two bottom pins to centre it) along your curved track to ensure no object comes within the required clearance. For straight track, just use the front shape. This gauge can just be used to check the lateral track clearance – it does not work to place overhead catenary.
With this file you will be able to print HO track clearance gauge with your 3D printer. Click on the button and save the file on your computer to work, edit or customize your design. You can also find more 3D designs for printers on HO track clearance gauge.