Hobie Hawk Sailplane
thingiverse
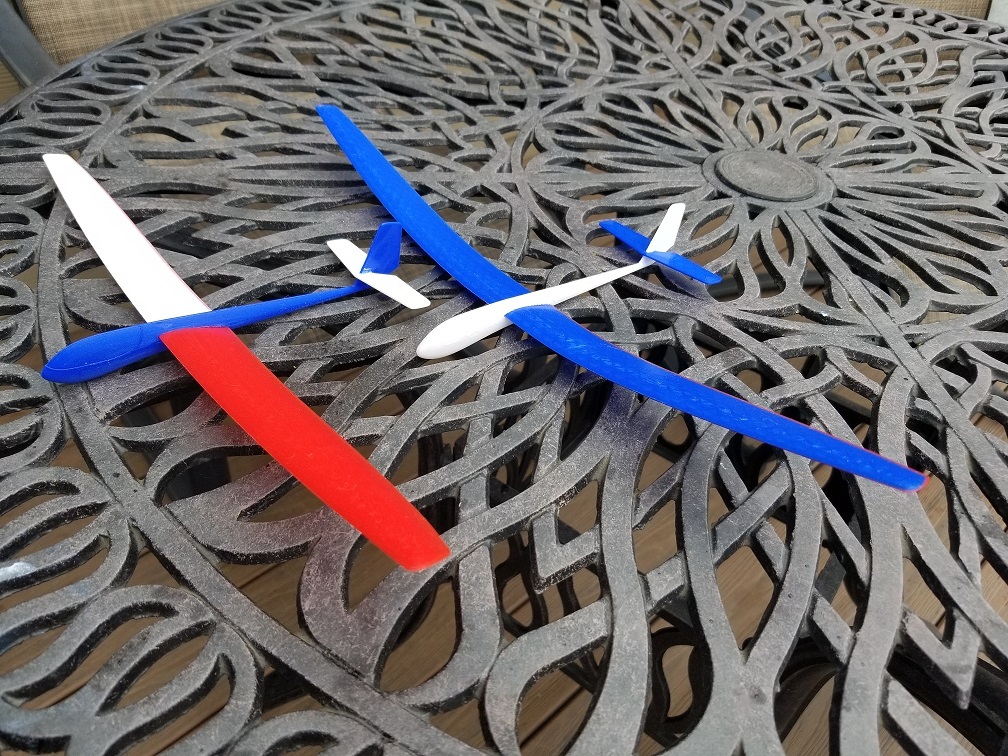
Hobie Hawk Sailplane Here is the second sailplane model that I made for fun and to share. It is a fairly scale version of the old Hobie Hawk sailplane from the 70's. Even though I've owned several Hobie Cat sailboats, I have never owned one of these but have always thought that it was the most beautiful model in the The fuse is created from a 3D scan of an actual hawk so the cross sections should be fairly accurate. There are two sets of wings. One is labeled "true". That is the actual wing shape with the under camber. It is very hard to print and make look good with the support lines so there is another set that has a flat bottom. The size is based on a the plane scaled to a 400mm wing span. It's a two piece wing. 200mm is a big as I can print on my Ender 3. This one does not fly. I don't think that the weight and scale of the model with the skinny Hawk wings work out very well. And to keep it to scale, the tail end is just too small to be strong enough for a crash/landing. My first attempt resulted in the tail breaking off. Just in case you want to try, I have two sets of fuse halves. One with a cavity and a hole in the top that makes it look like a whale blow hole to add small lead shot and one solid one. The one with the cavity also has a launch hook. Small planes like this are a challenge to make fly very well. I ask one thing, if you do get it to fly, post in the comments how you did it. I printed in PLA. My real reason for even starting this was to see if something like this cold be done in PLA and still be strong enough to fly. That is not a problem for the Aquila I made which is also posted here on Thingiverse, but this one just don't work for that. Build Notes: . I print at .12 or .08 layer heights. I was having a problem printing a .08 until I decreased the retract to 1mm from the stock Cura setting of 5mm for the Ender 3. I think the filament just moves too slow and heats back up into the the throat causing plugs. . I print with one bottom layer, 3 wall, and 5 top layers at .08 trying to keep parts as light as possible but strong enough to take land. You will have to experiment with this for your printer. . I used a 15% grid pattern that is oriented at 45 degrees to the length of the wing. If you do standard ribs oriented perpendicular to the wing length with a line infill, they have a tendency to buckle if you try to set a bend in the wings to get a curved shape. . All of the assembly with CA. First glue the wing halves to the fuse halves. That way you can press down on both the wing and the fuse against a flat surface and get good alignment. Then glue the two halves together with CA using the two holes in the wing roots as alignment aids. The holes are sized for the 1.75mm PLA. . The wing alignment holes are each 10mm deep so cut a few pieces of PLA just under 20mm for the alignment pins. . Glue the stabilizer in last but use it unglued to help align the two fuse halves properly at the tail while gluing the fuse together. . After assembly, I put a bow in the wing to help stabilize flight and make it look kind of like a Hobie wing by simply bowing up the wings a few inches and taping them in place and let set for 24 hours. When you take the tape off, there is a nice enough set that takes place to give a smooth curve to the wings. I tried using a little heat with the oven at 110 (bread proof on out oven) but that cause a lot of problems like sagging fuse and stab. .................................
With this file you will be able to print Hobie Hawk Sailplane with your 3D printer. Click on the button and save the file on your computer to work, edit or customize your design. You can also find more 3D designs for printers on Hobie Hawk Sailplane.